Building a React App using Catalyst Pipelines
Catalyst Pipelines provides a comprehensive platform for Continuous Integration and Continuous Deployment (CI/CD). It covers everything from building and compiling your code to running automated tests and deploying your applications. In this post, we'll walk through creating a catalyst-pipeline.yaml file to support the following problem statement.
Problem Statement:
A developer has a React app with the code stored in a GitHub repository. Each time a commit is pushed to the master branch, the build process should automatically trigger. Once the build process is completed the build artifact should be available to be downloaded.
Let's see how the above use case can be solved with the Catalyst pipeline.
Let's first connect the GitHub account to Catalyst.
Settings -> General Settings -> Integration -> GitHub Integration
Once the GitHub account is connected, close the settings and click on the "Pipelines" icon from the left bottom on the service icon menu.

Click on Create Pipeline
Give a name for your pipeline
Choose GitHub
Select the GitHub org where your repository is located
Select your repository

Click on Continue
Select "Create default YAML template"
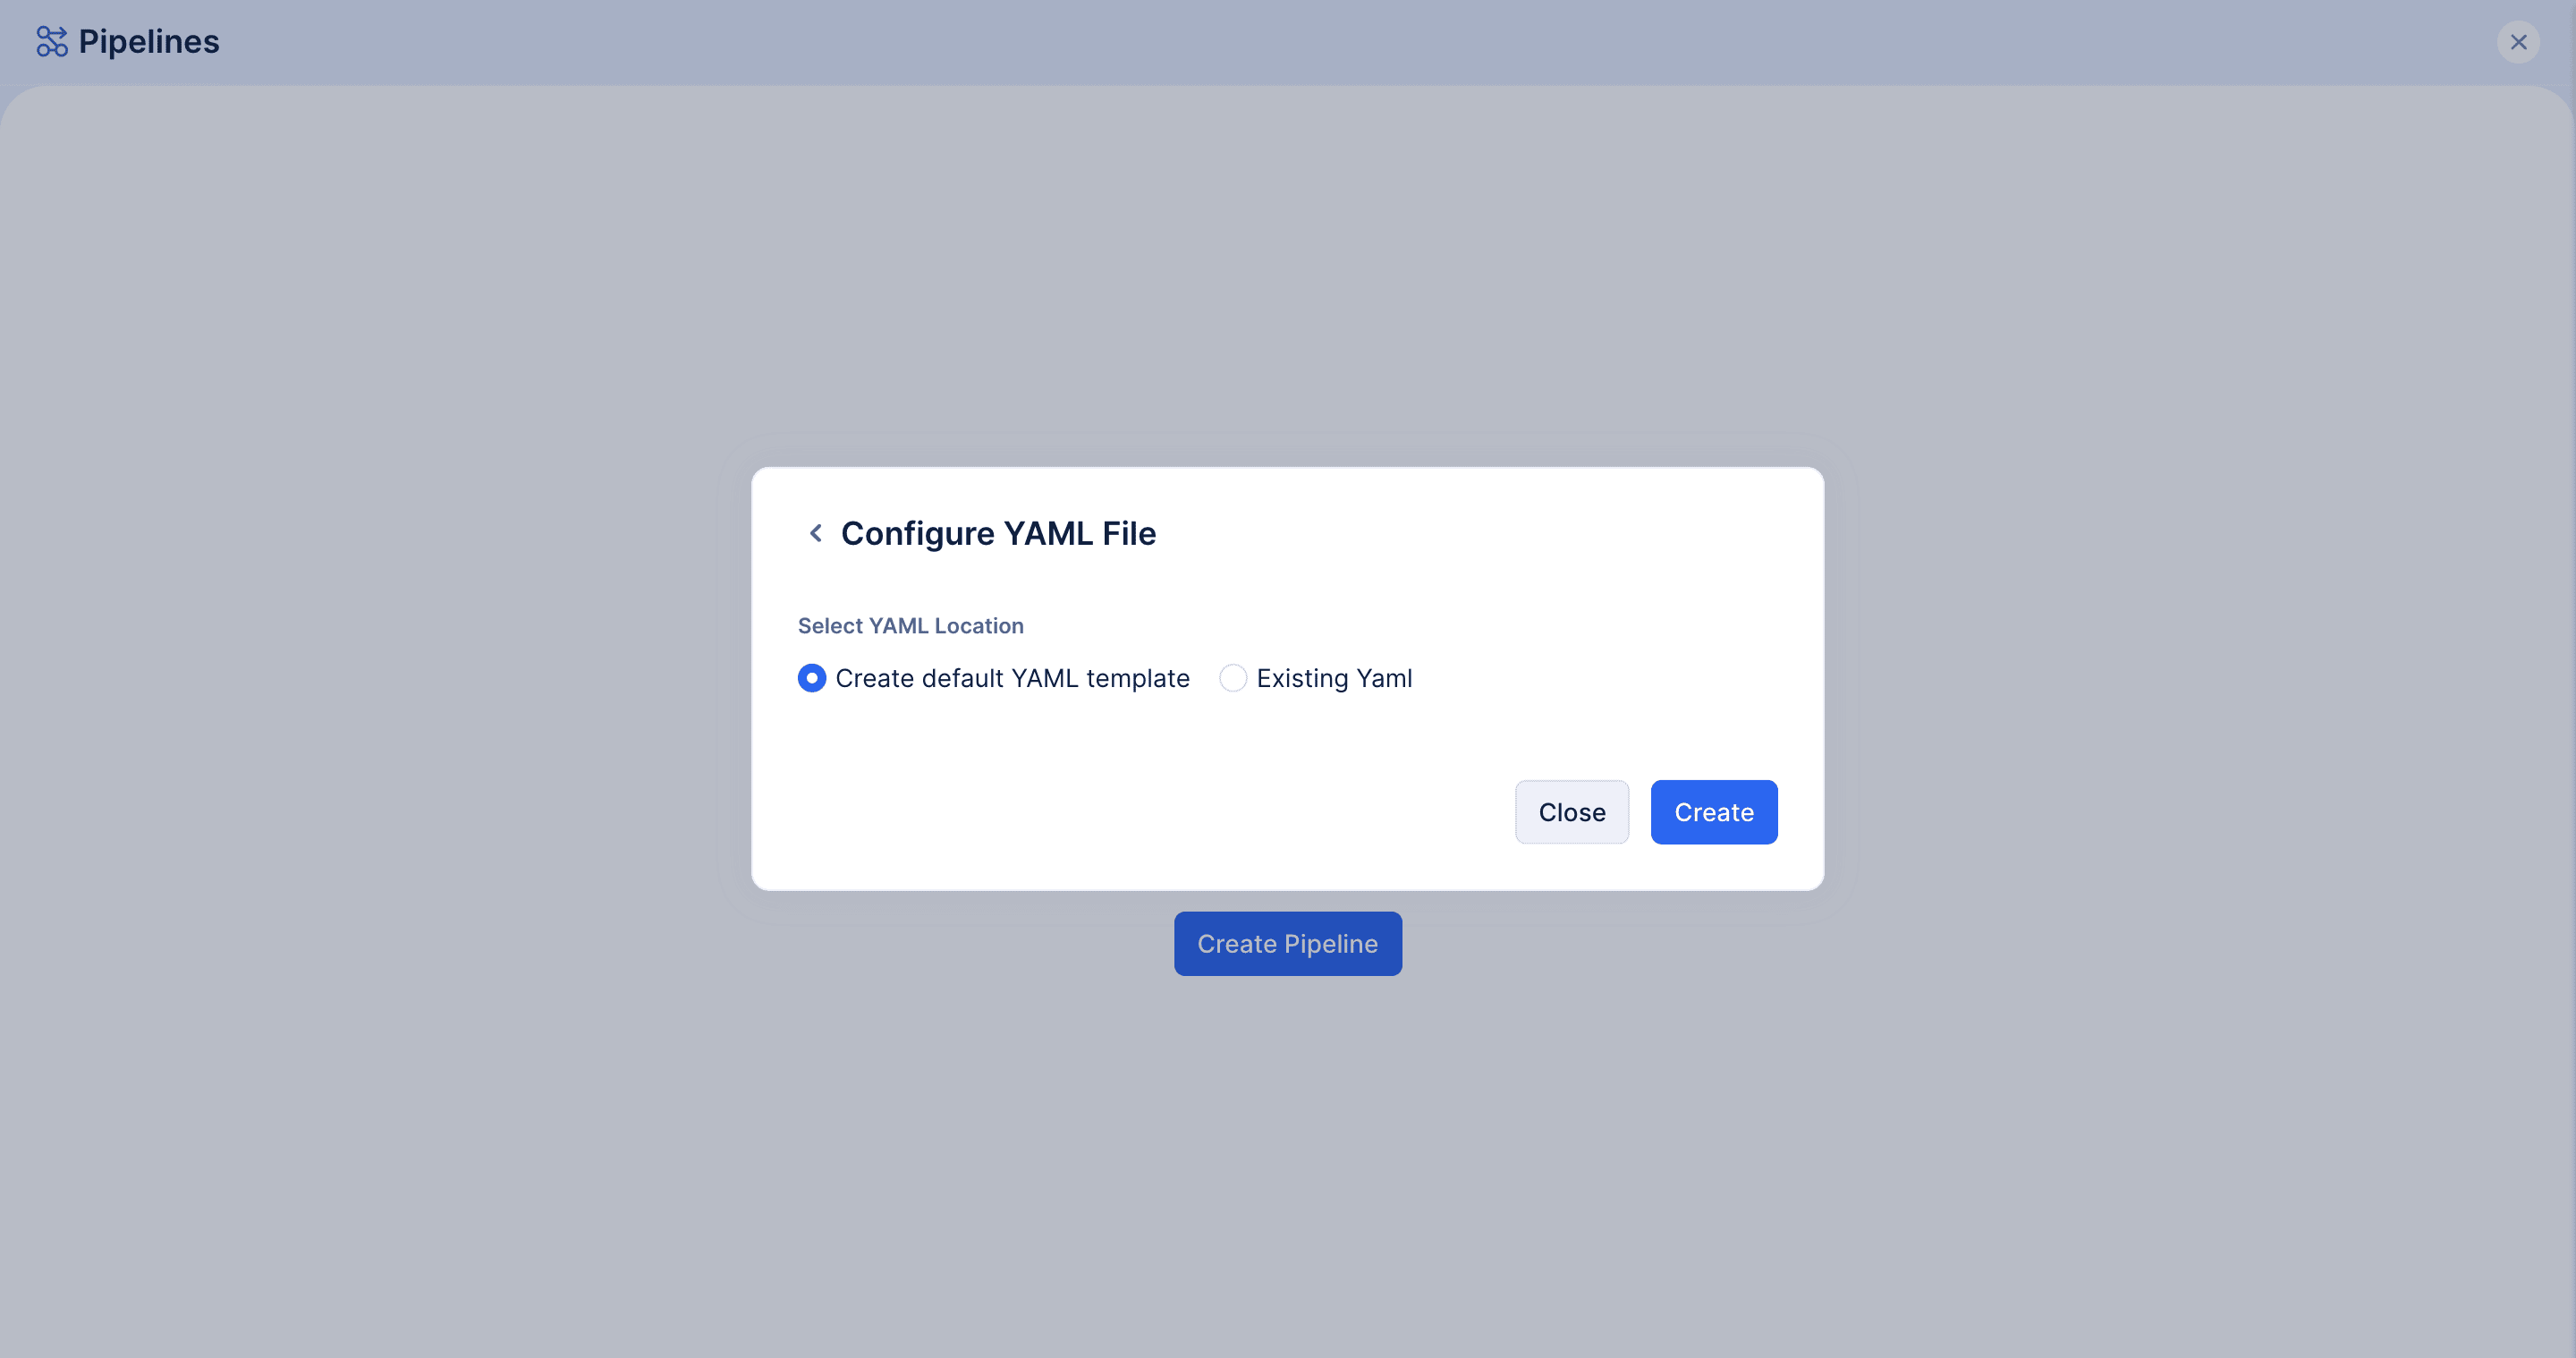
Click on Create
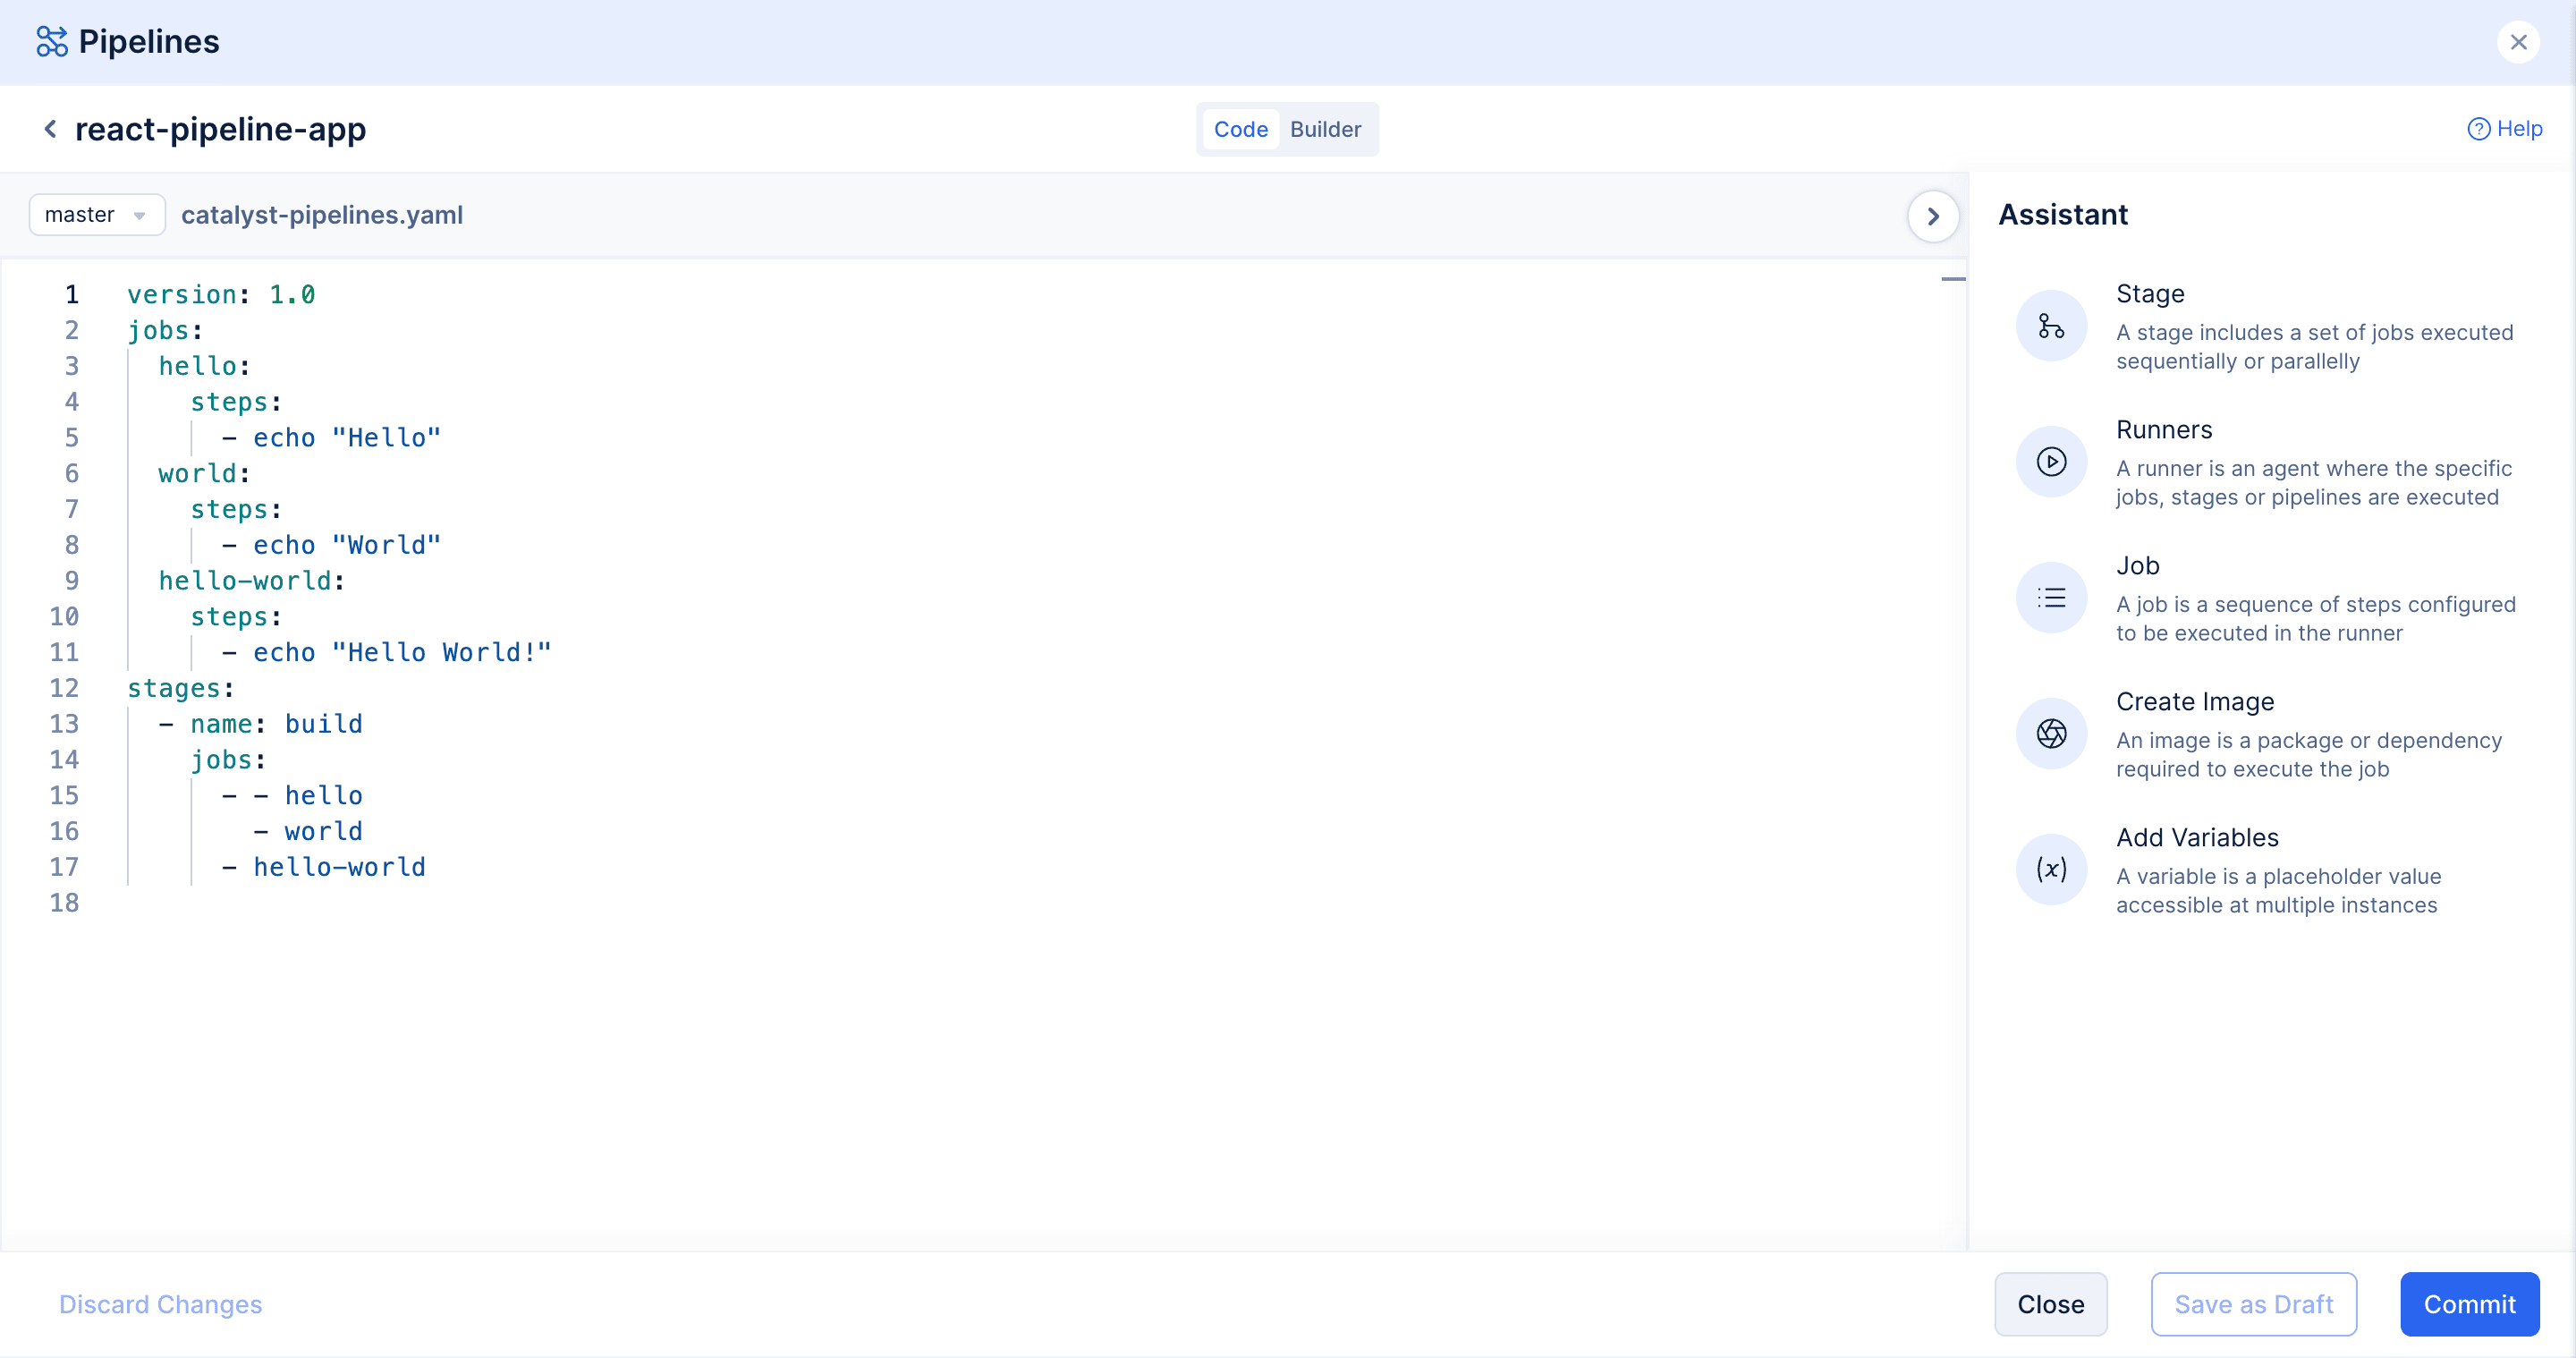
The above is the default template; we need to edit the template so that we can achieve our goal.
Before diving into the problem statement, we need to understand Catalyst Pipelines offers a platform to carry out the CI/CD process, which means. To execute the process, we need to define our platform. A platform can be defined with Runners and Images.
Runner:
A runner is a computing agent, similar to a virtual instance. A runner in Catalyst Pipeline can be had with three configurations.
Low : 1 GB RAM, 0.8 vCPU(Virtual), 2 GB Disk Space
Medium : 2 GB RAM, 1.2 vCPU(Virtual), 2 GB Disk Space
High : 4 GB RAM, 2.0 vCPU(Virtual), 2 GB Disk Space
Image:
A Docker Image, where you want to execute the build process.
From the above context, we can see that a Runner and an Image combine to give us a platform.
Now for our problem statement, we are good to go with a "Medium" runner configuration and "node:18" image.
Let's remove the boiler plate code and start to define our Runner.
Create Runner:
From the Assistant, Click on Runner
Give your runner a name and Select a Medium from Runner Configuration
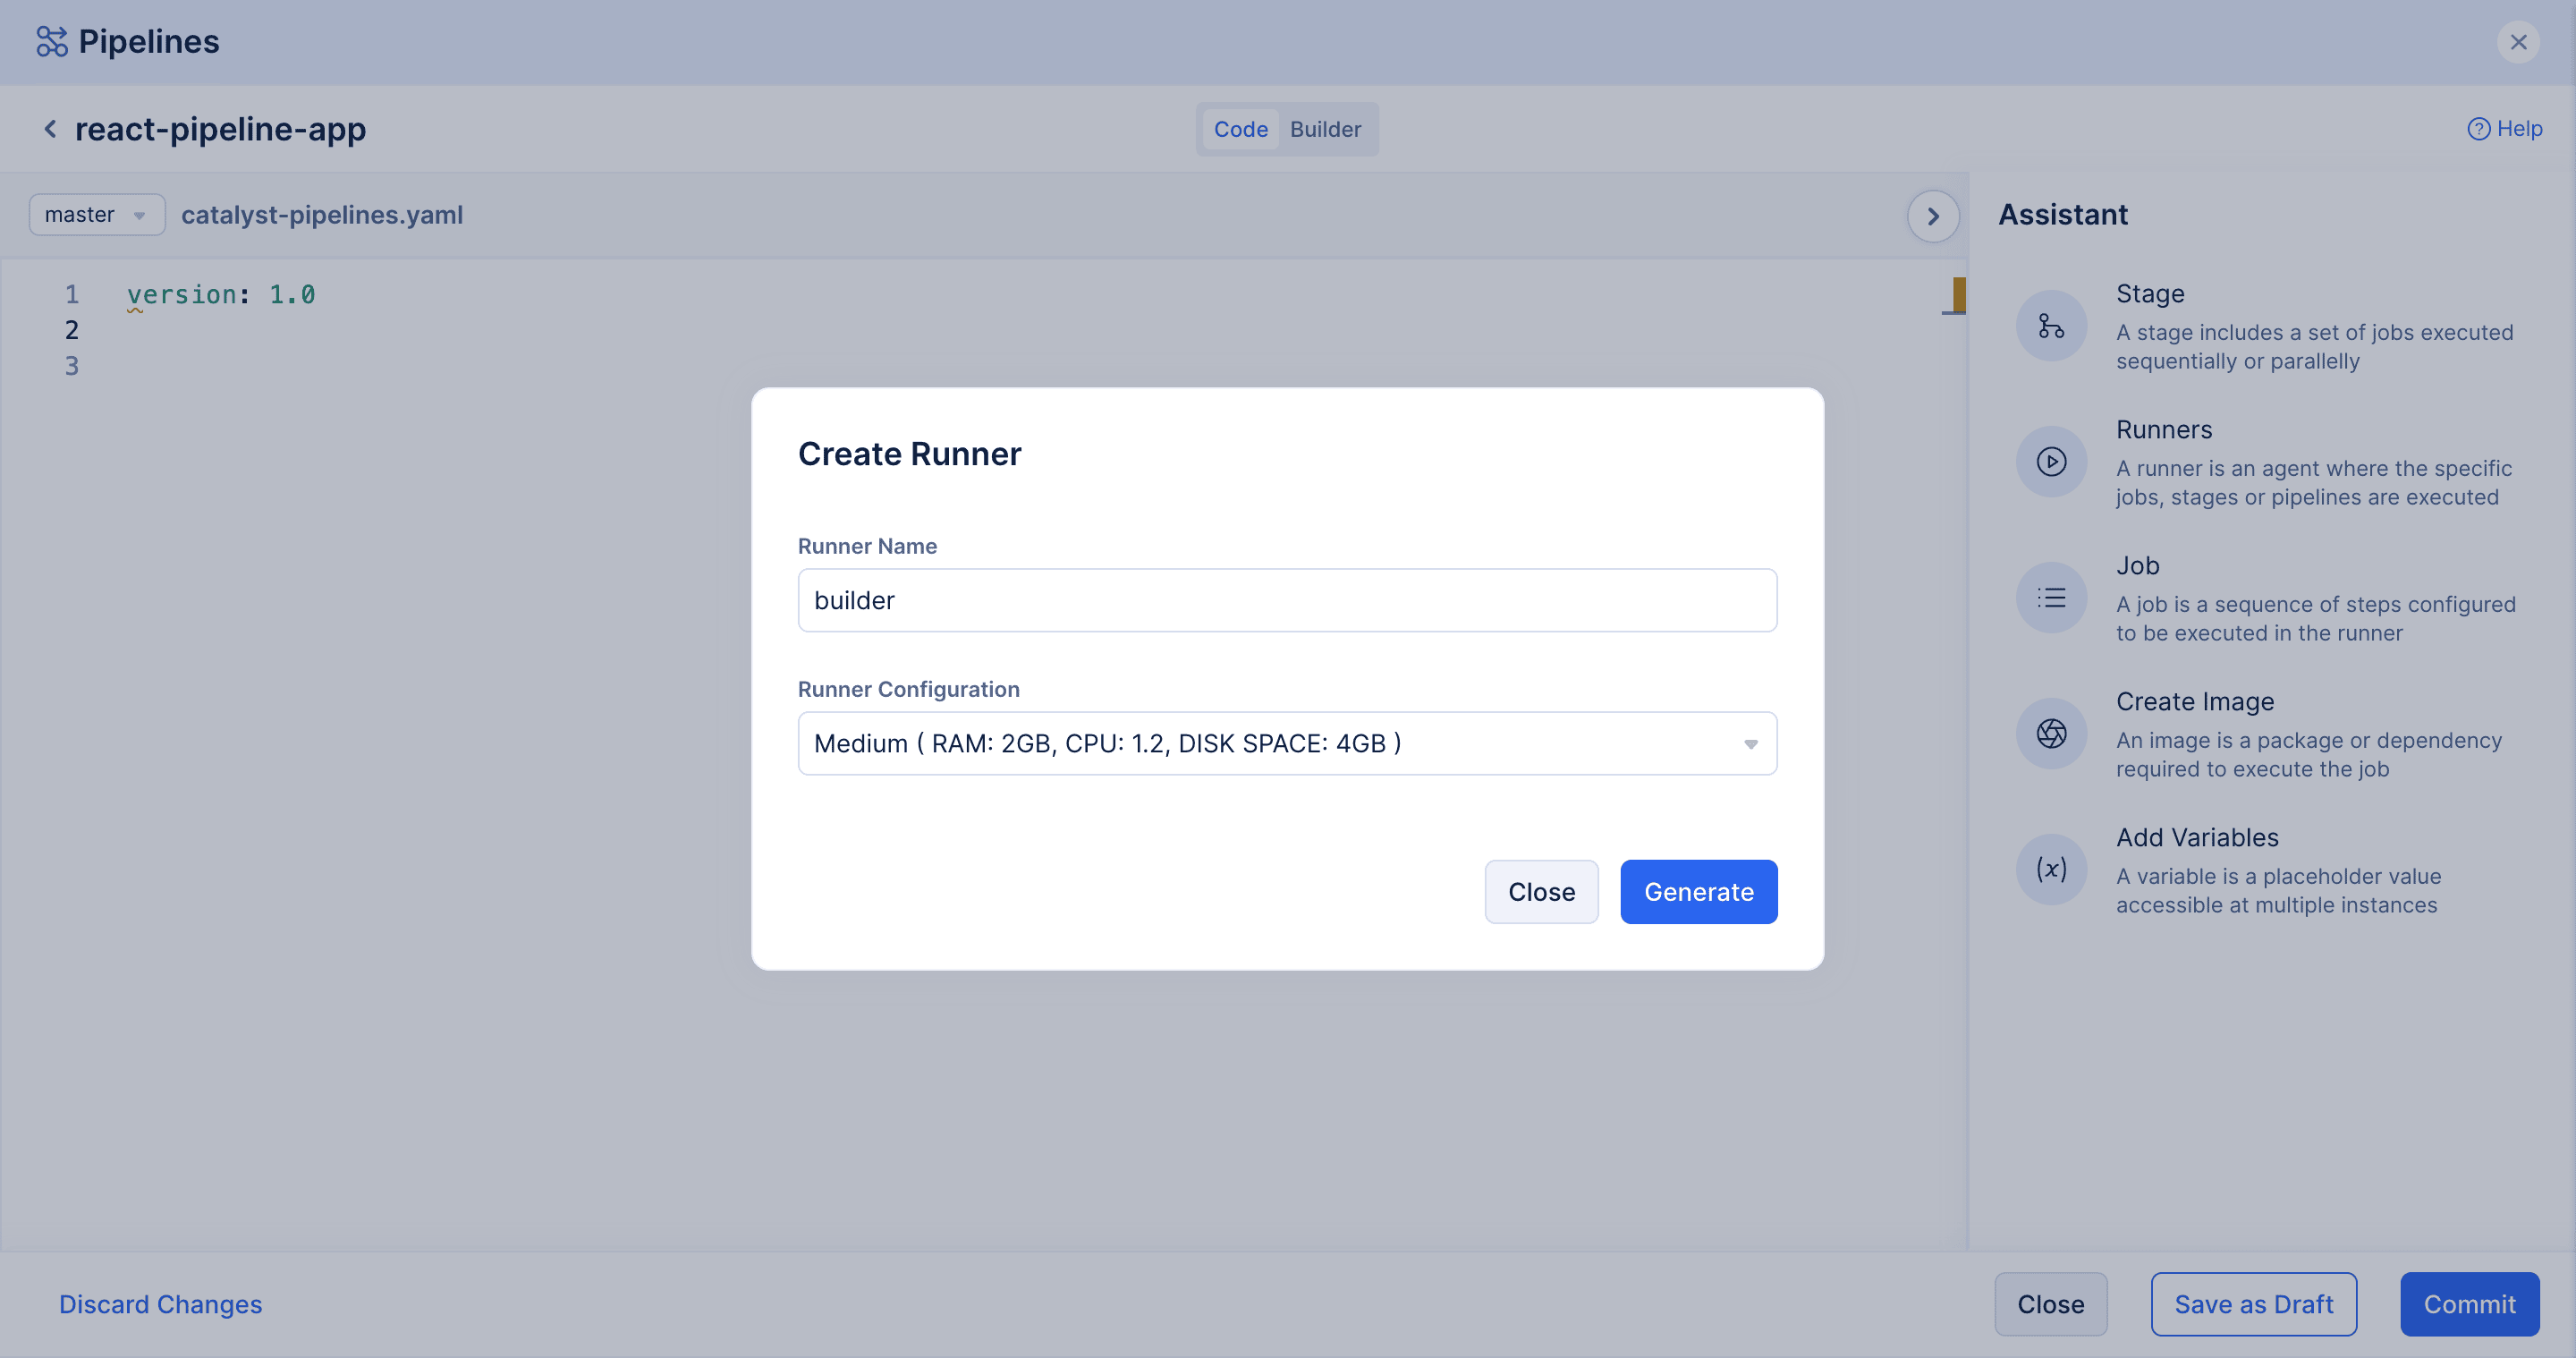
Click on Generate
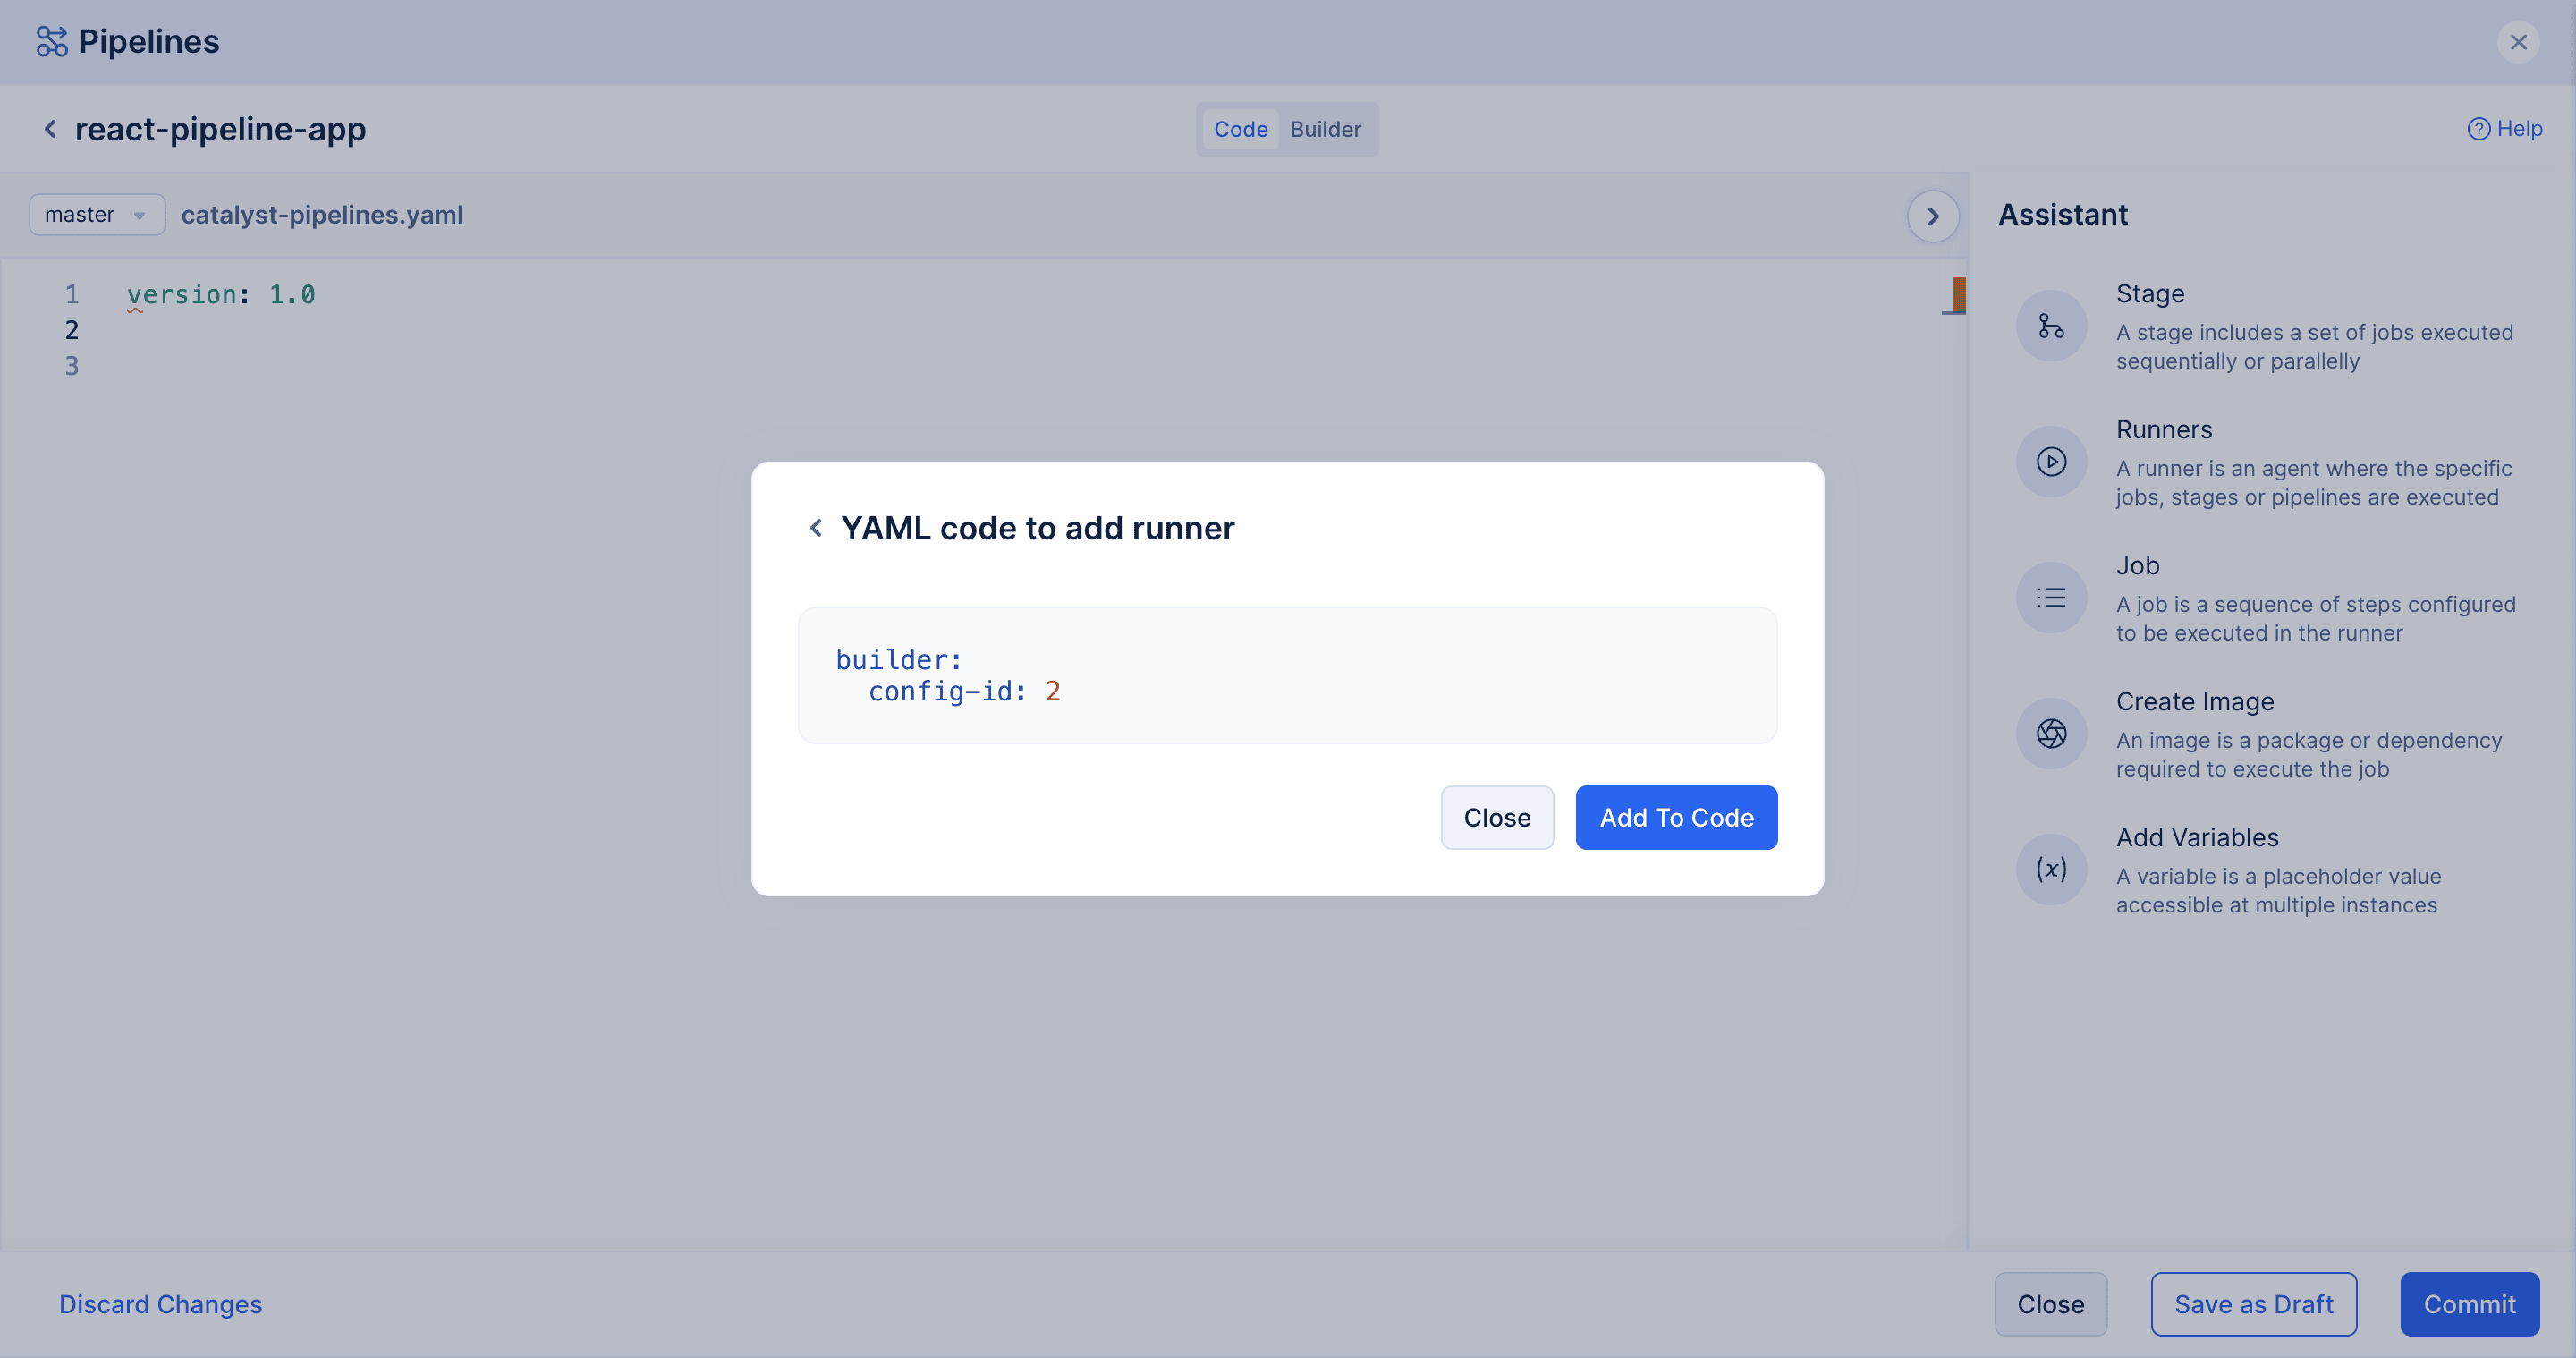
Click Add To Code
Once it is done the catalyst-pipeline.yaml should look like the below picture:
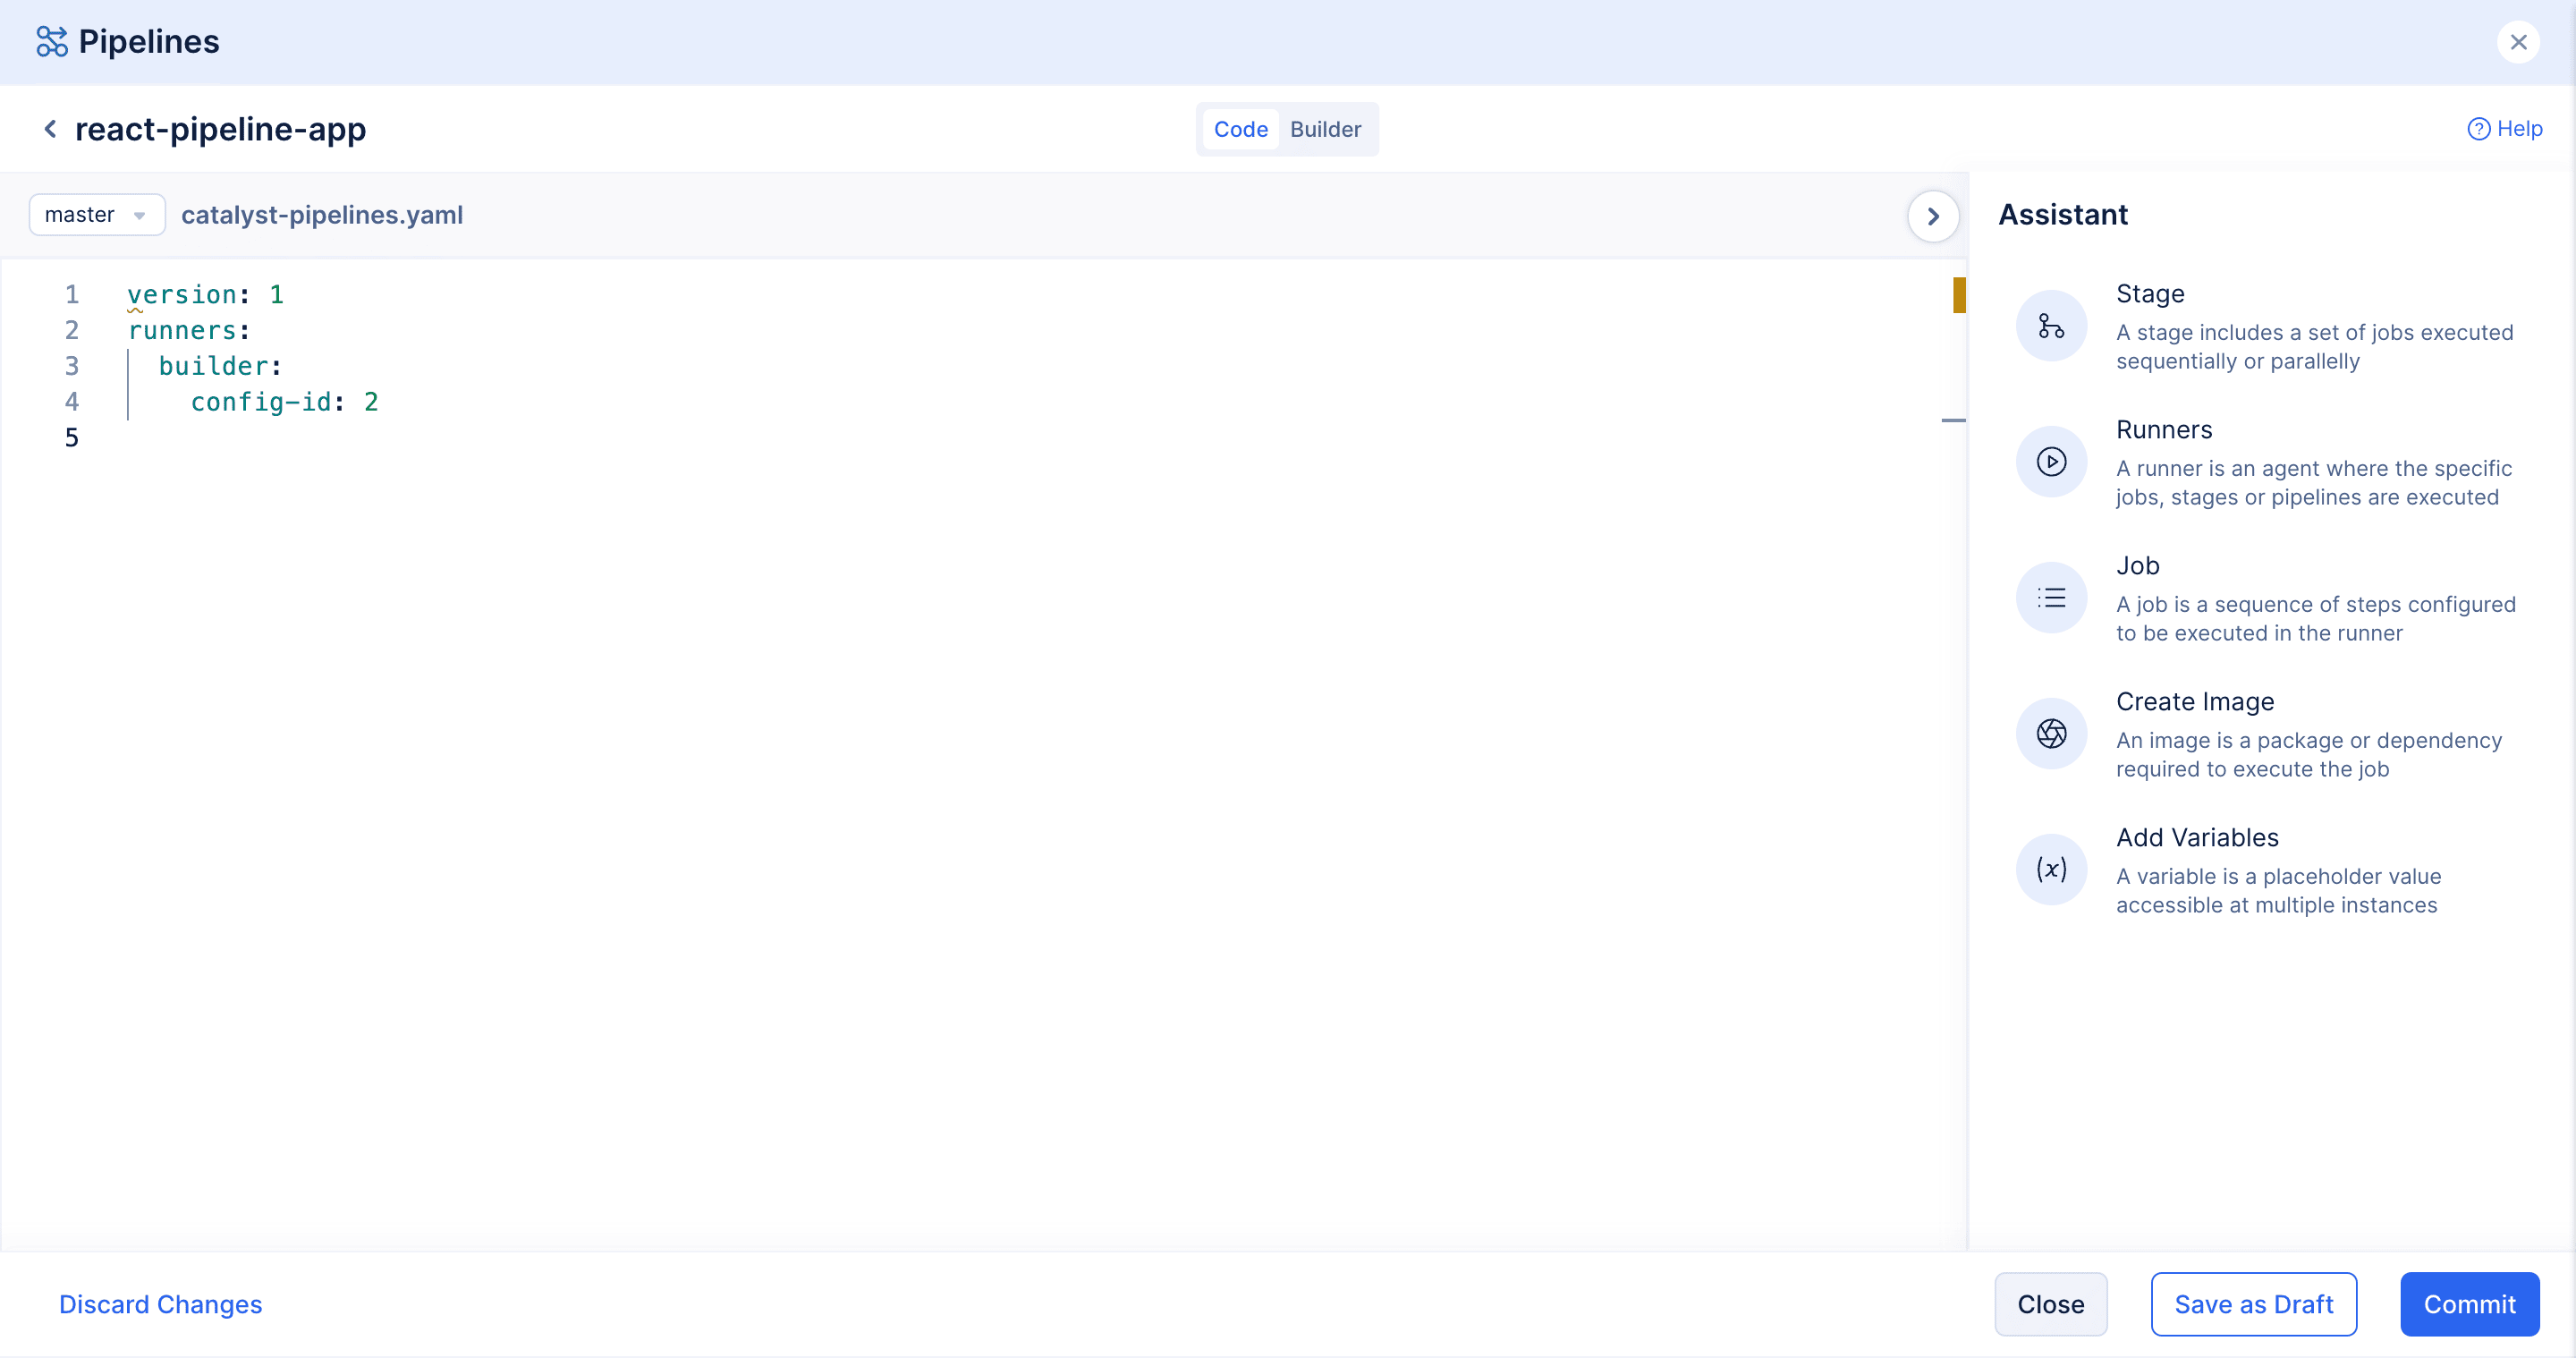
Create Image
From the assistant, click on Create Image
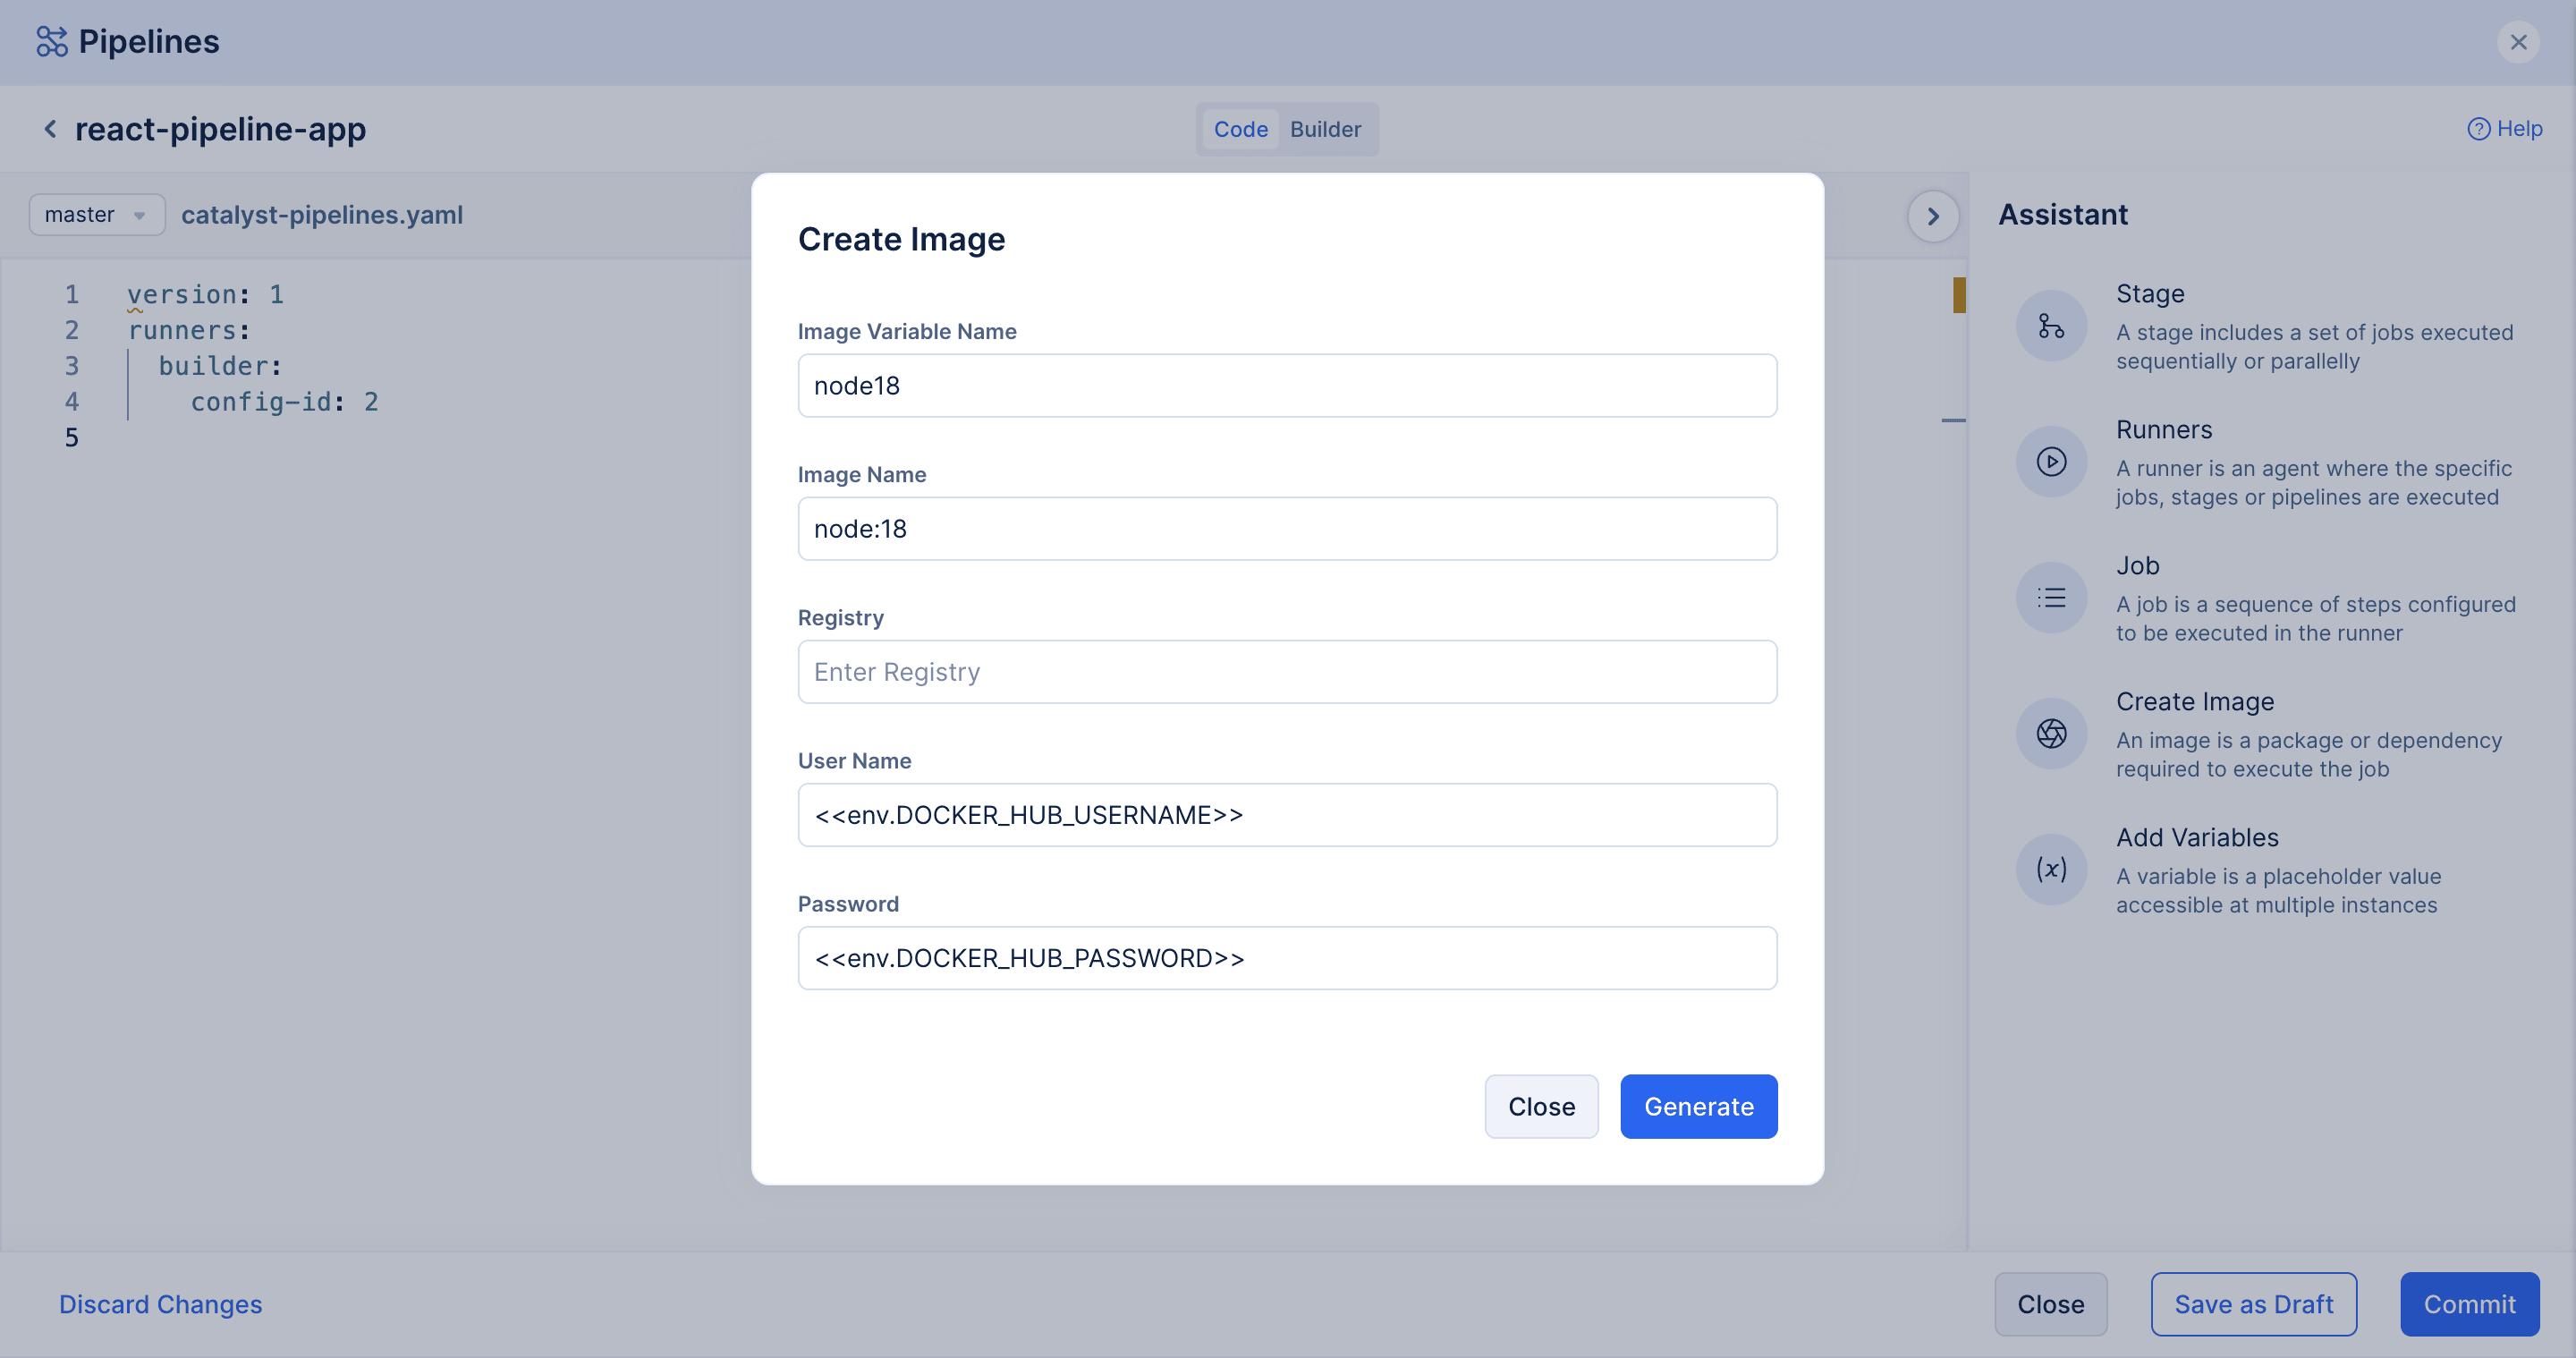
Enter the image variable name and image name
Leave the registry input empty, By default, if the registry field is empty, the pipeline while executing fetched the image from Docker Hub.
For user name and password enter the following: <<env.DOCKER_HUB_USERNAME>>, <<env.DOCKER_HUB_PASSWORD>>
Once filled, it should look like the following.
Click on Generate
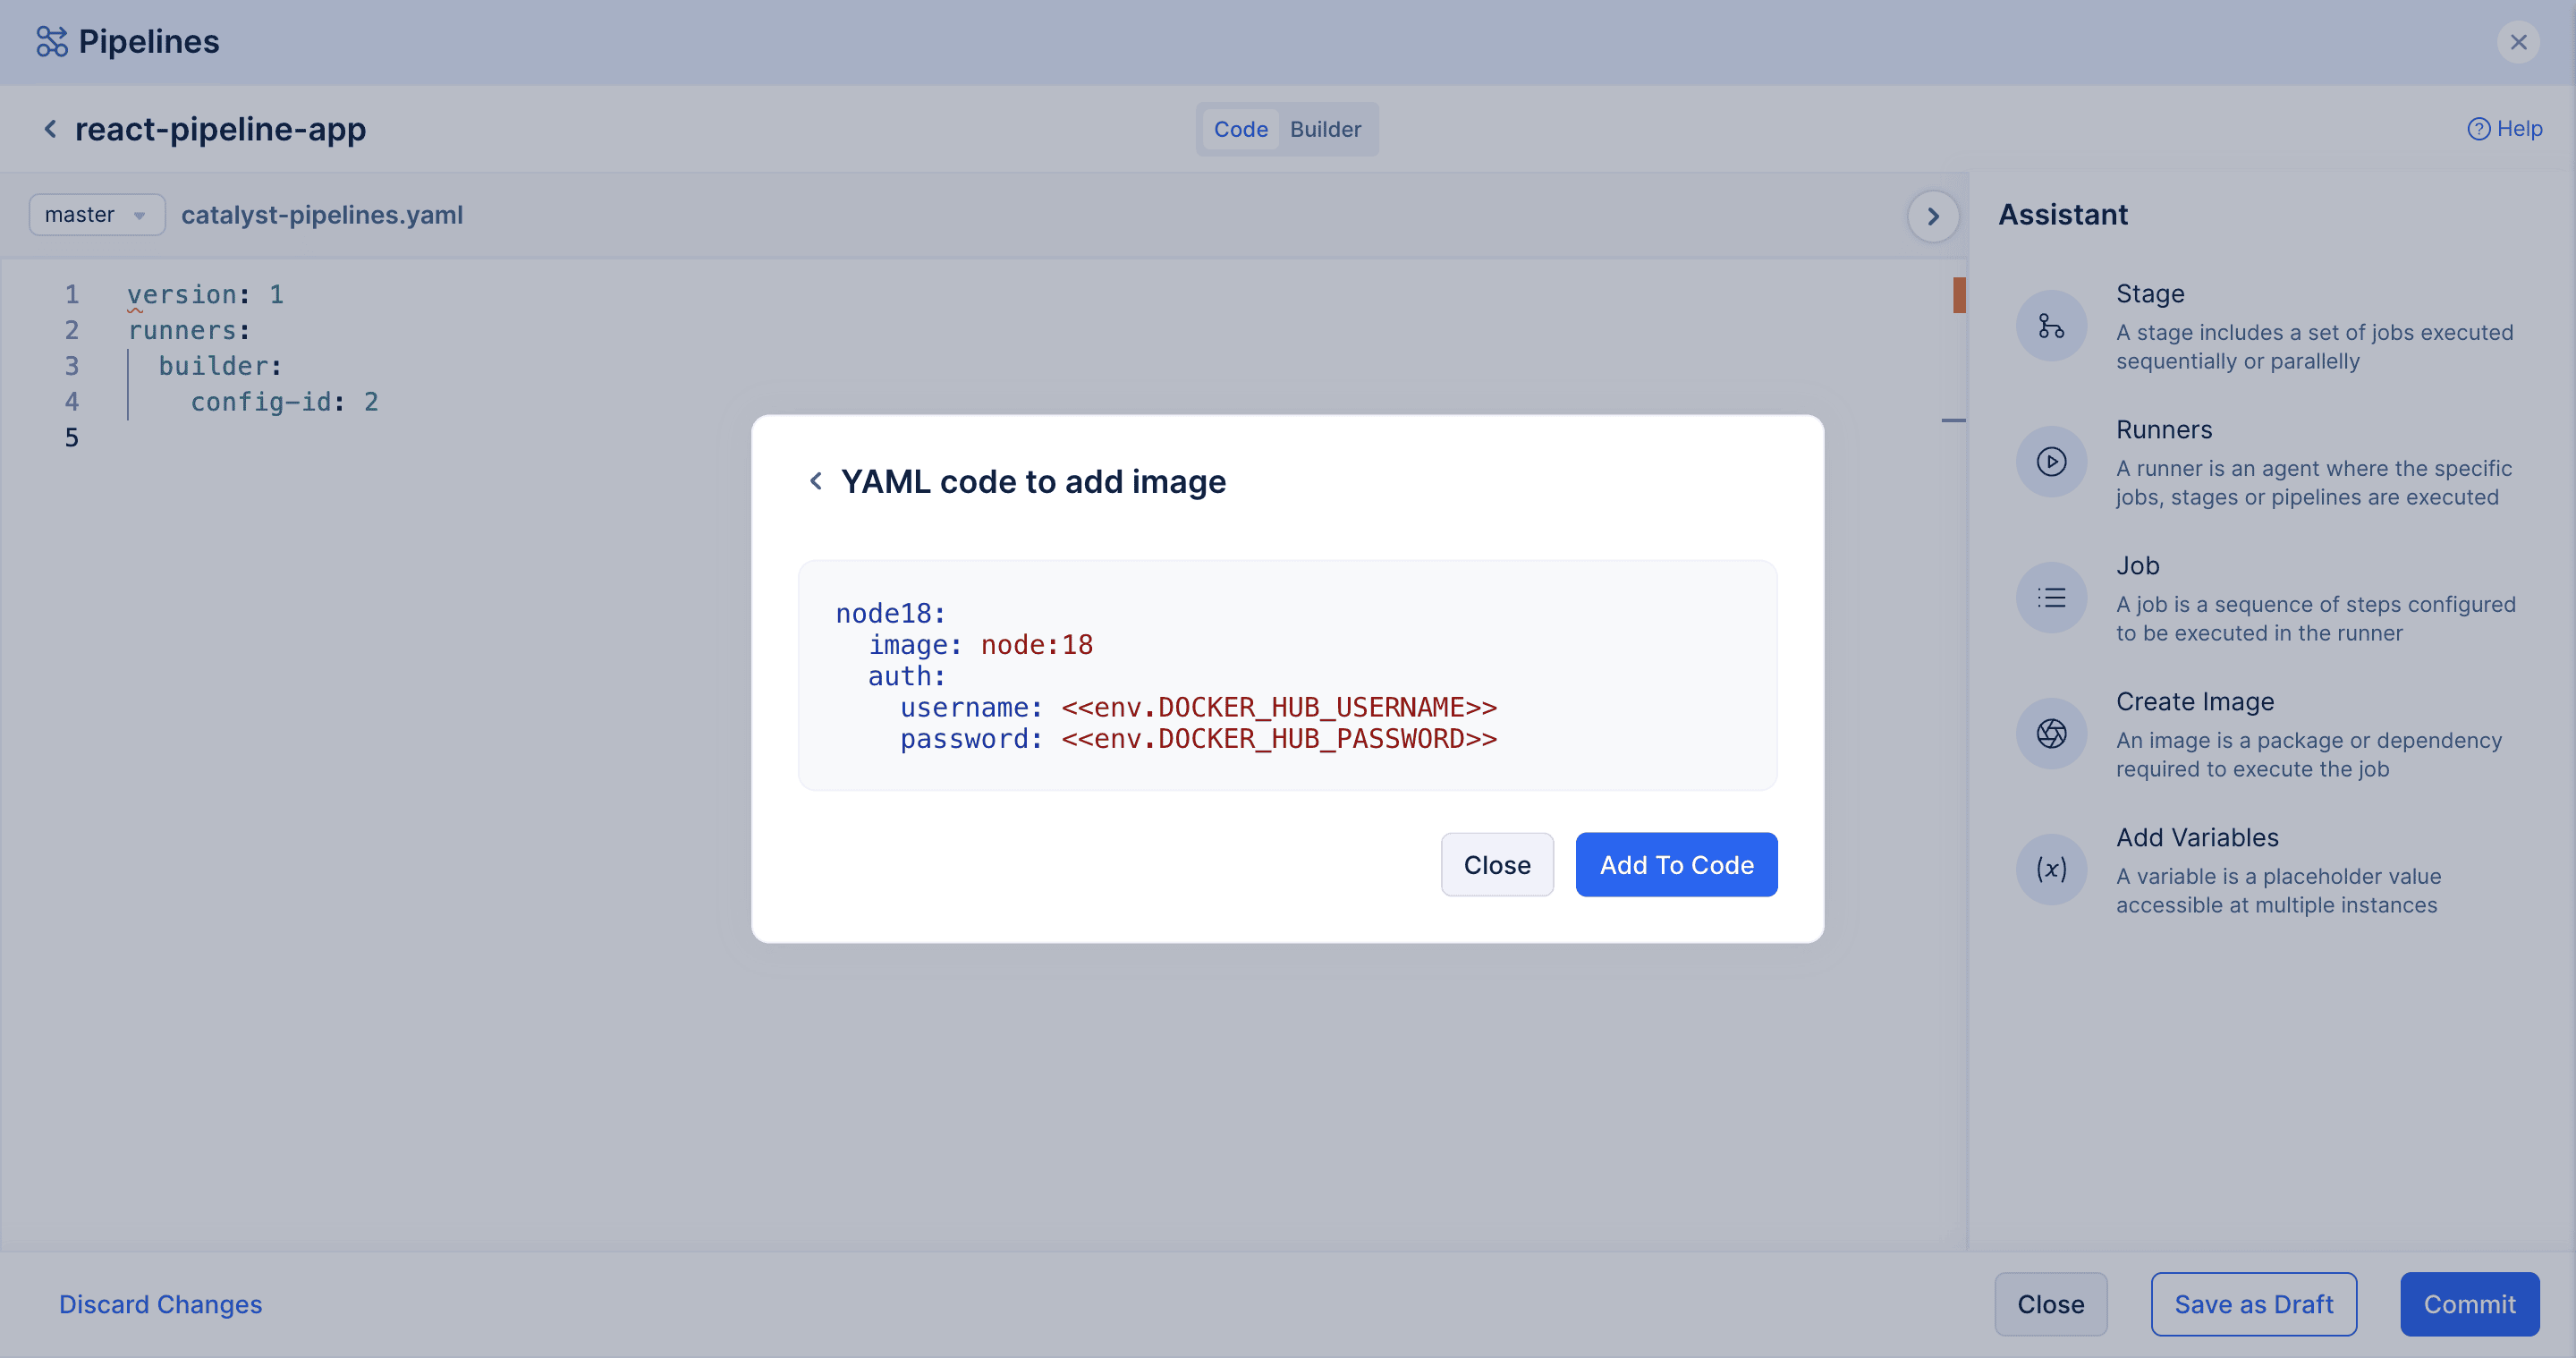
Click on Add To Code
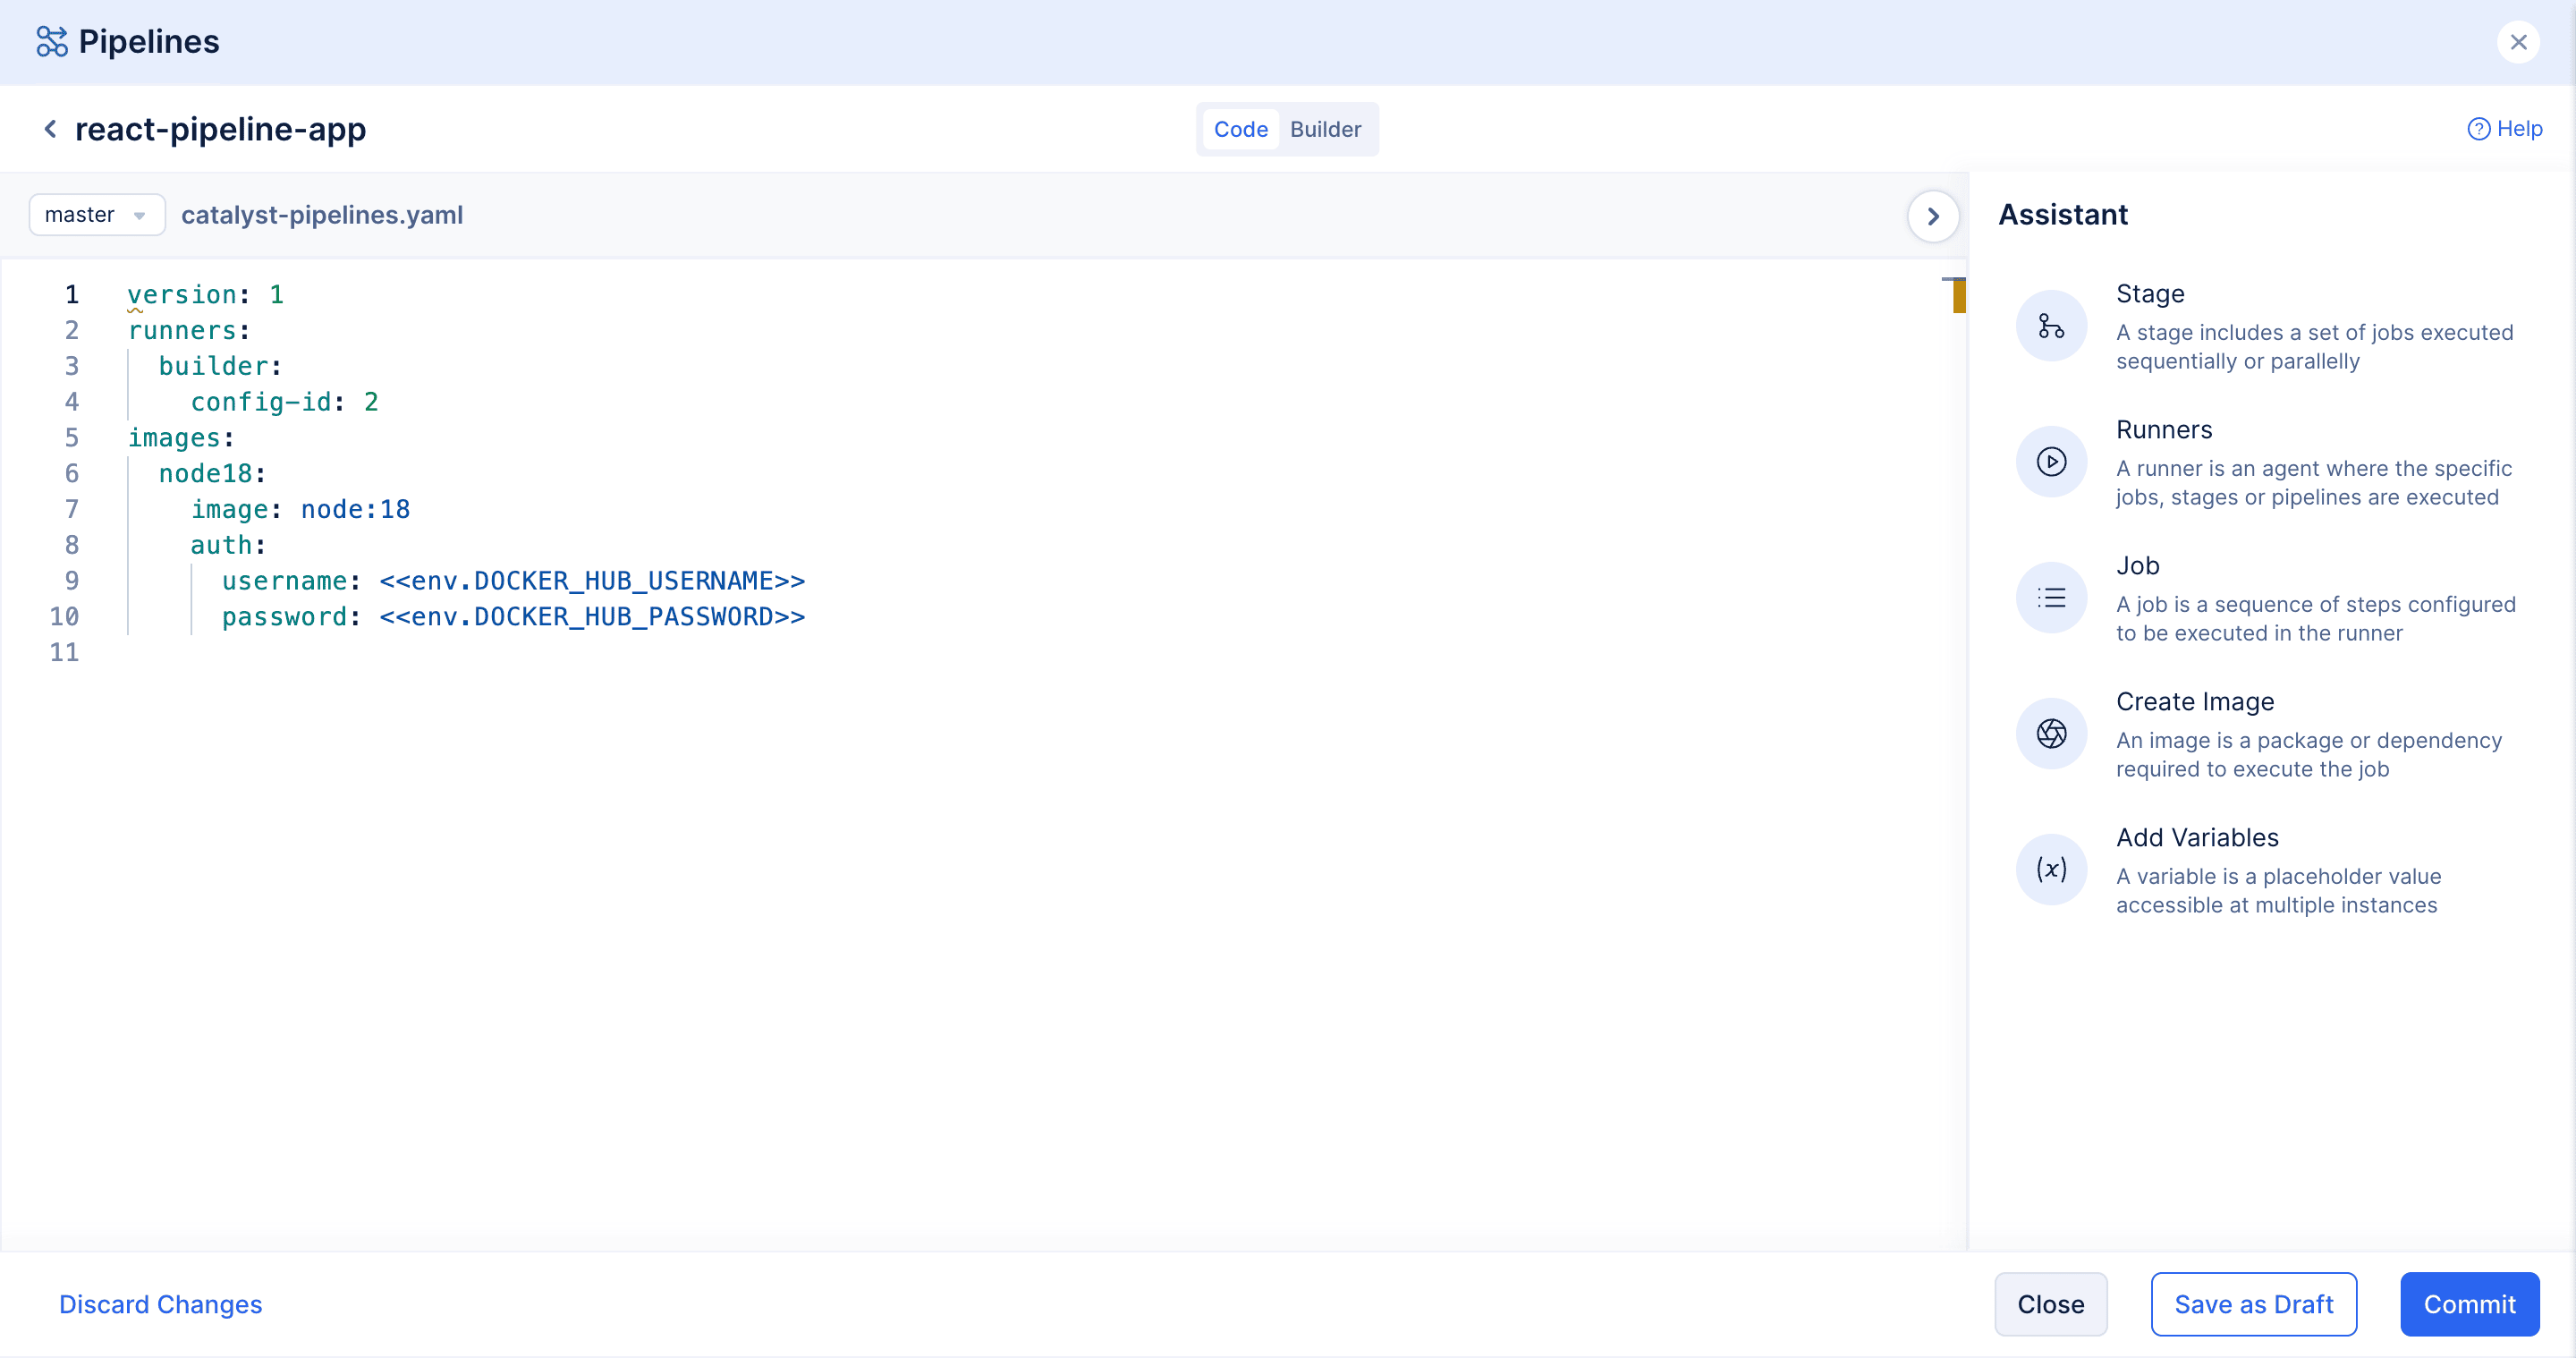
Once it is done the catalyst-pipeline.yaml should look like the below picture:
Configuring Global Variable:
We have used Pipeline's Global variable in the username and password field. We need to define that variable with your credentials. To do that,
Click on Save as Draft and then the back button.
You should be seeing a screen like the below picture:
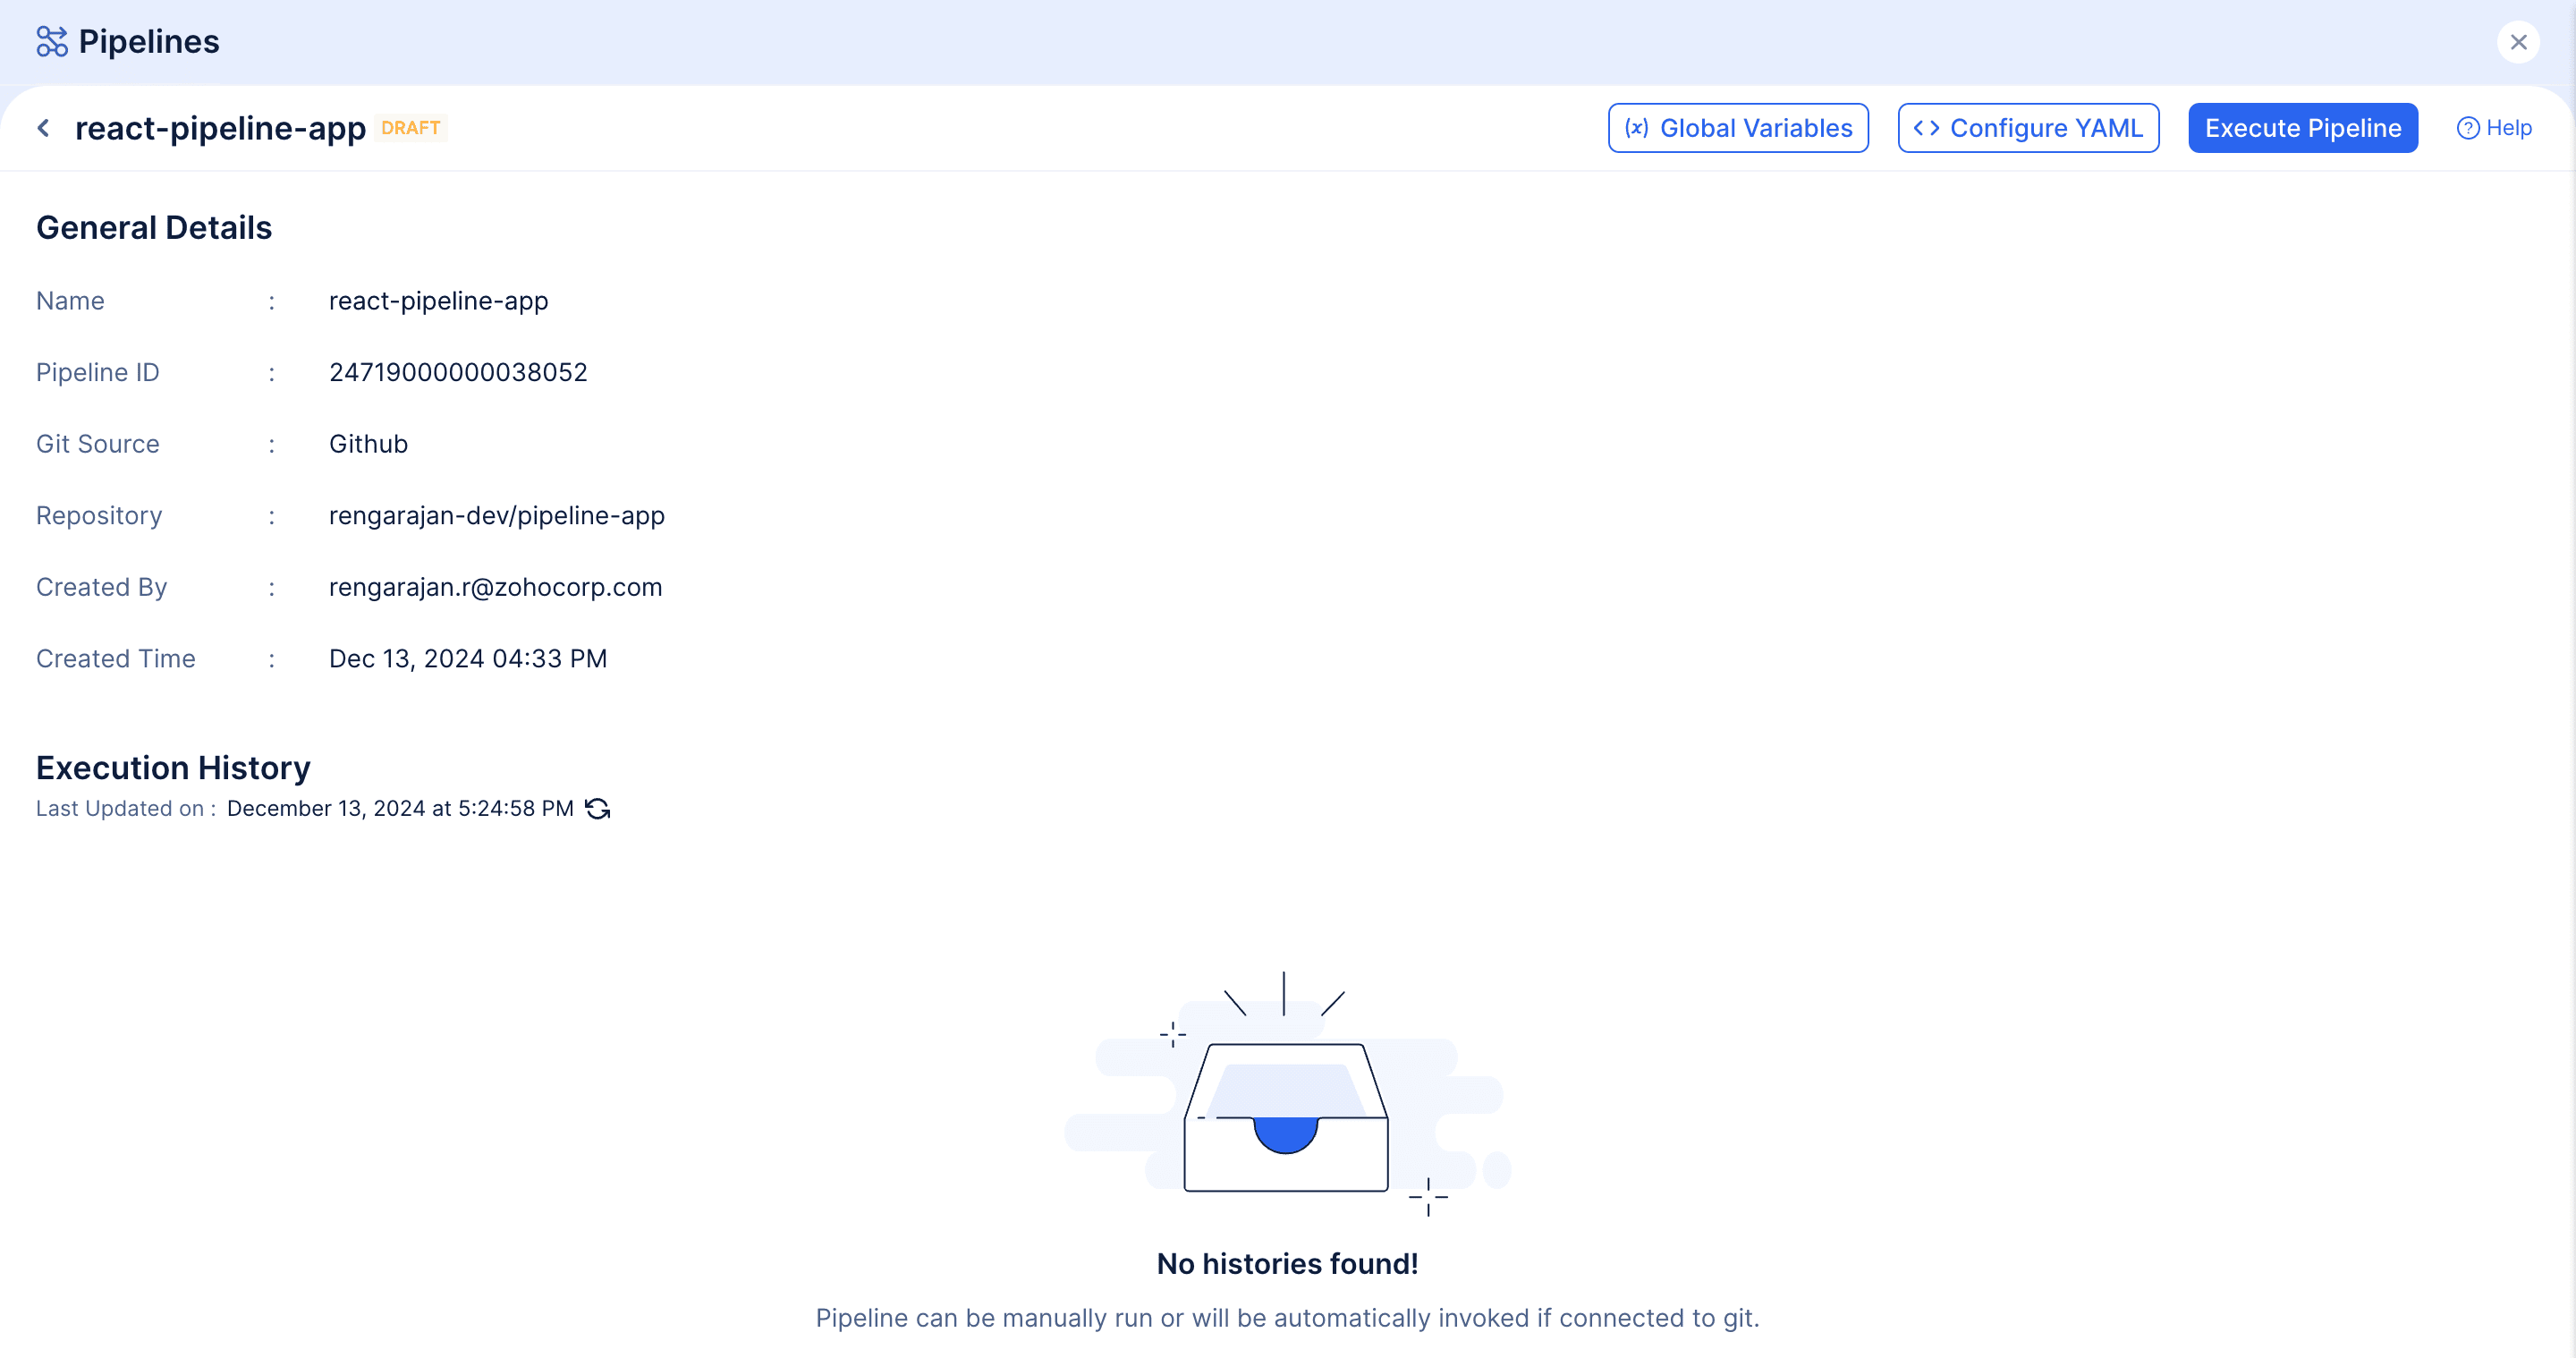
Click on Global Variables, and enter the details like shown in the below image
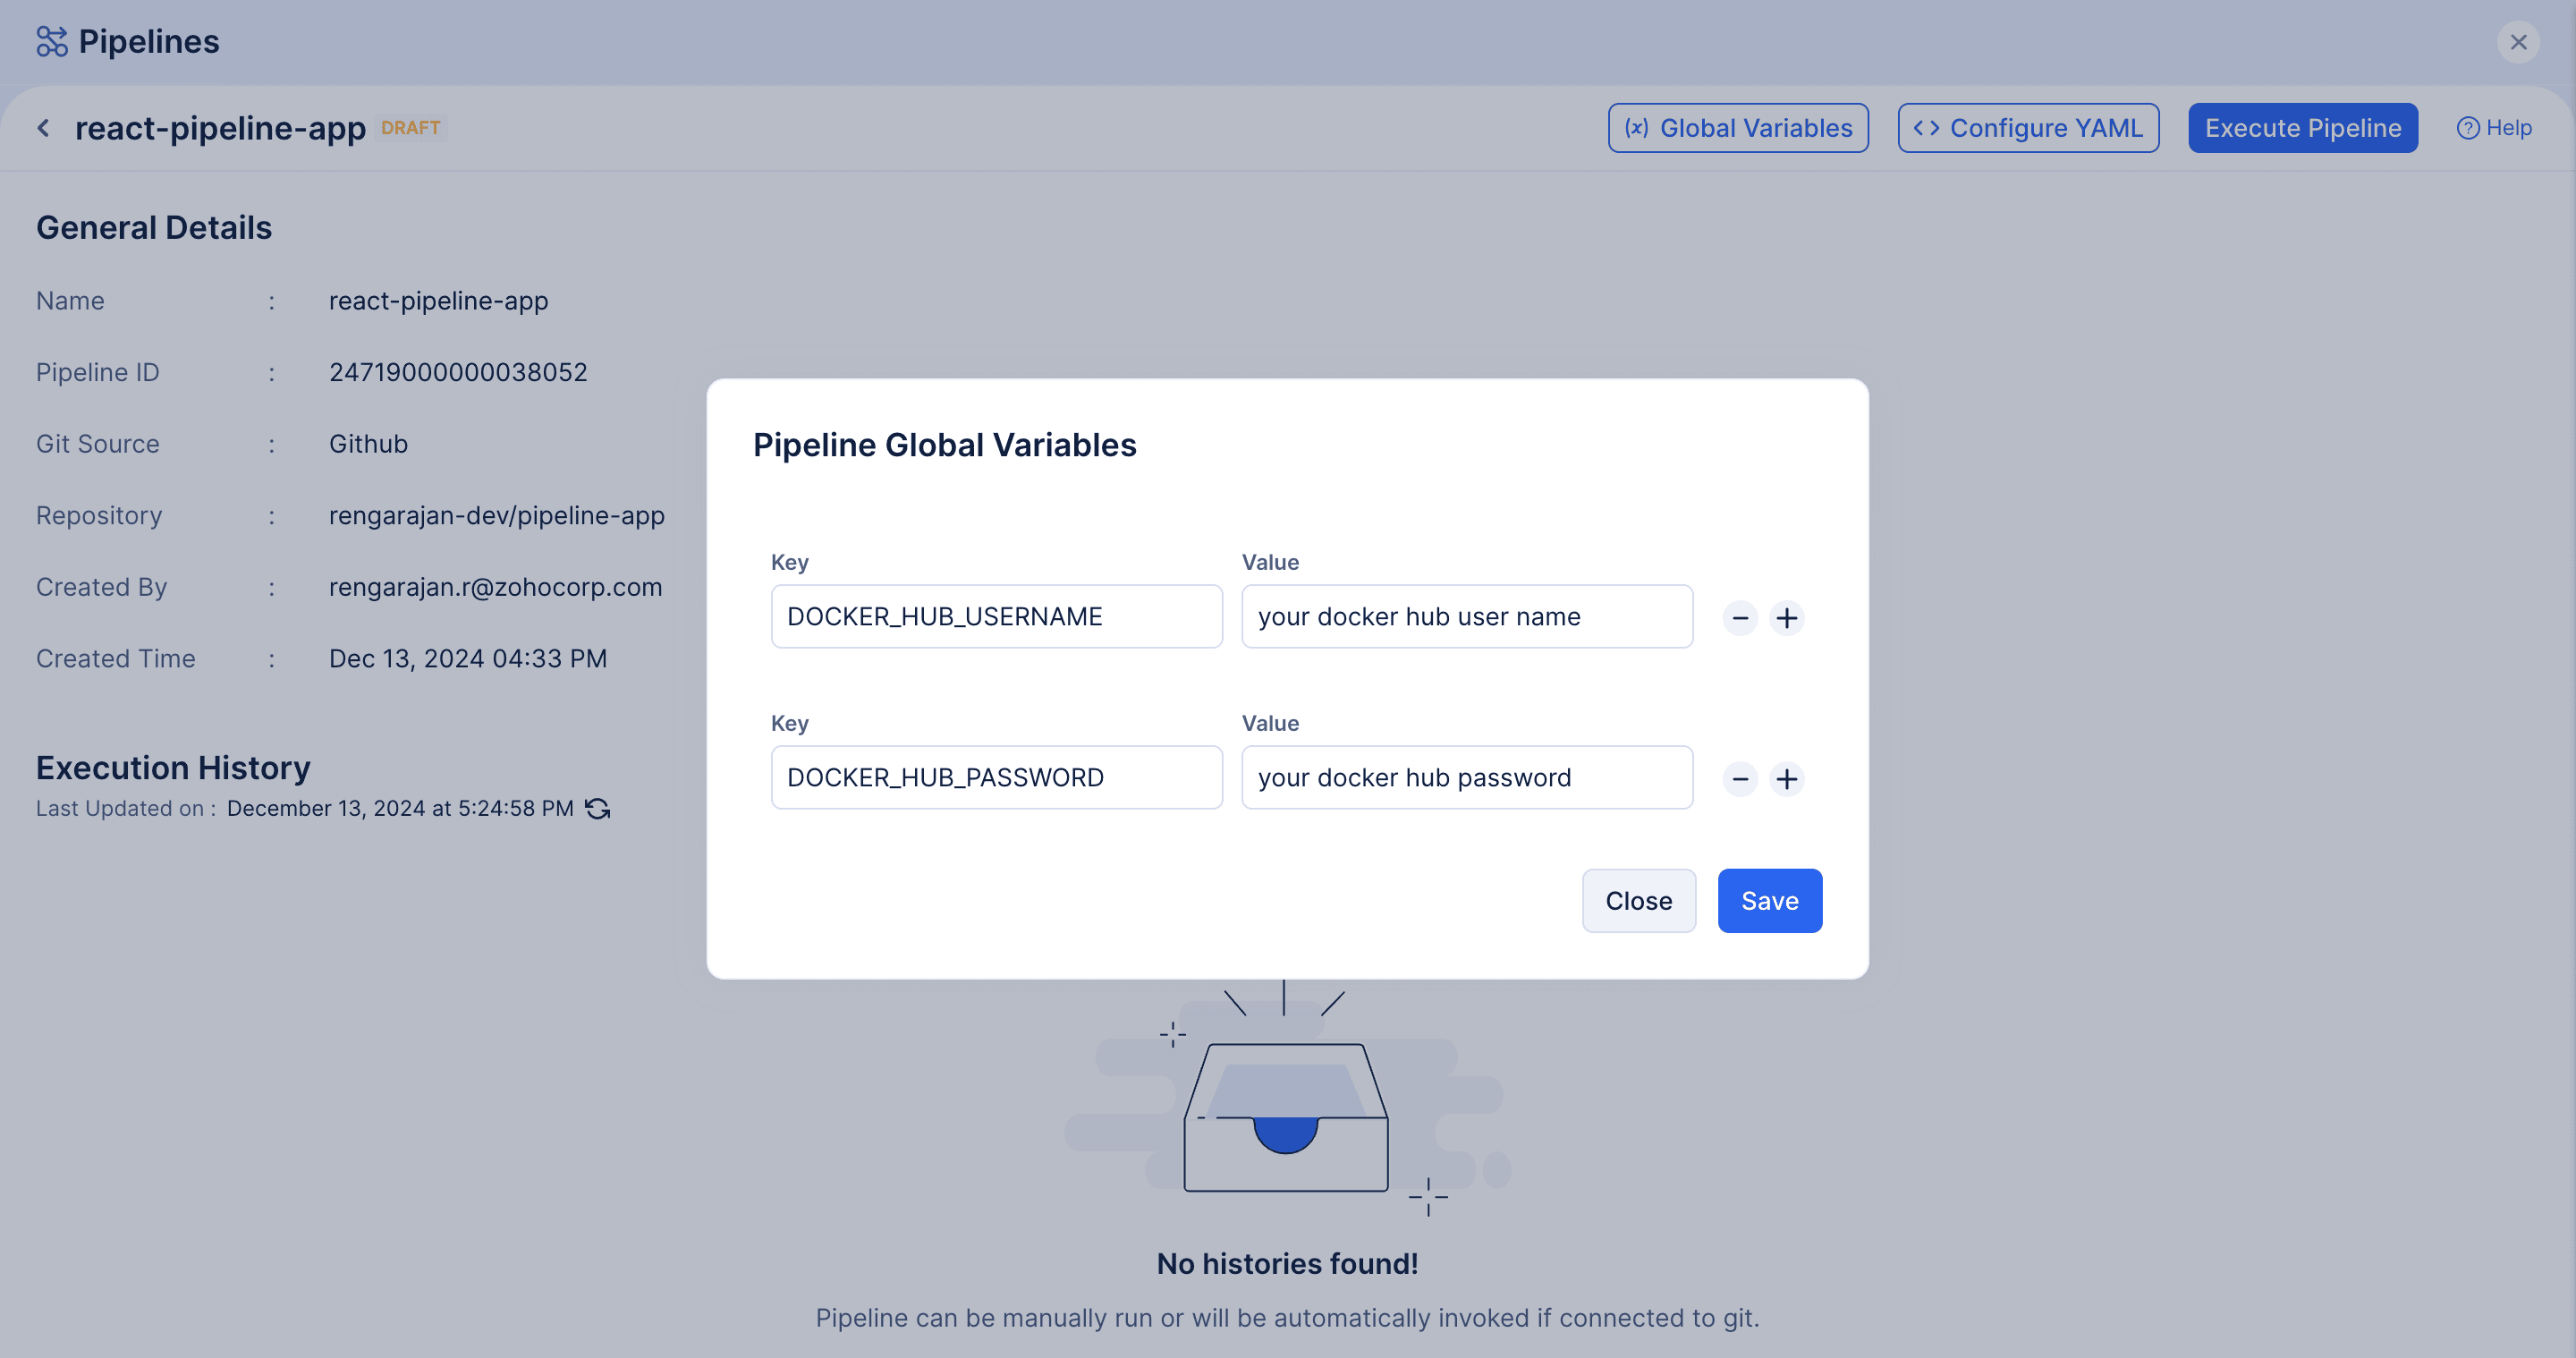
you can refer to this documentation to know more about creating a Docker Hub account.
Click on Save
Click in Configure YAML
Creating Jobs:
A Job is a sequence of steps to be executed in the pipeline; A step is the smallest building block of a pipeline. They are a set of commands to be executed to build, deploy, or test the source code.
For the given problem statement, We can have a single Job for building and uploading the build artifact. The build artifacts are stored in within the Catalyst project in a storage service called stratus. Before uploading to Stratus, we need to create a bucket. Refer to this documentation for creating a bucket. Follow the below steps after creating the bucket.
From the assistant, click on Job
Give a Job name, Select "Create using Steps".
From the drop-down menu, select the Runner and Image which was created previously
If your code has a different working directory, you can choose to change it.
Enter the build scripts.
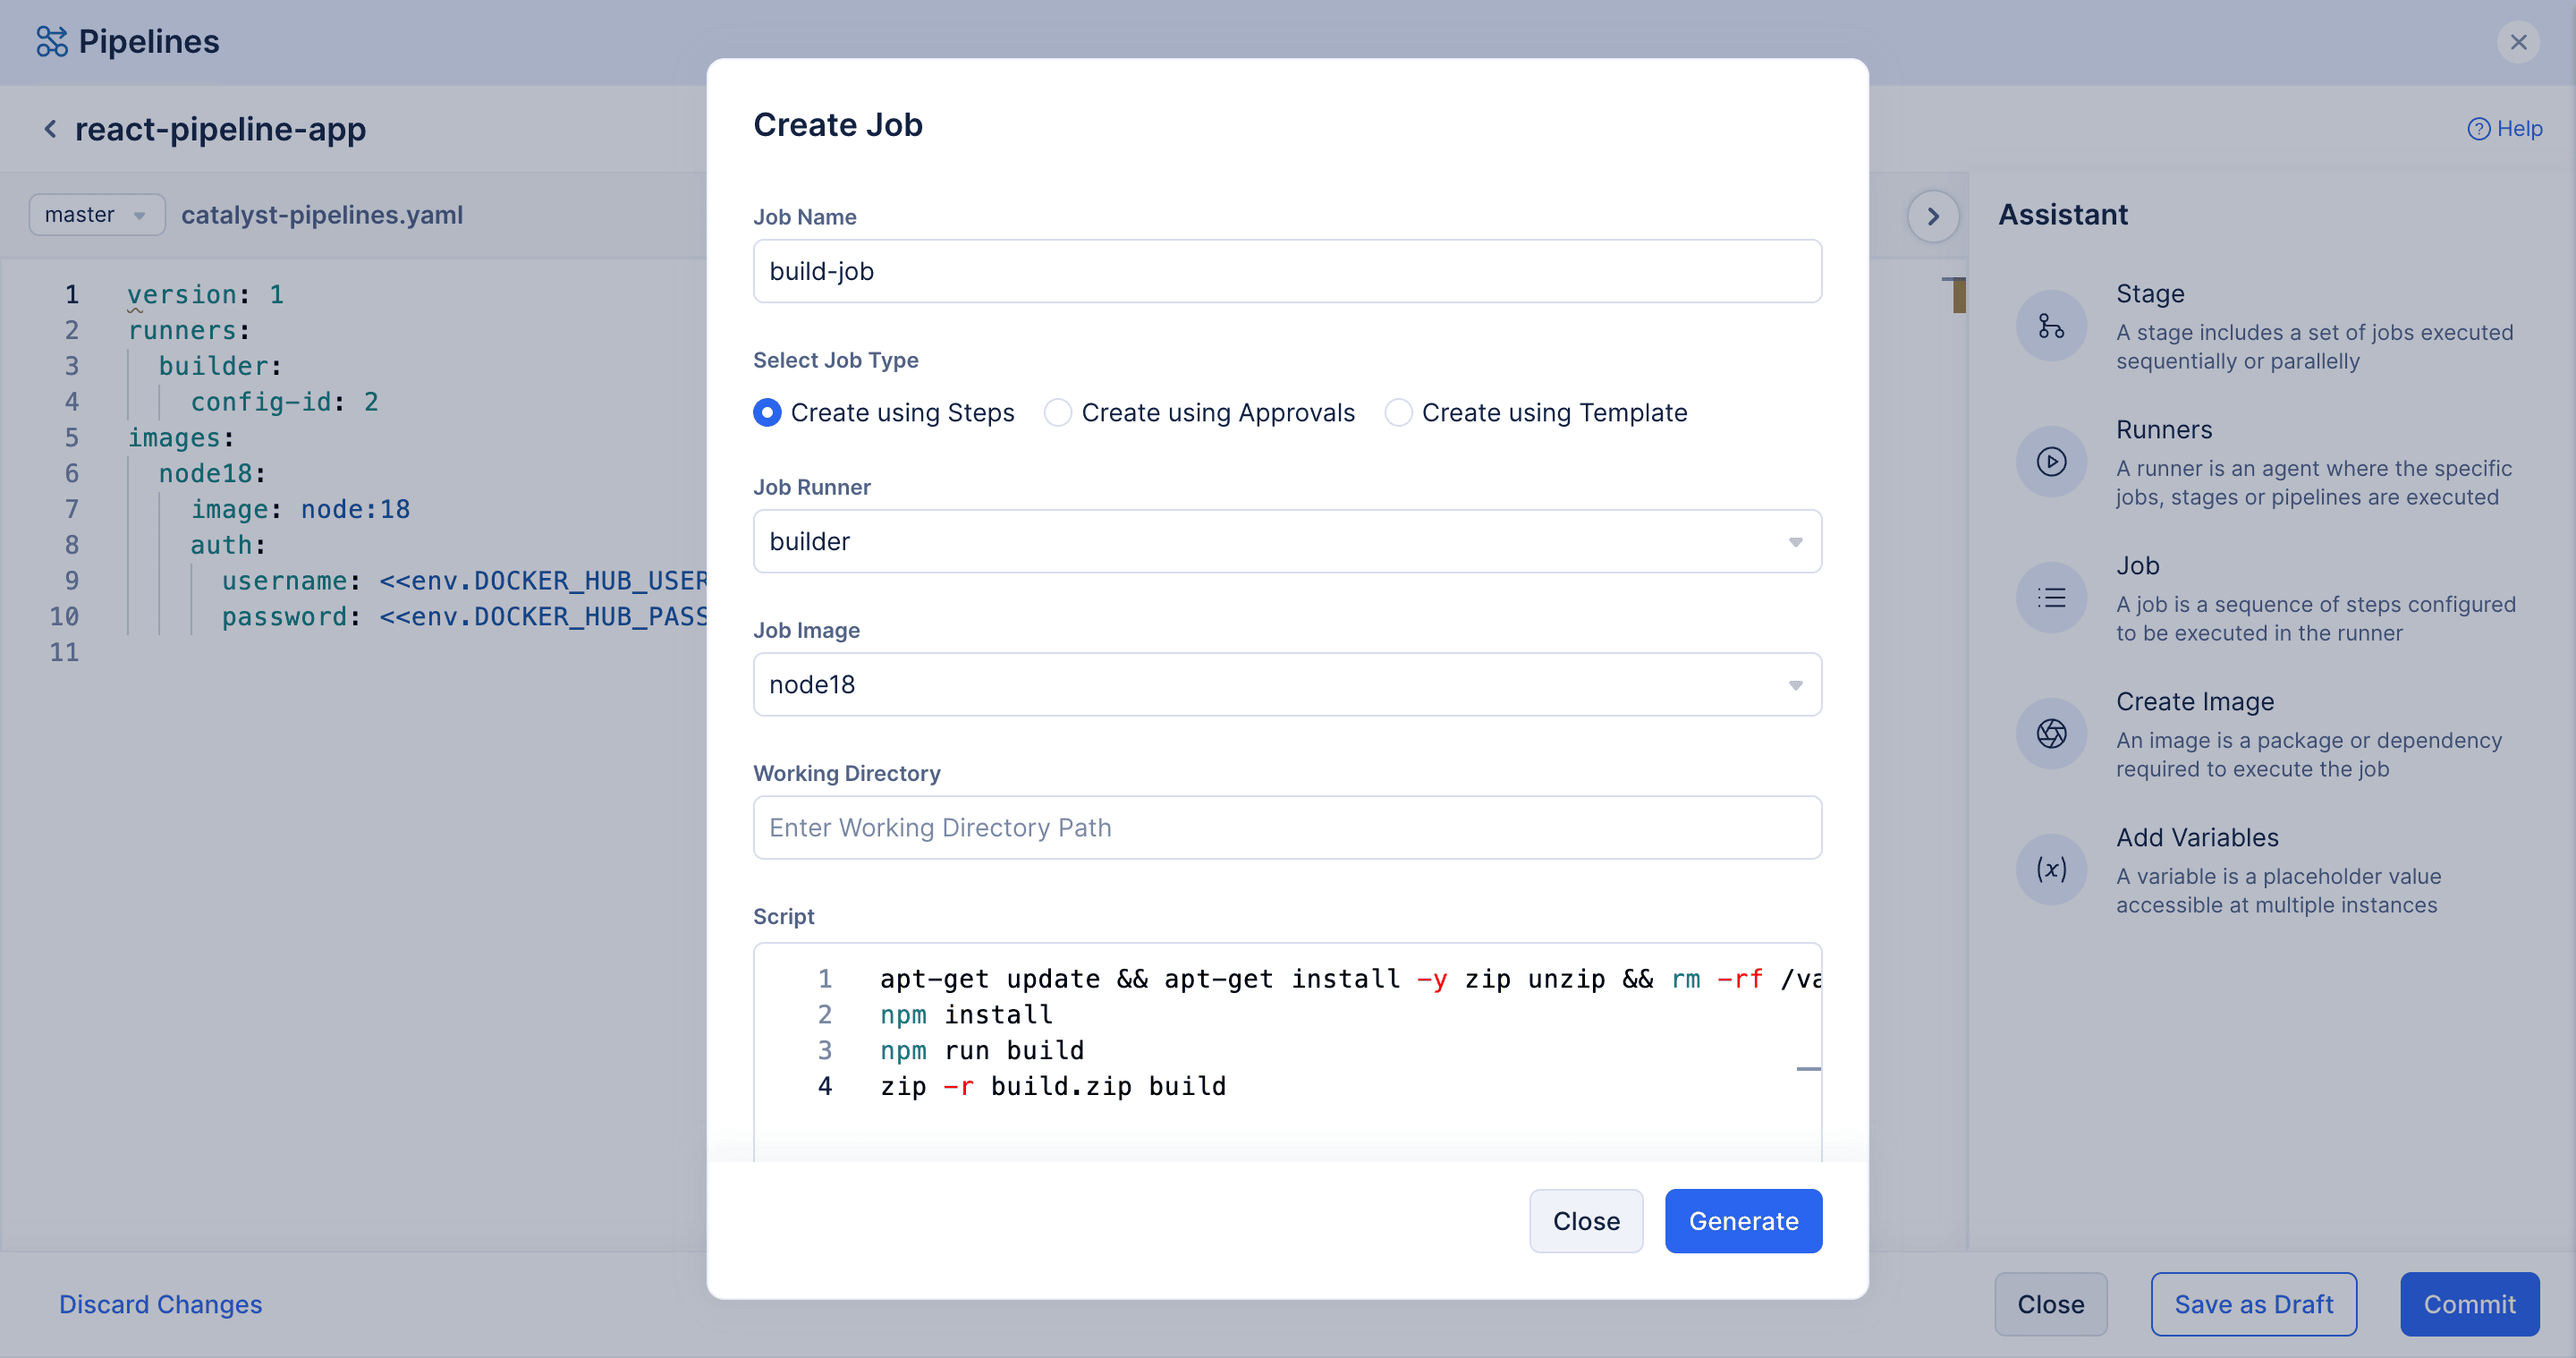
build-job:
runner: builder
image: node18
steps:
- >-
apt-get update && apt-get install -y zip unzip && rm -rf
/var/lib/apt/lists/*
- npm install
- npm run build
- zip -r build.zip build
Click on Generate
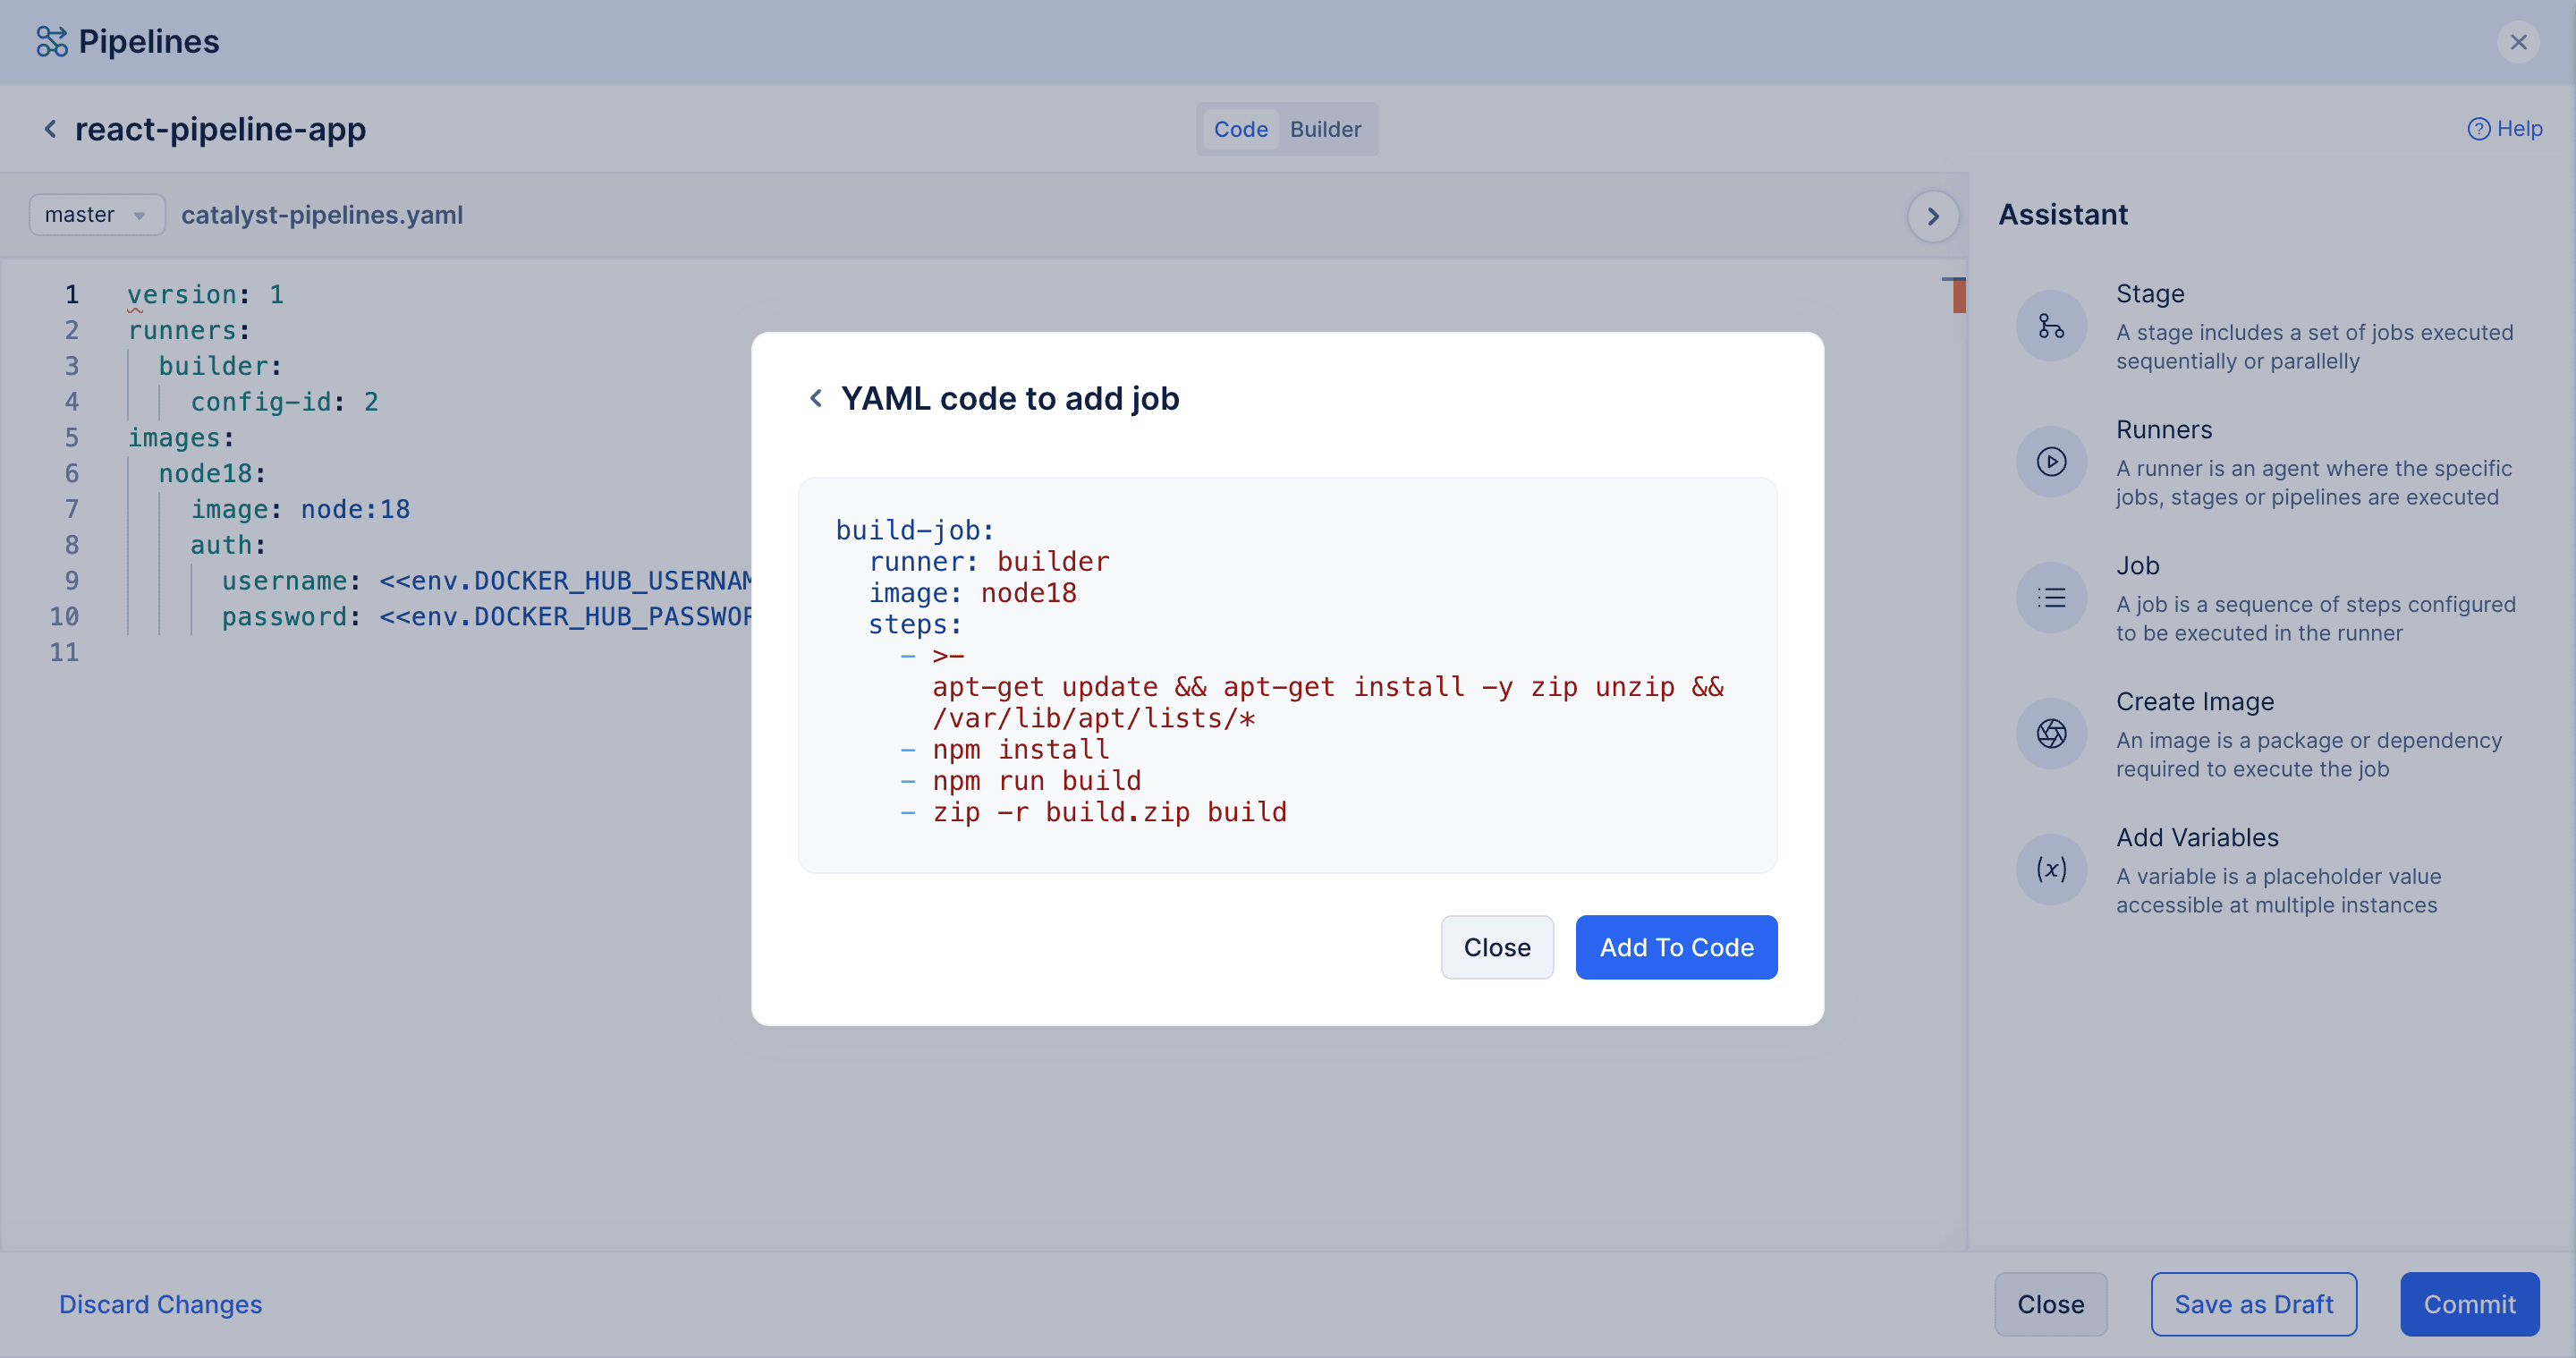
Click on Add To Code
Once that done the catalyst-pipeline.yaml should look like the following
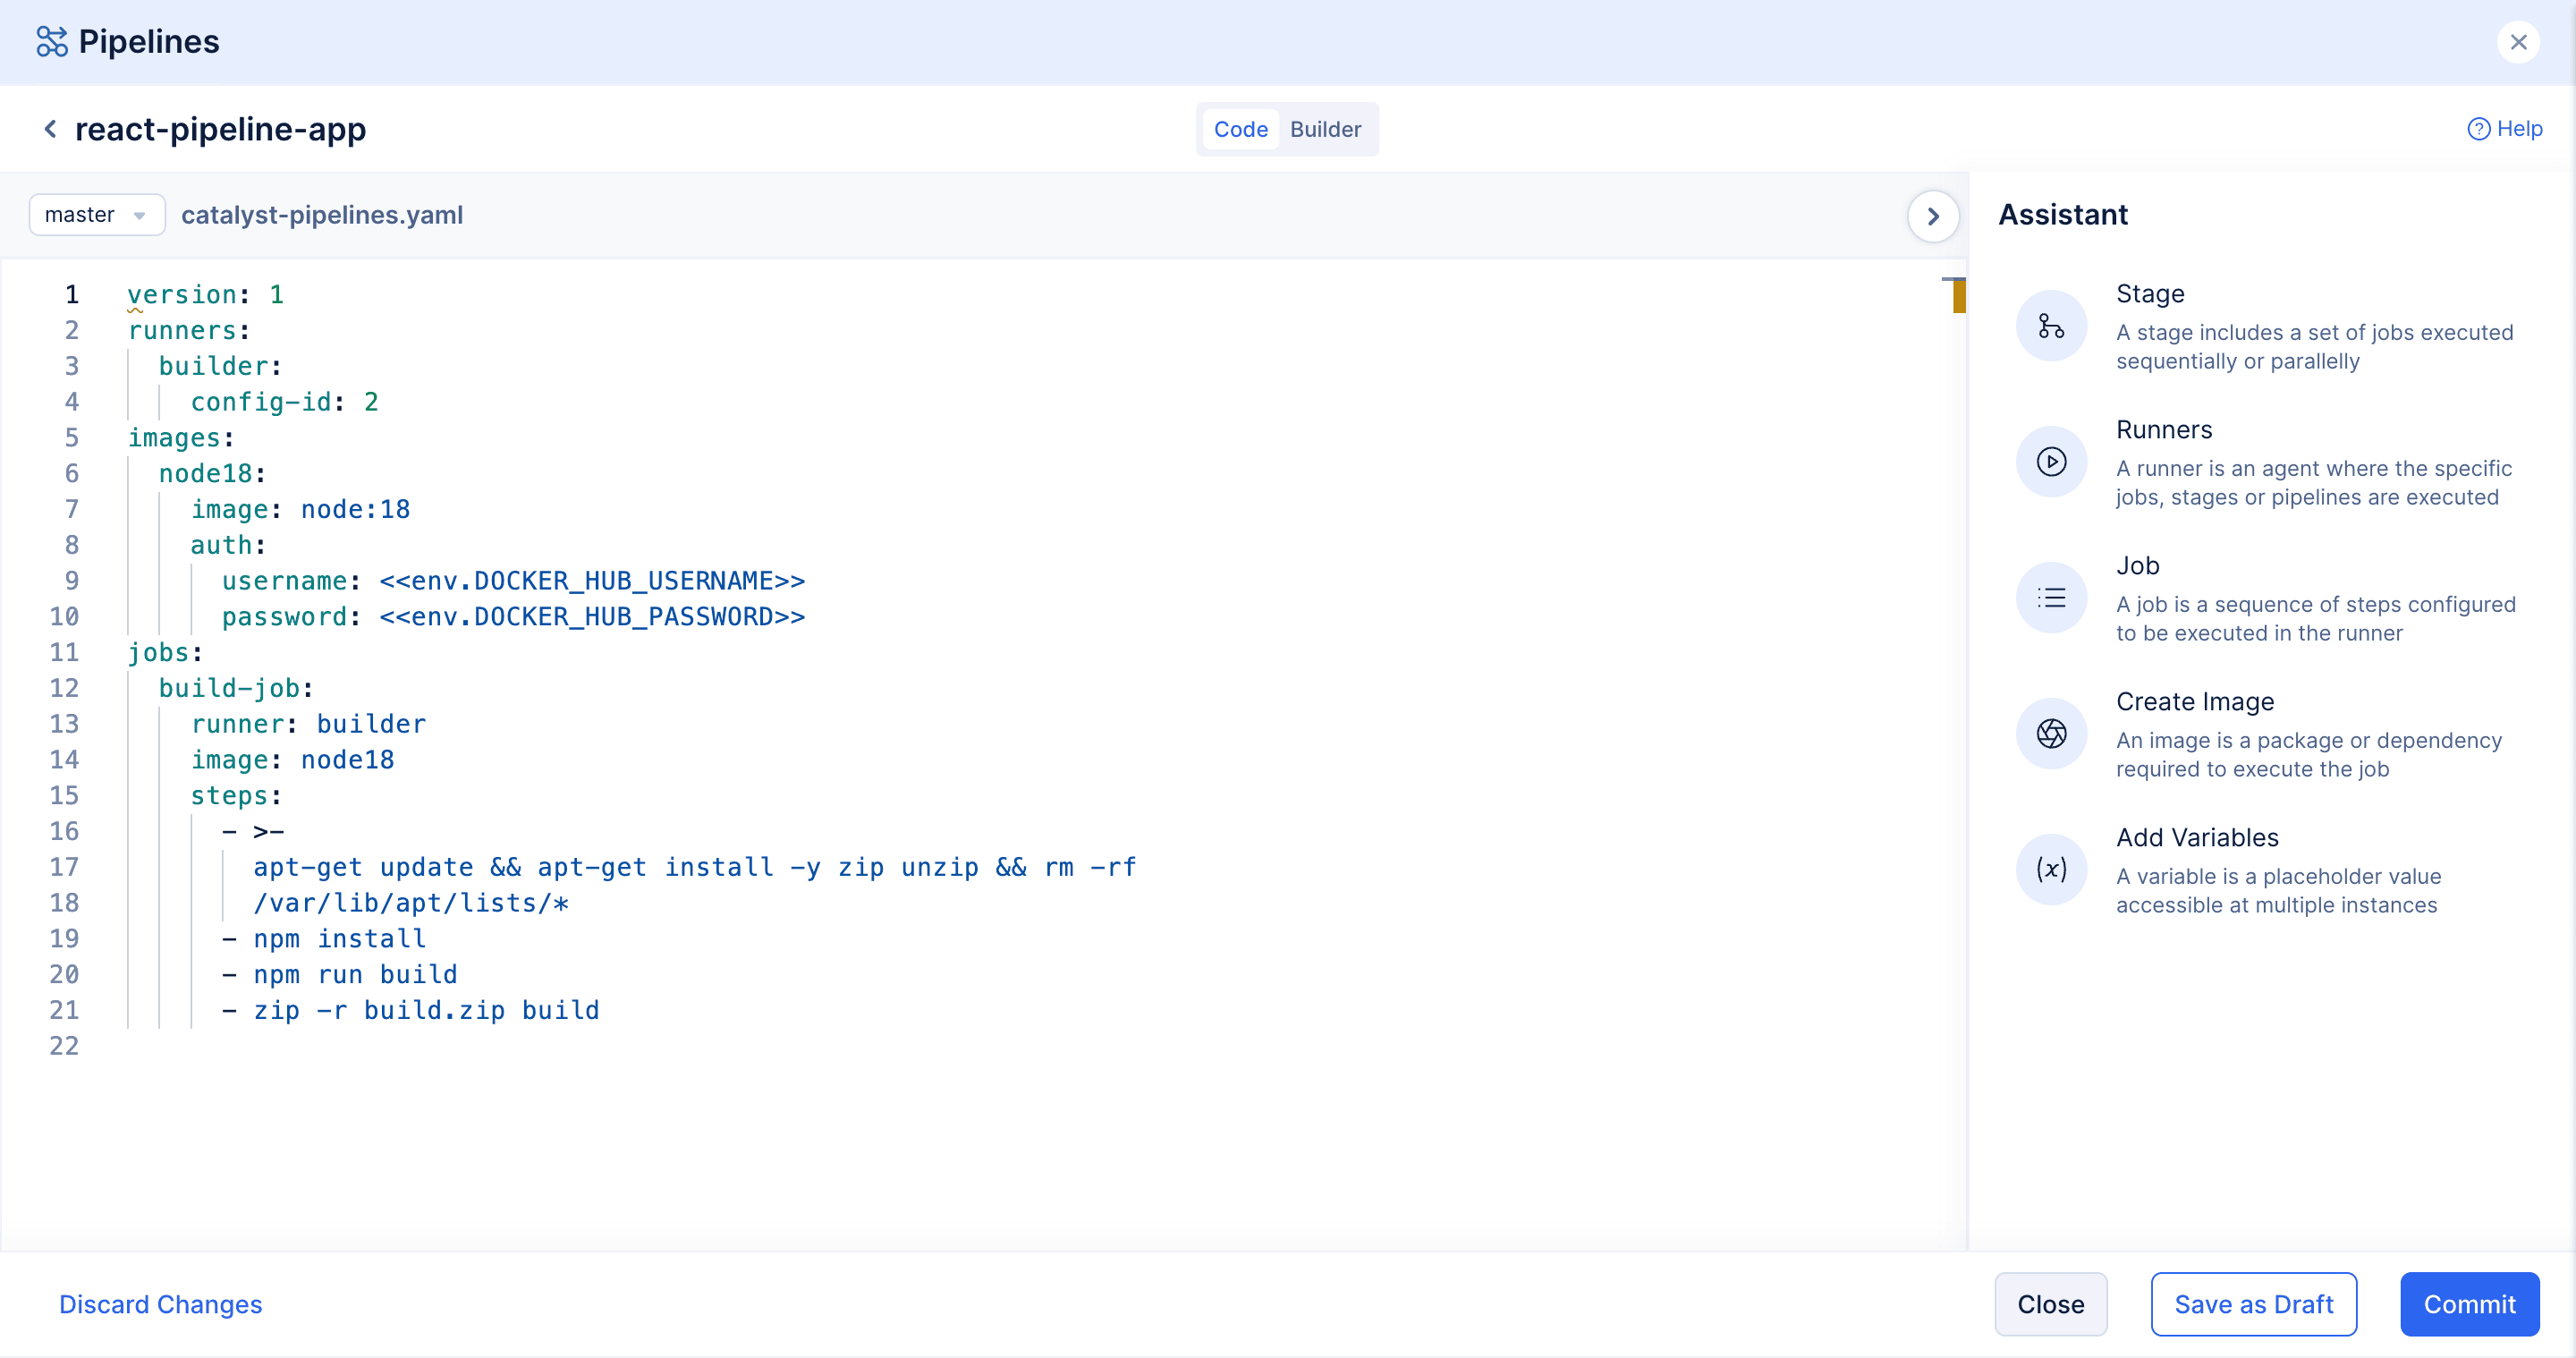
As mentioned earlier, the build and upload artifact are part of same job we need to upload the ziped build artifact which can be done with the following script.
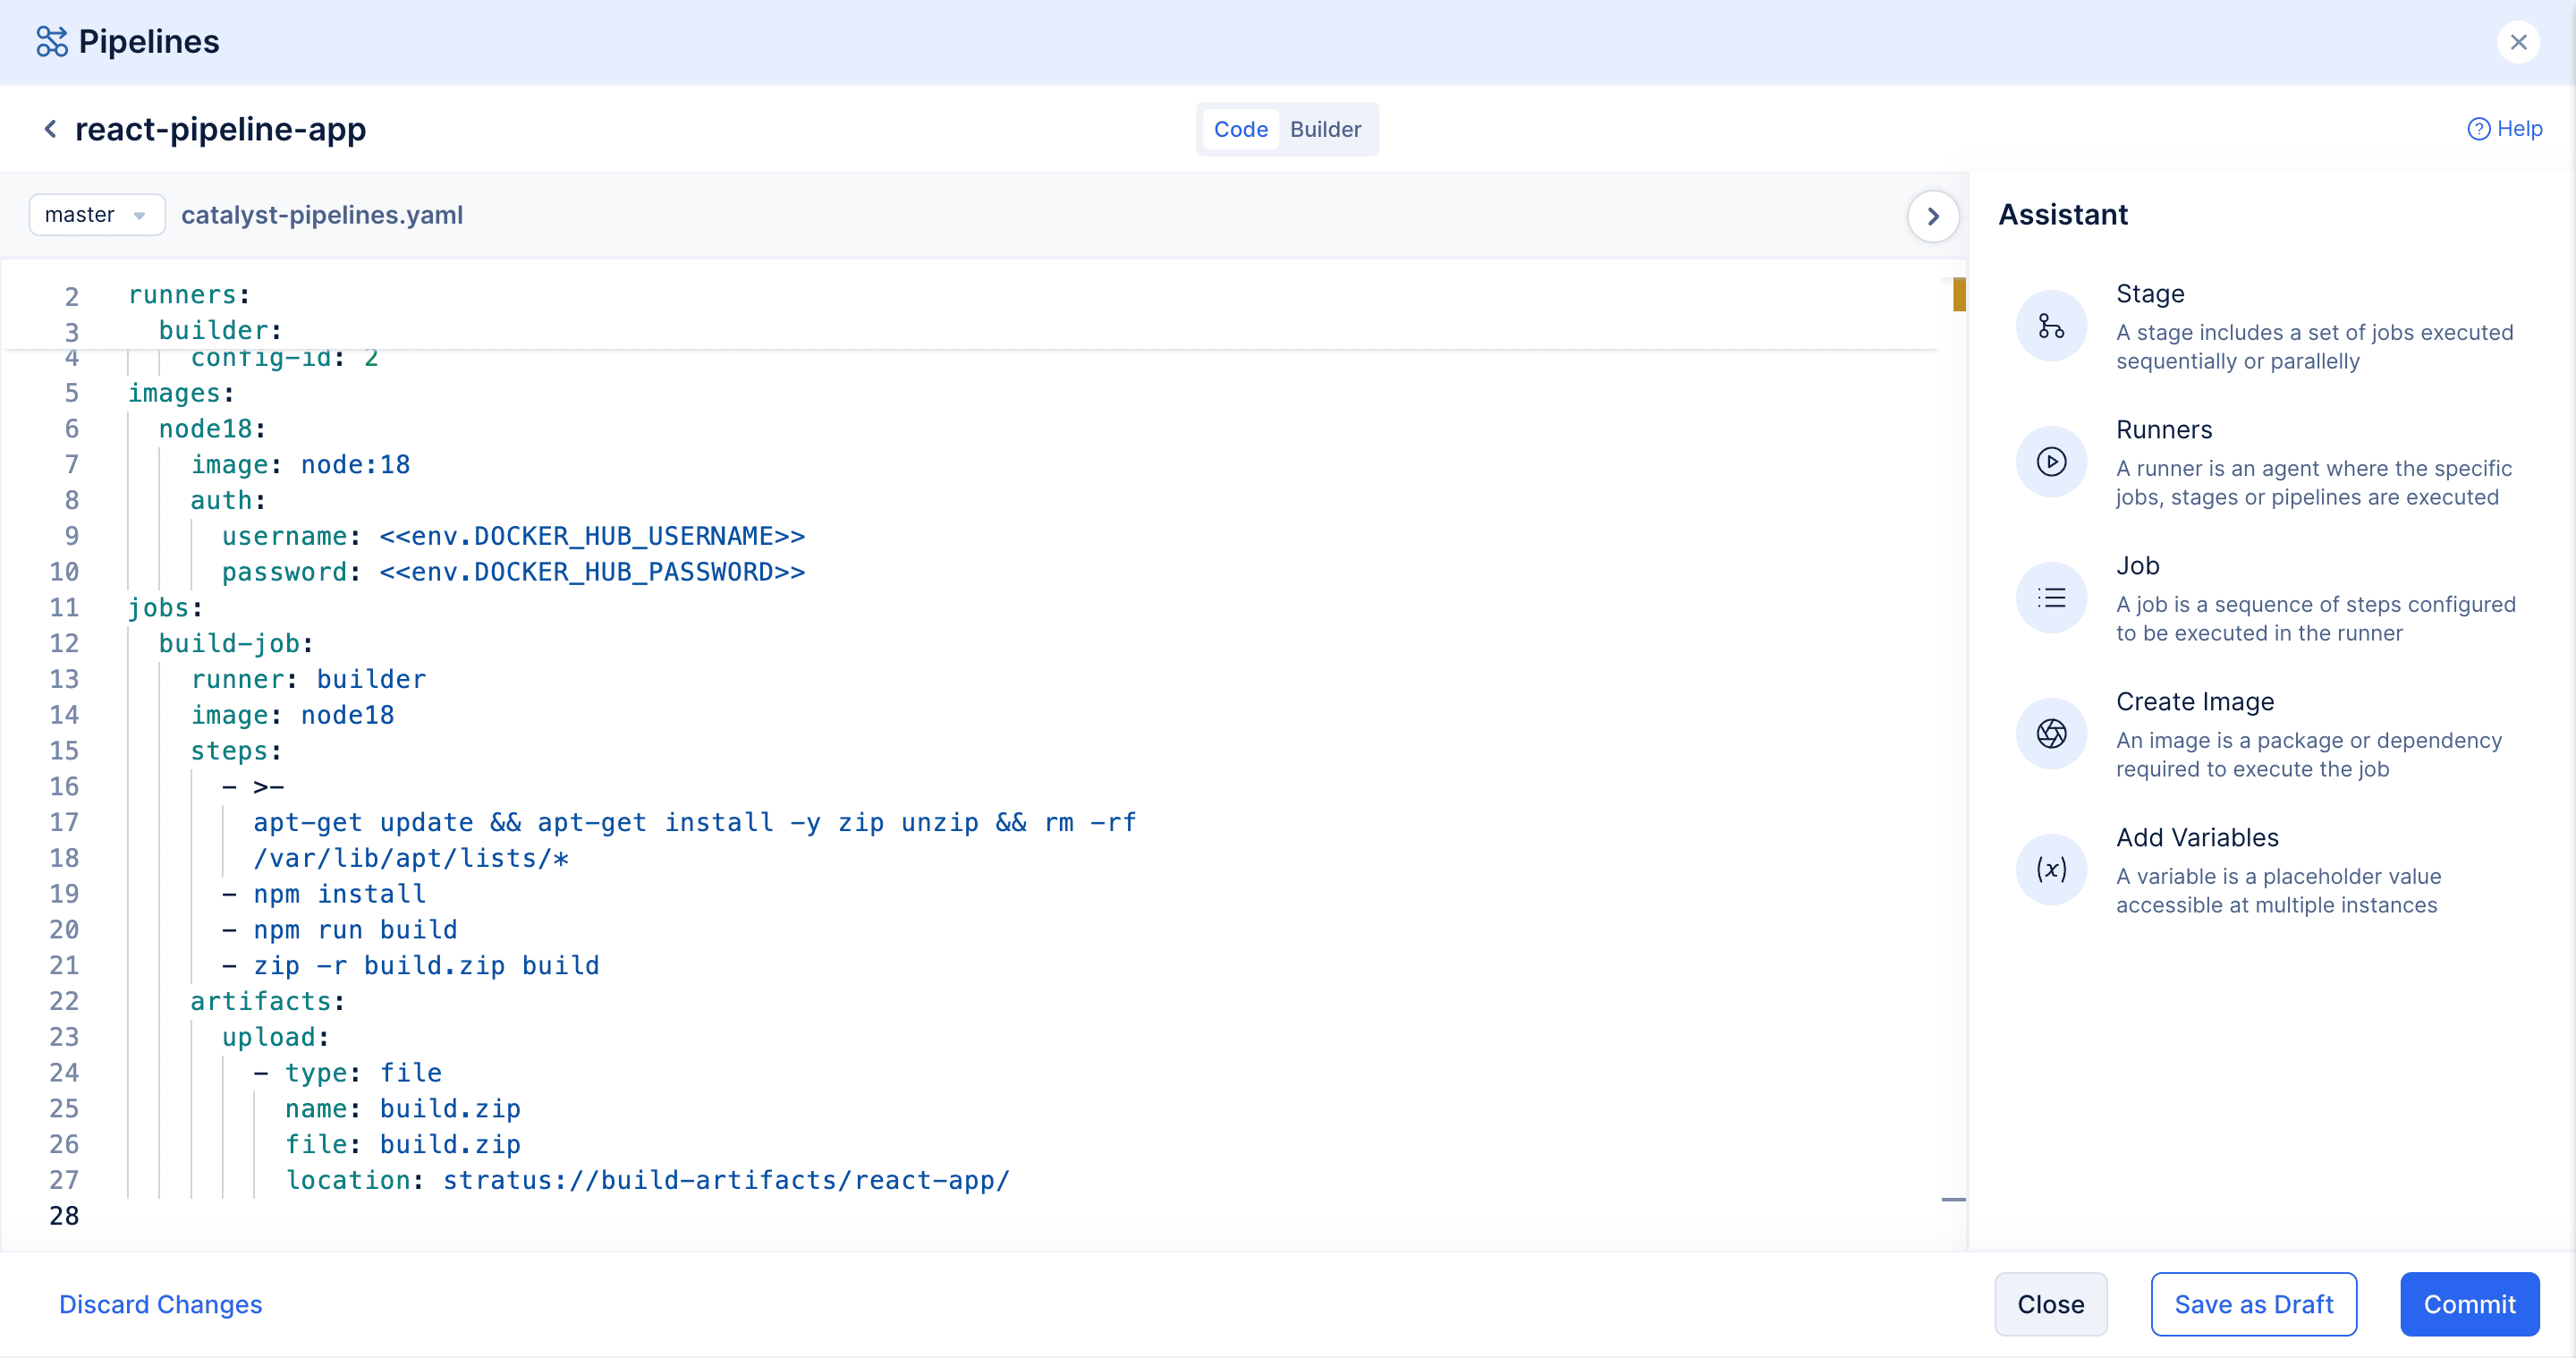
in the "location" key you can give your bucket name and path where you want to upload the build artifact, for more information check out this doc.
Instead of uploading the artifact to stratus, if you want to use the artifact and upload it to a different service, then you can install the respective CLI in the runner using scripts and execute the deploy command.
Once the jobs are created, we need to execute these jobs, A Job will be executed only if the job is added to a stage.
Creating Stage:
A stage is a pivotal component in a pipeline that organizes the execution sequence of jobs within a pipeline. Each stage represents a distinct phase in the software delivery process, such as building, testing, or deploying an application
For our problem statement, we'll be using a single stage.
From the Assistant, Select Stage
Give the stage a name and select the job that was created on the previous step.
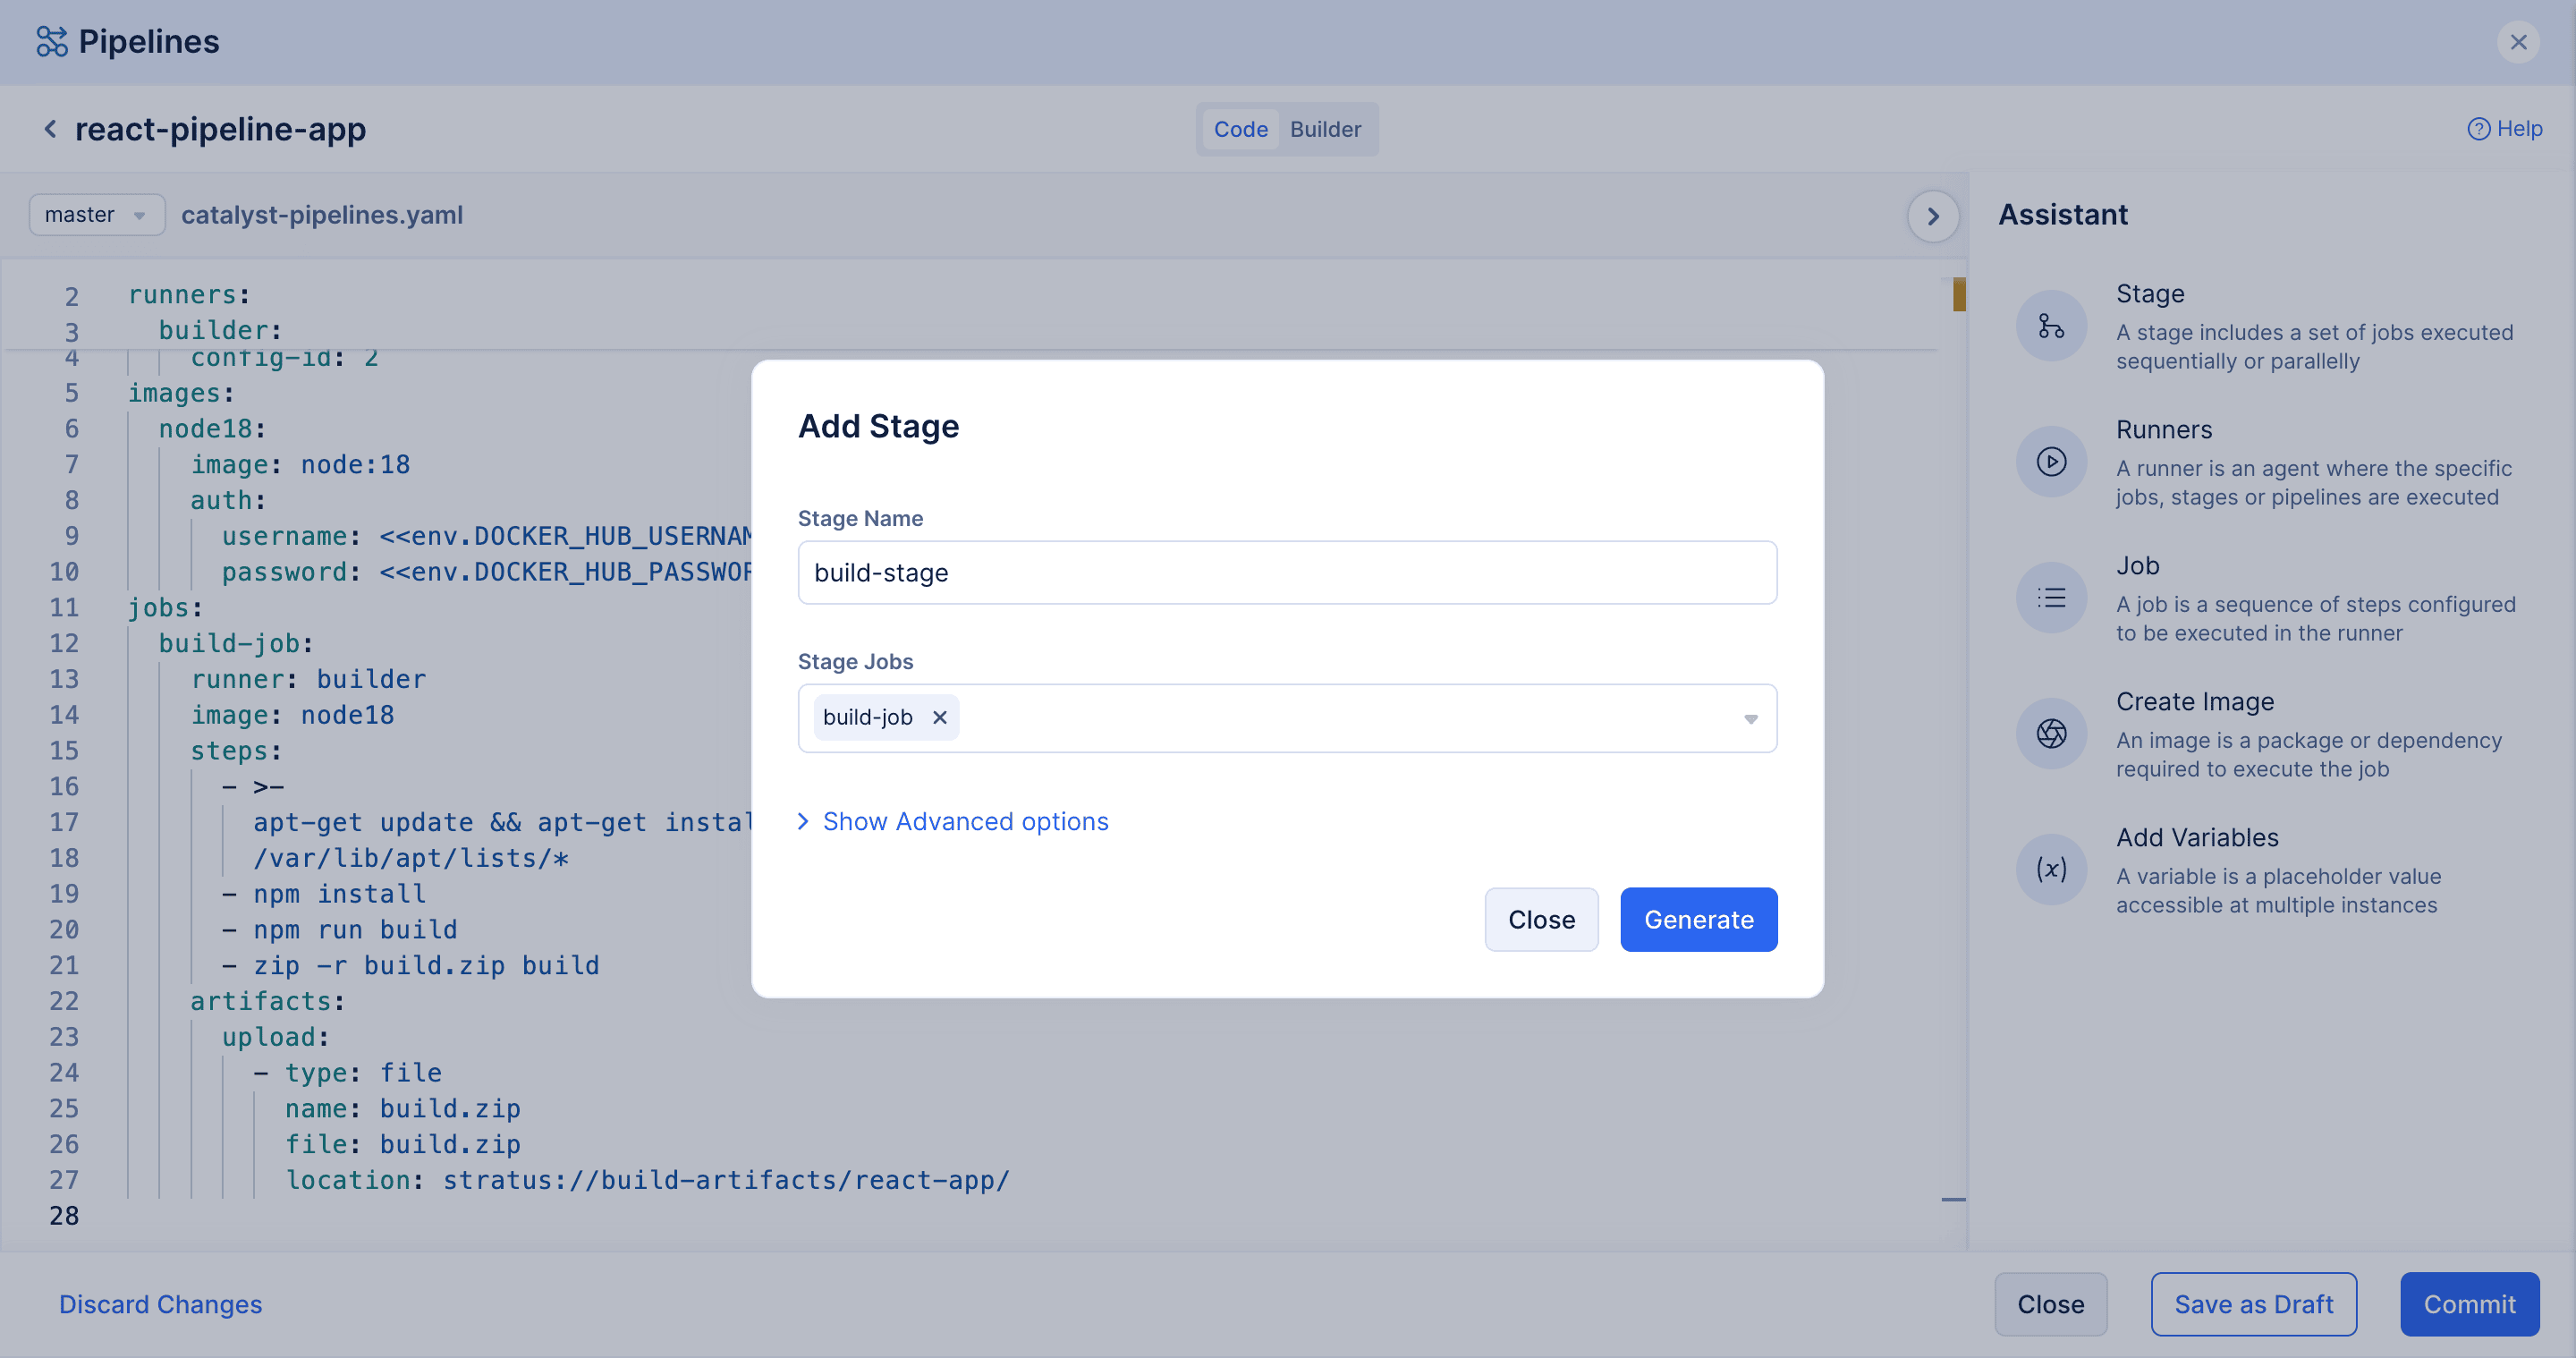
Click on Generate
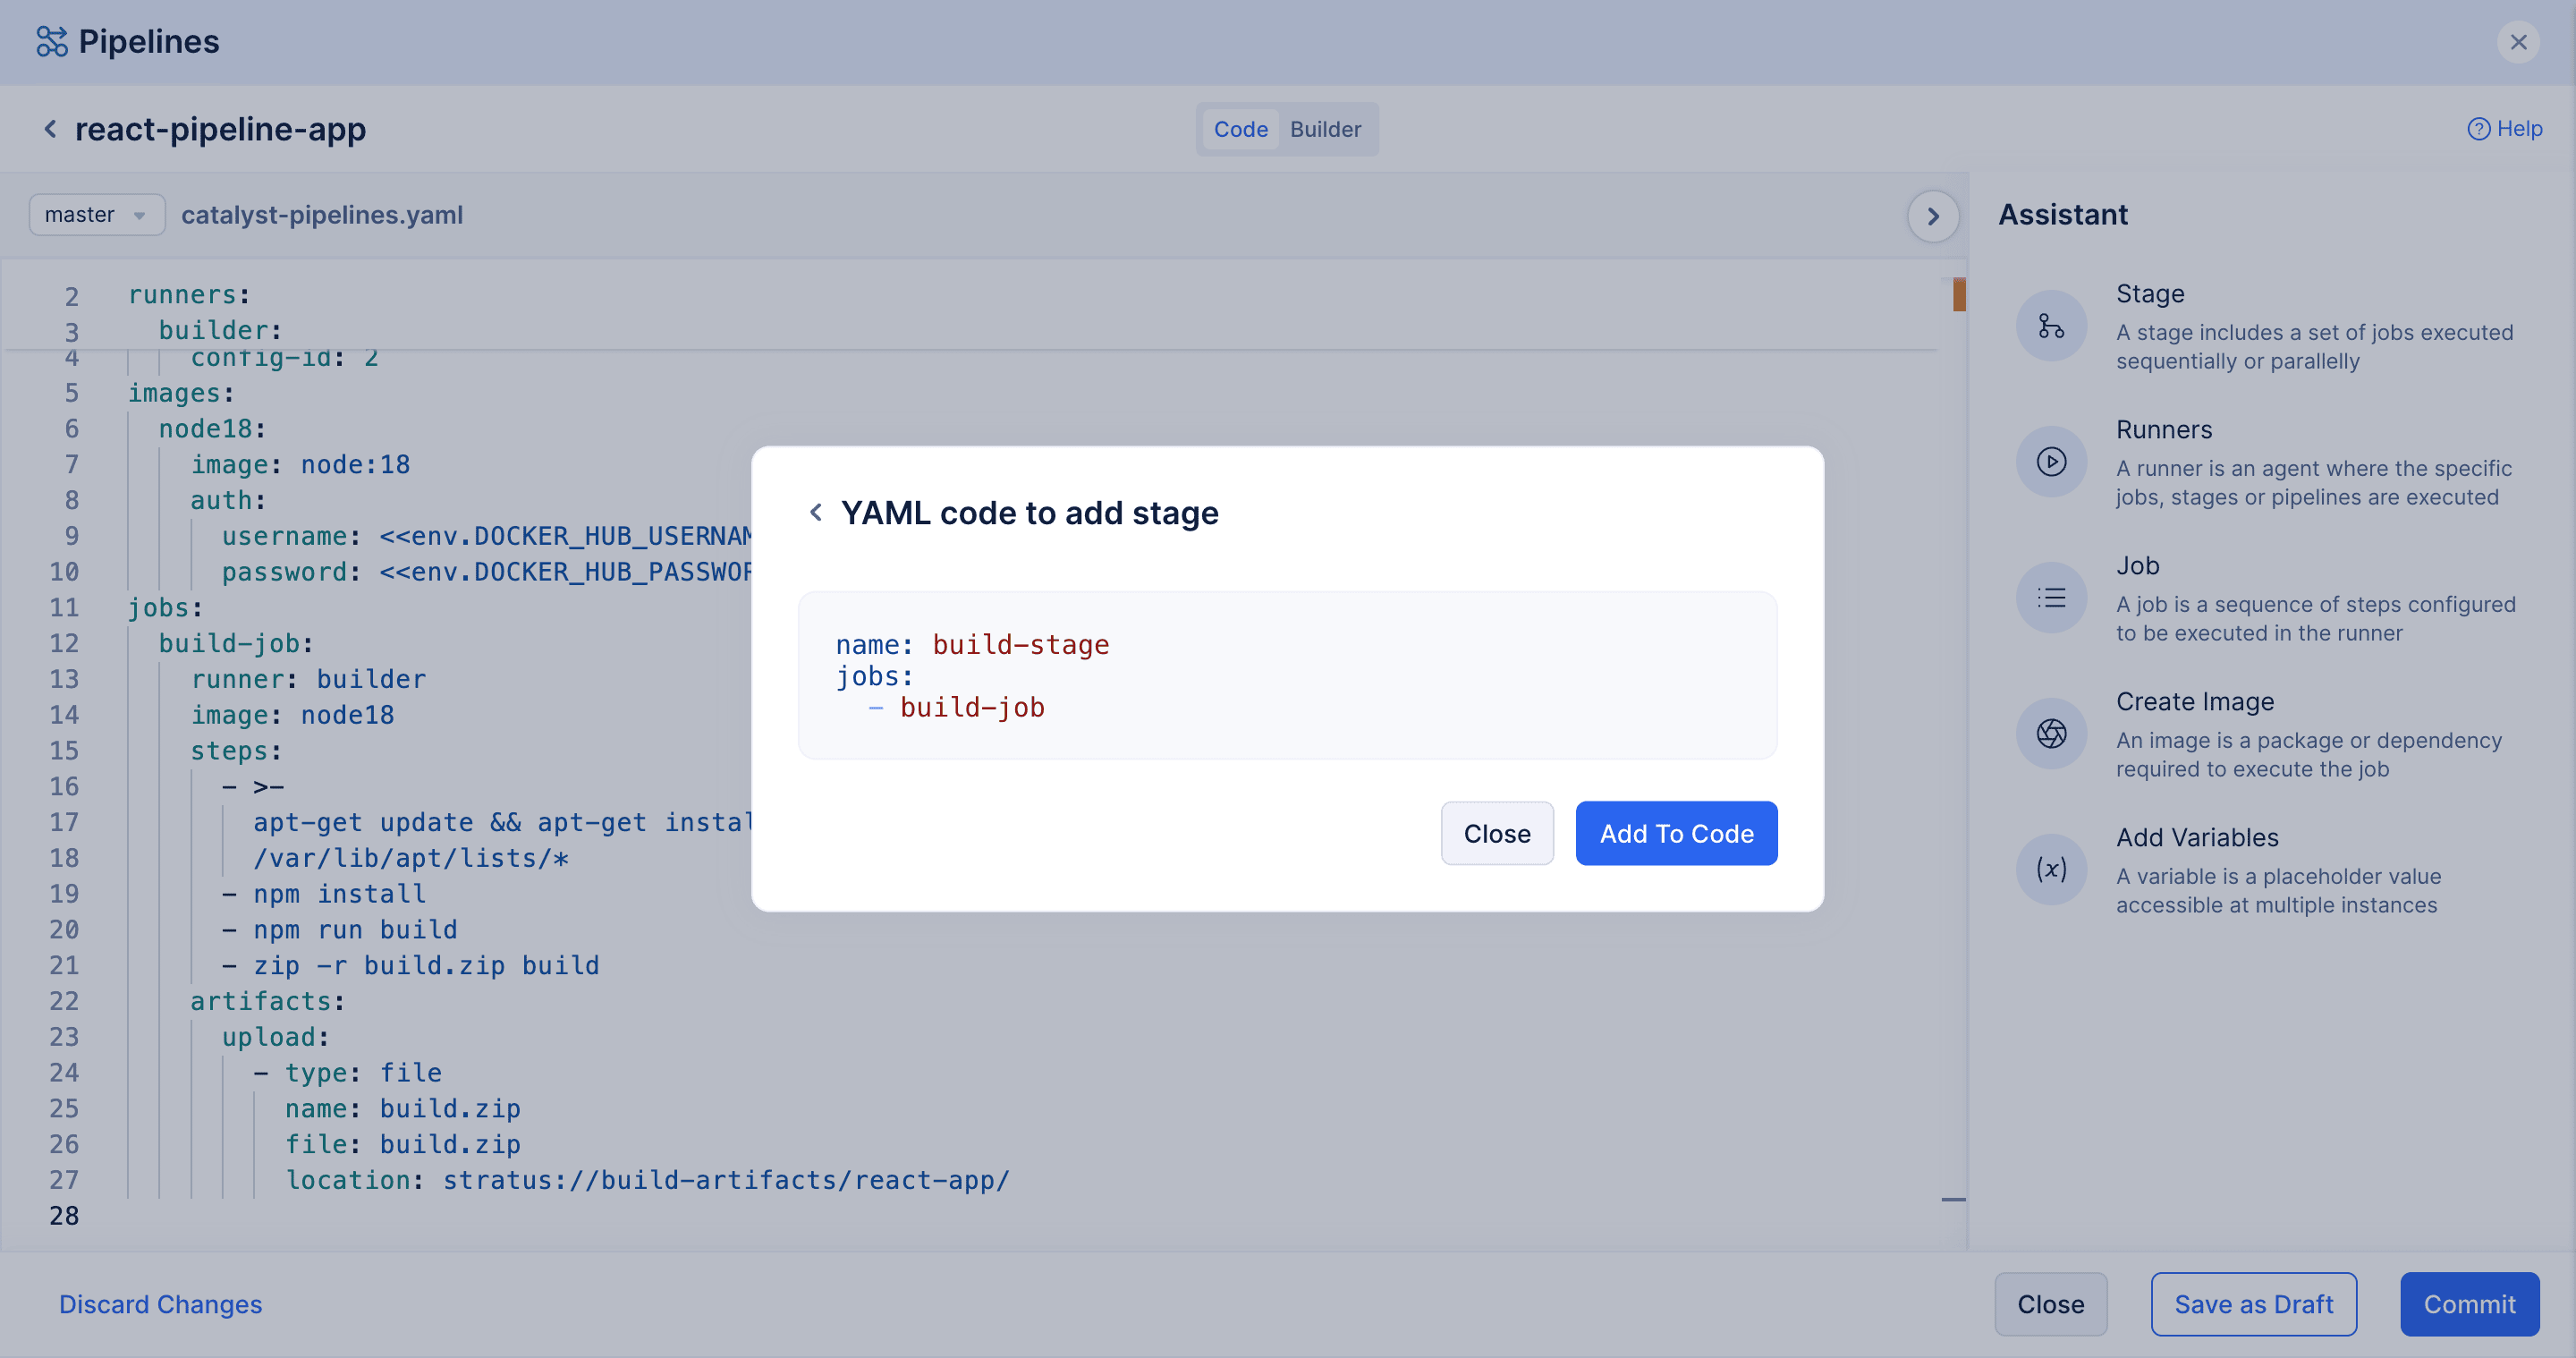
Click in Add To Code
Once that done, the catalyst-pipeline.yaml should look the following
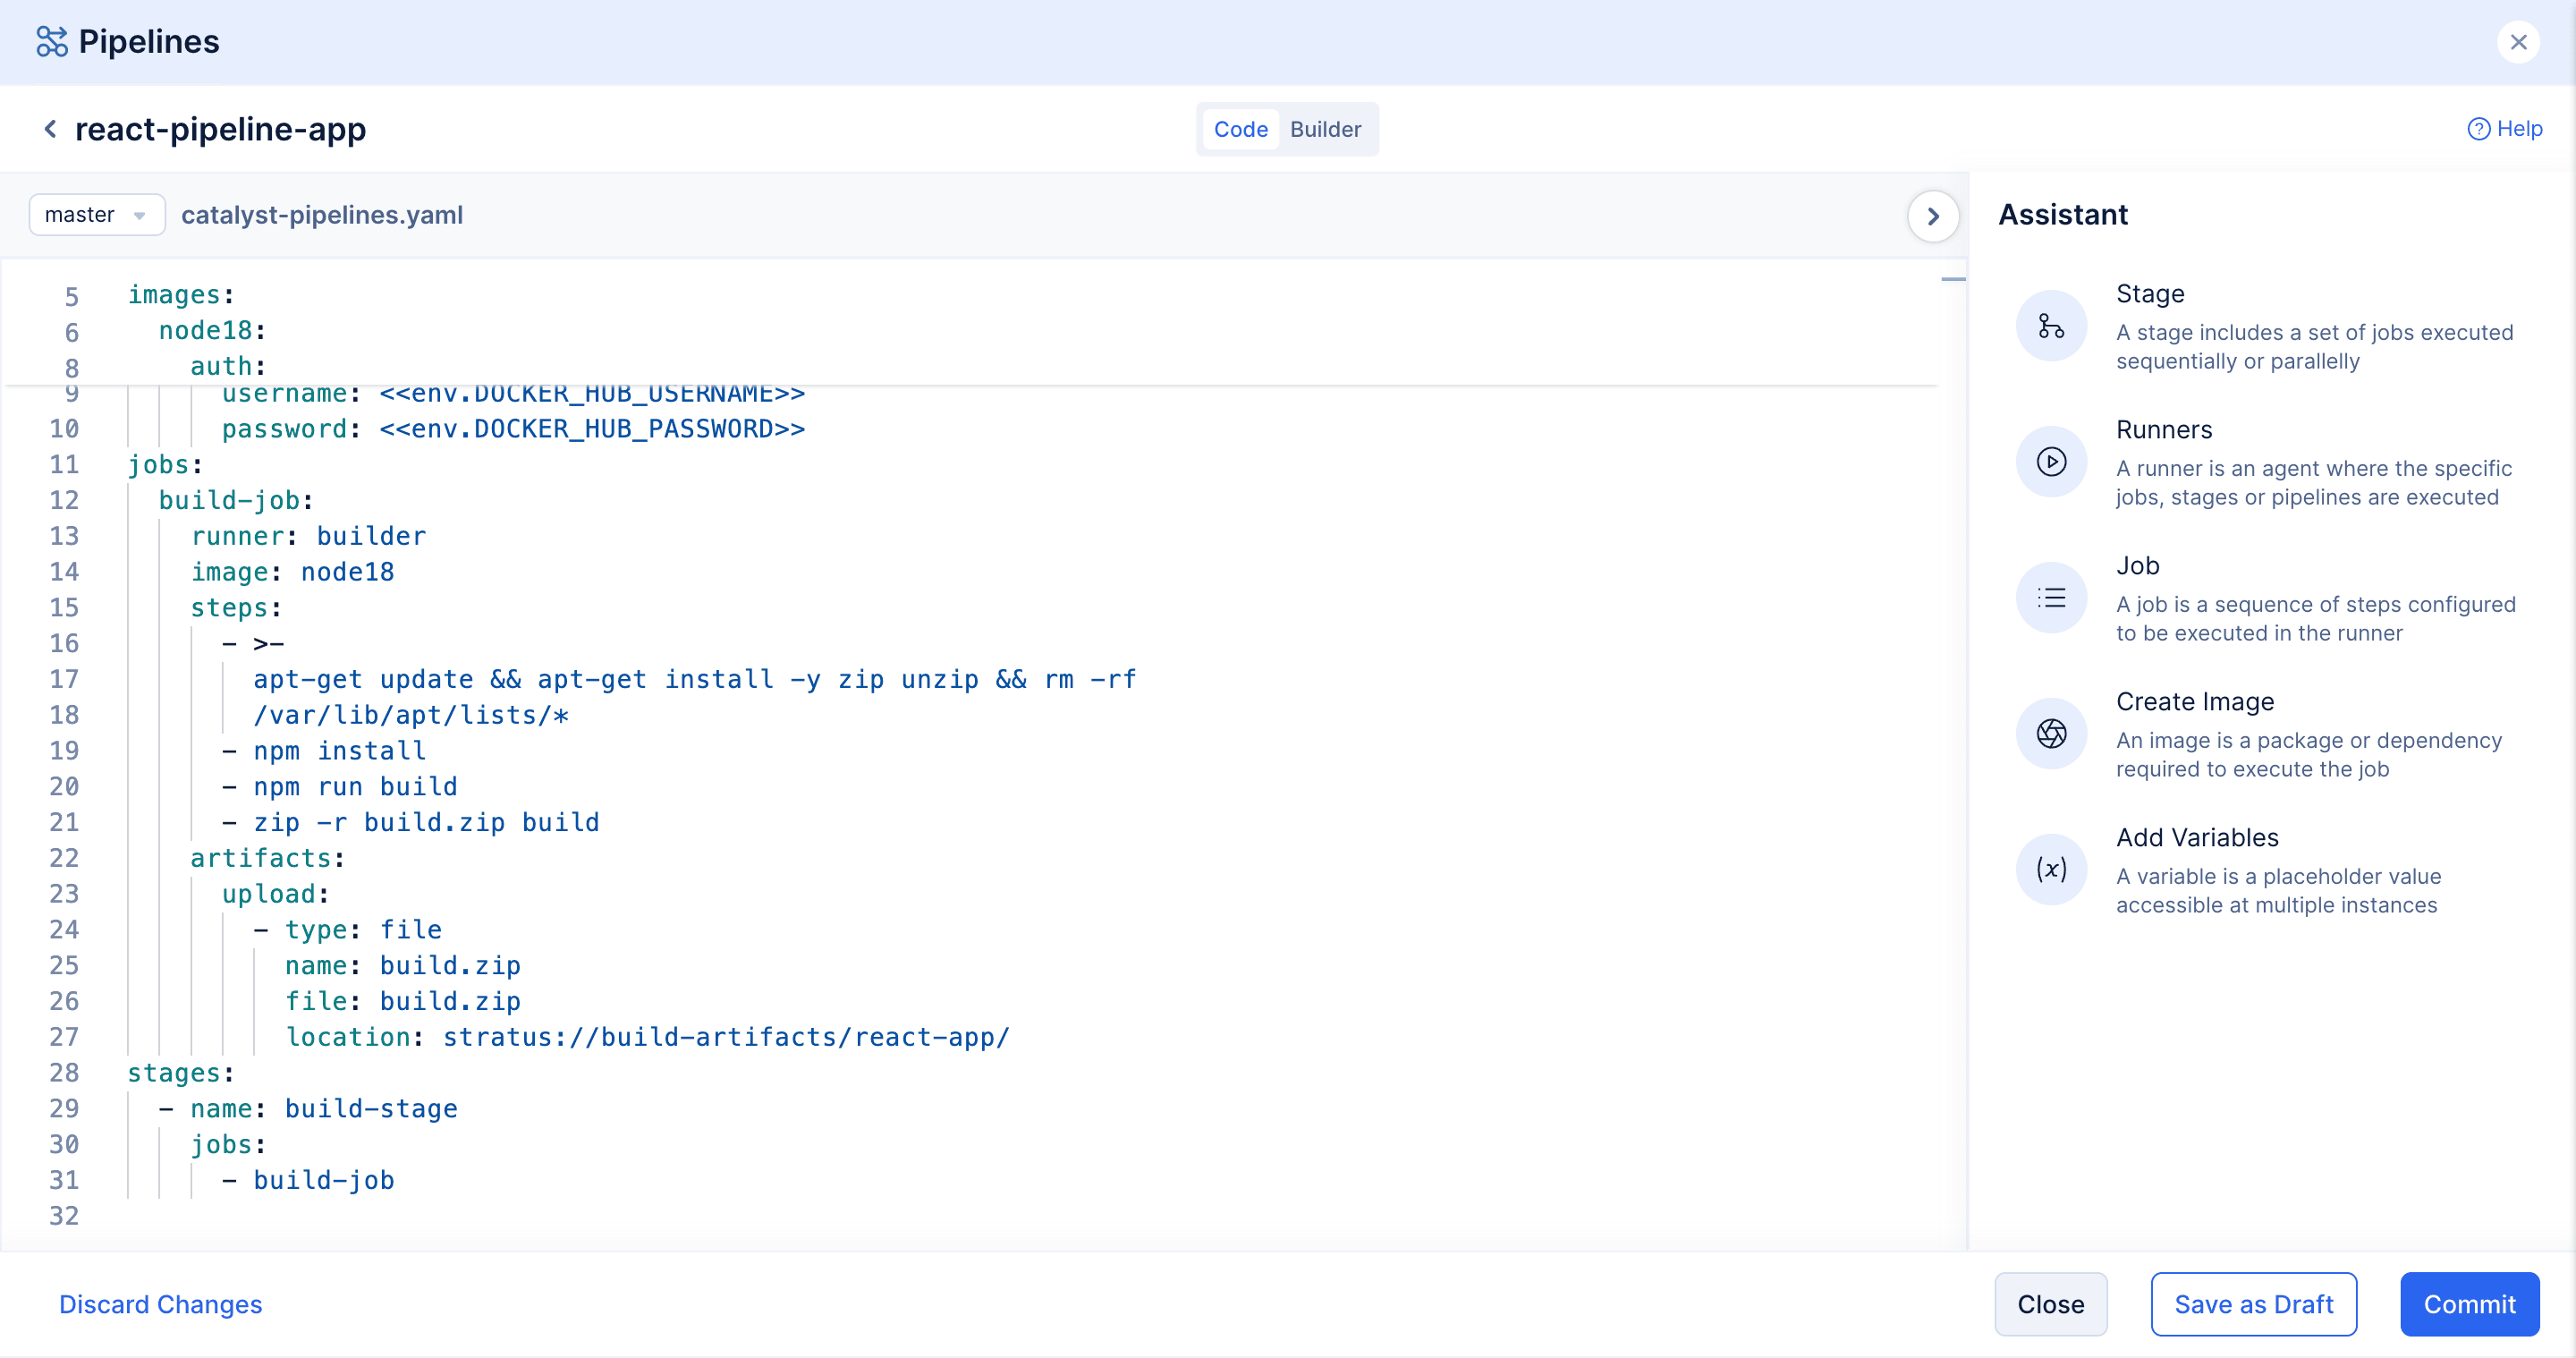
Committing the Changes:
We are now done with the pipeline file part; all we need to do now is to commit this to the GitHub repository.
Click on the commit button
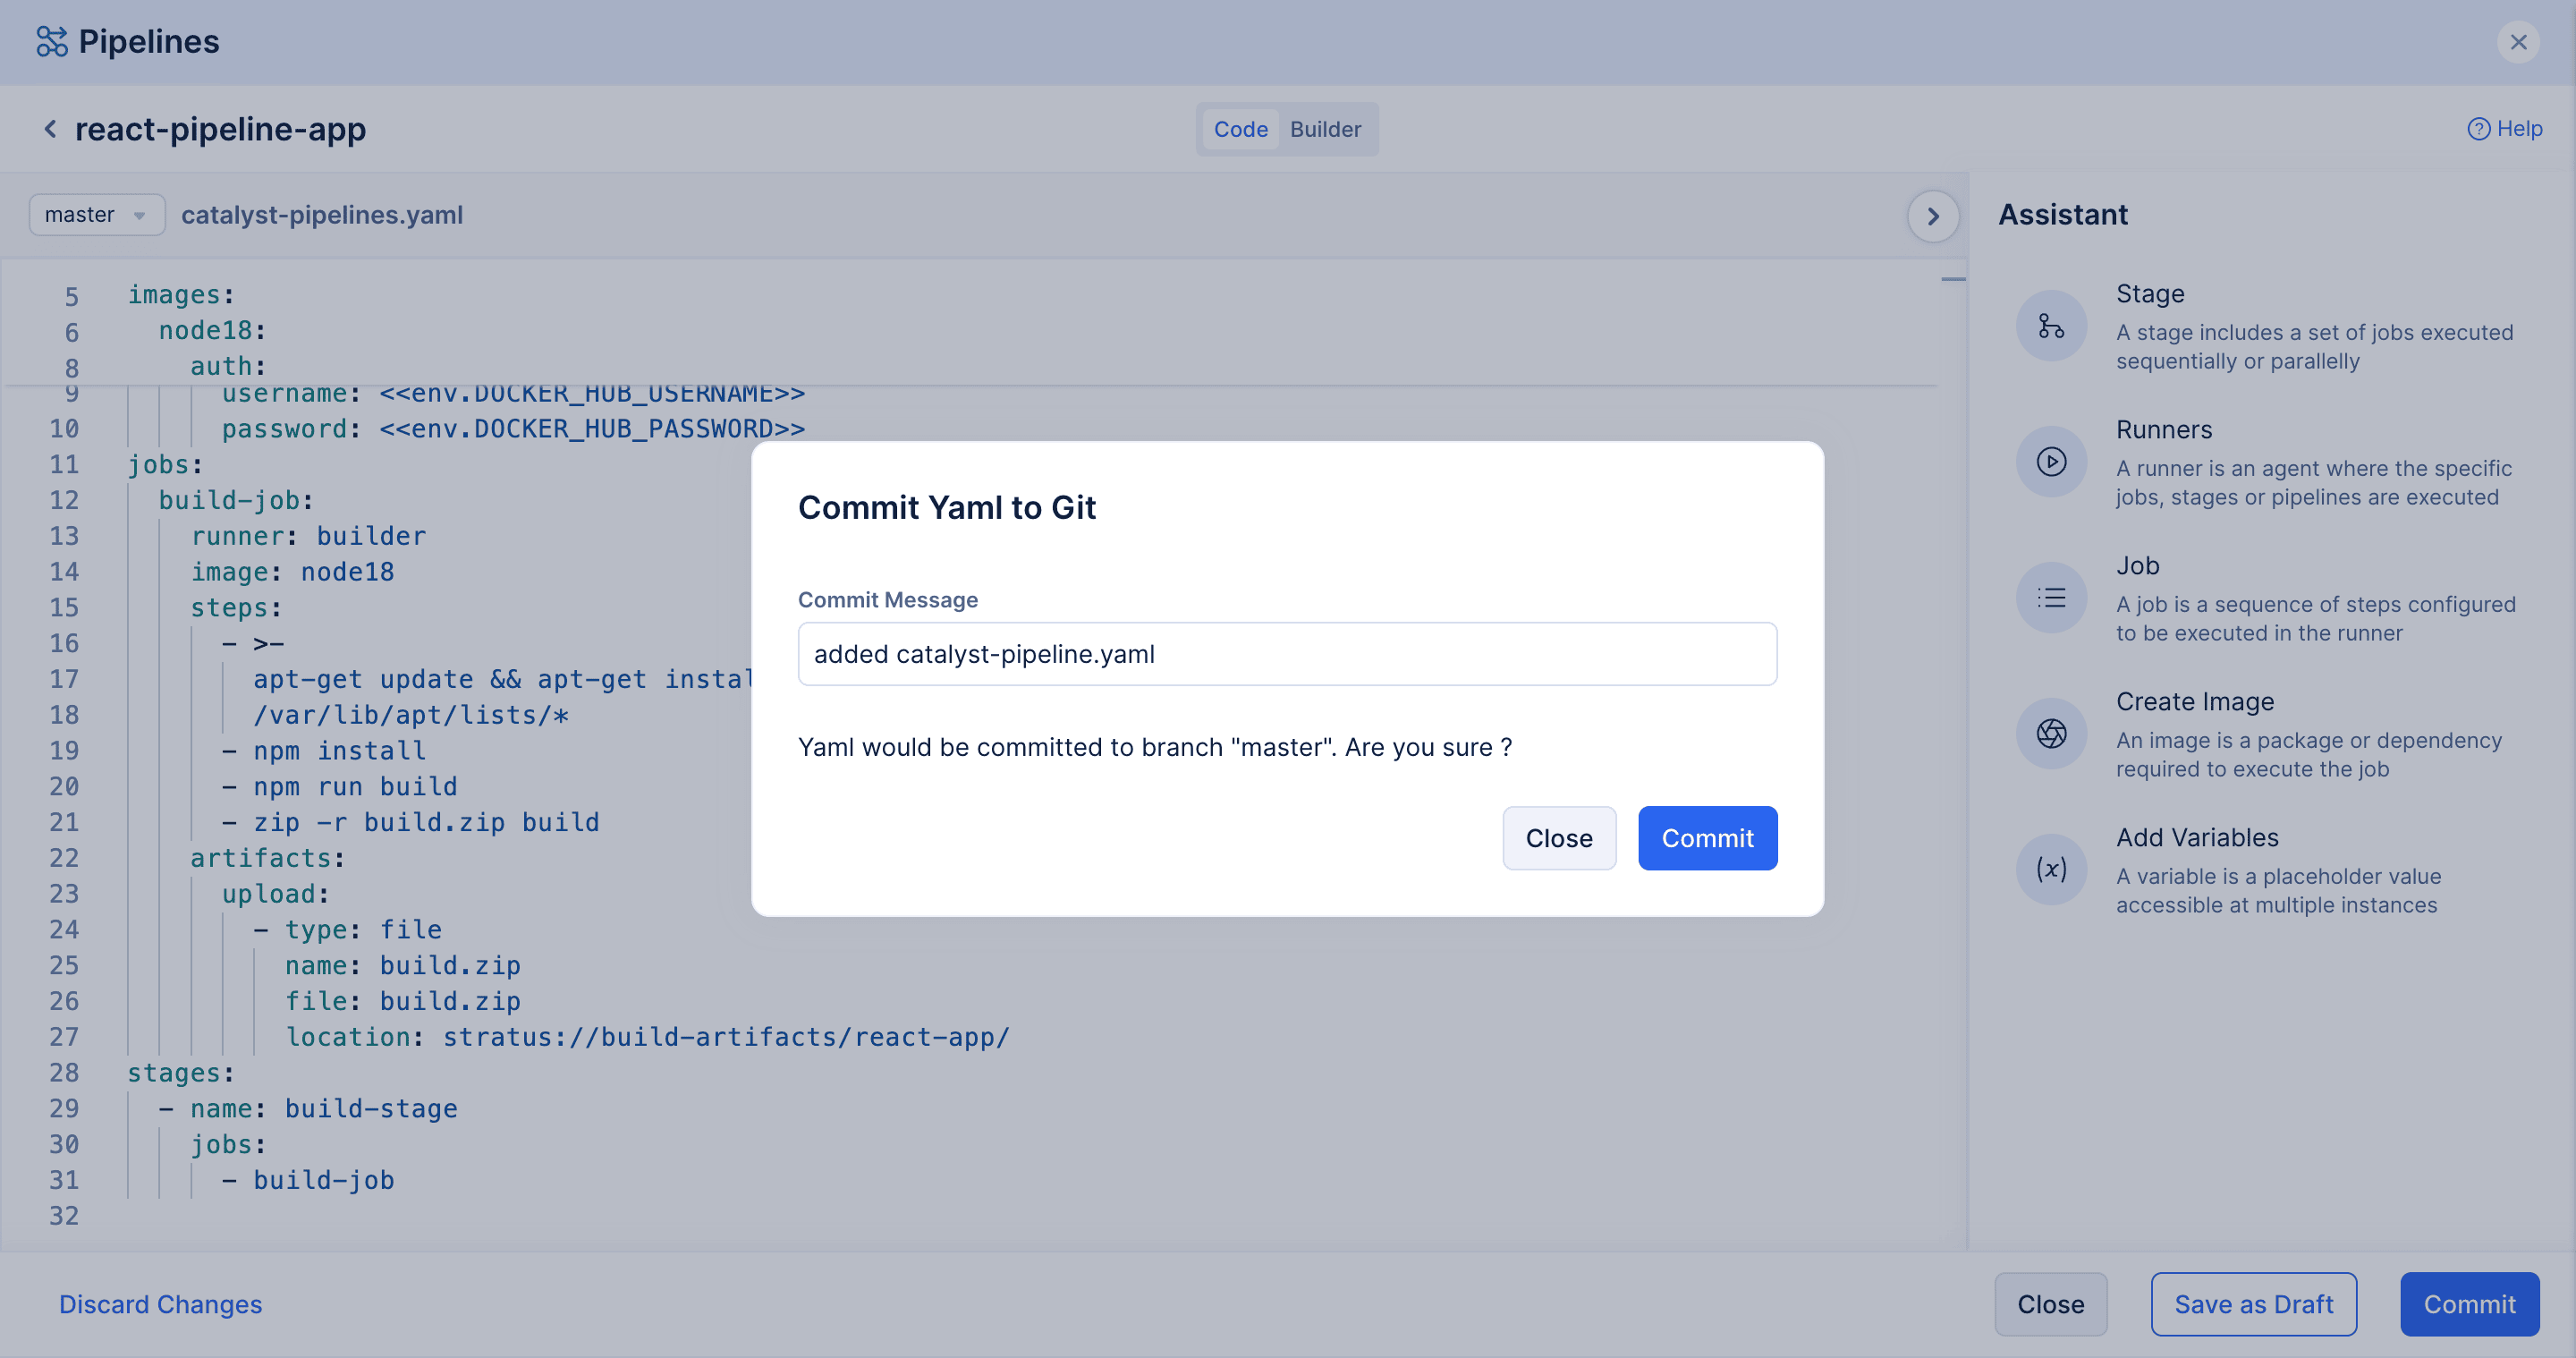
Enter a commit Message and Click on commit
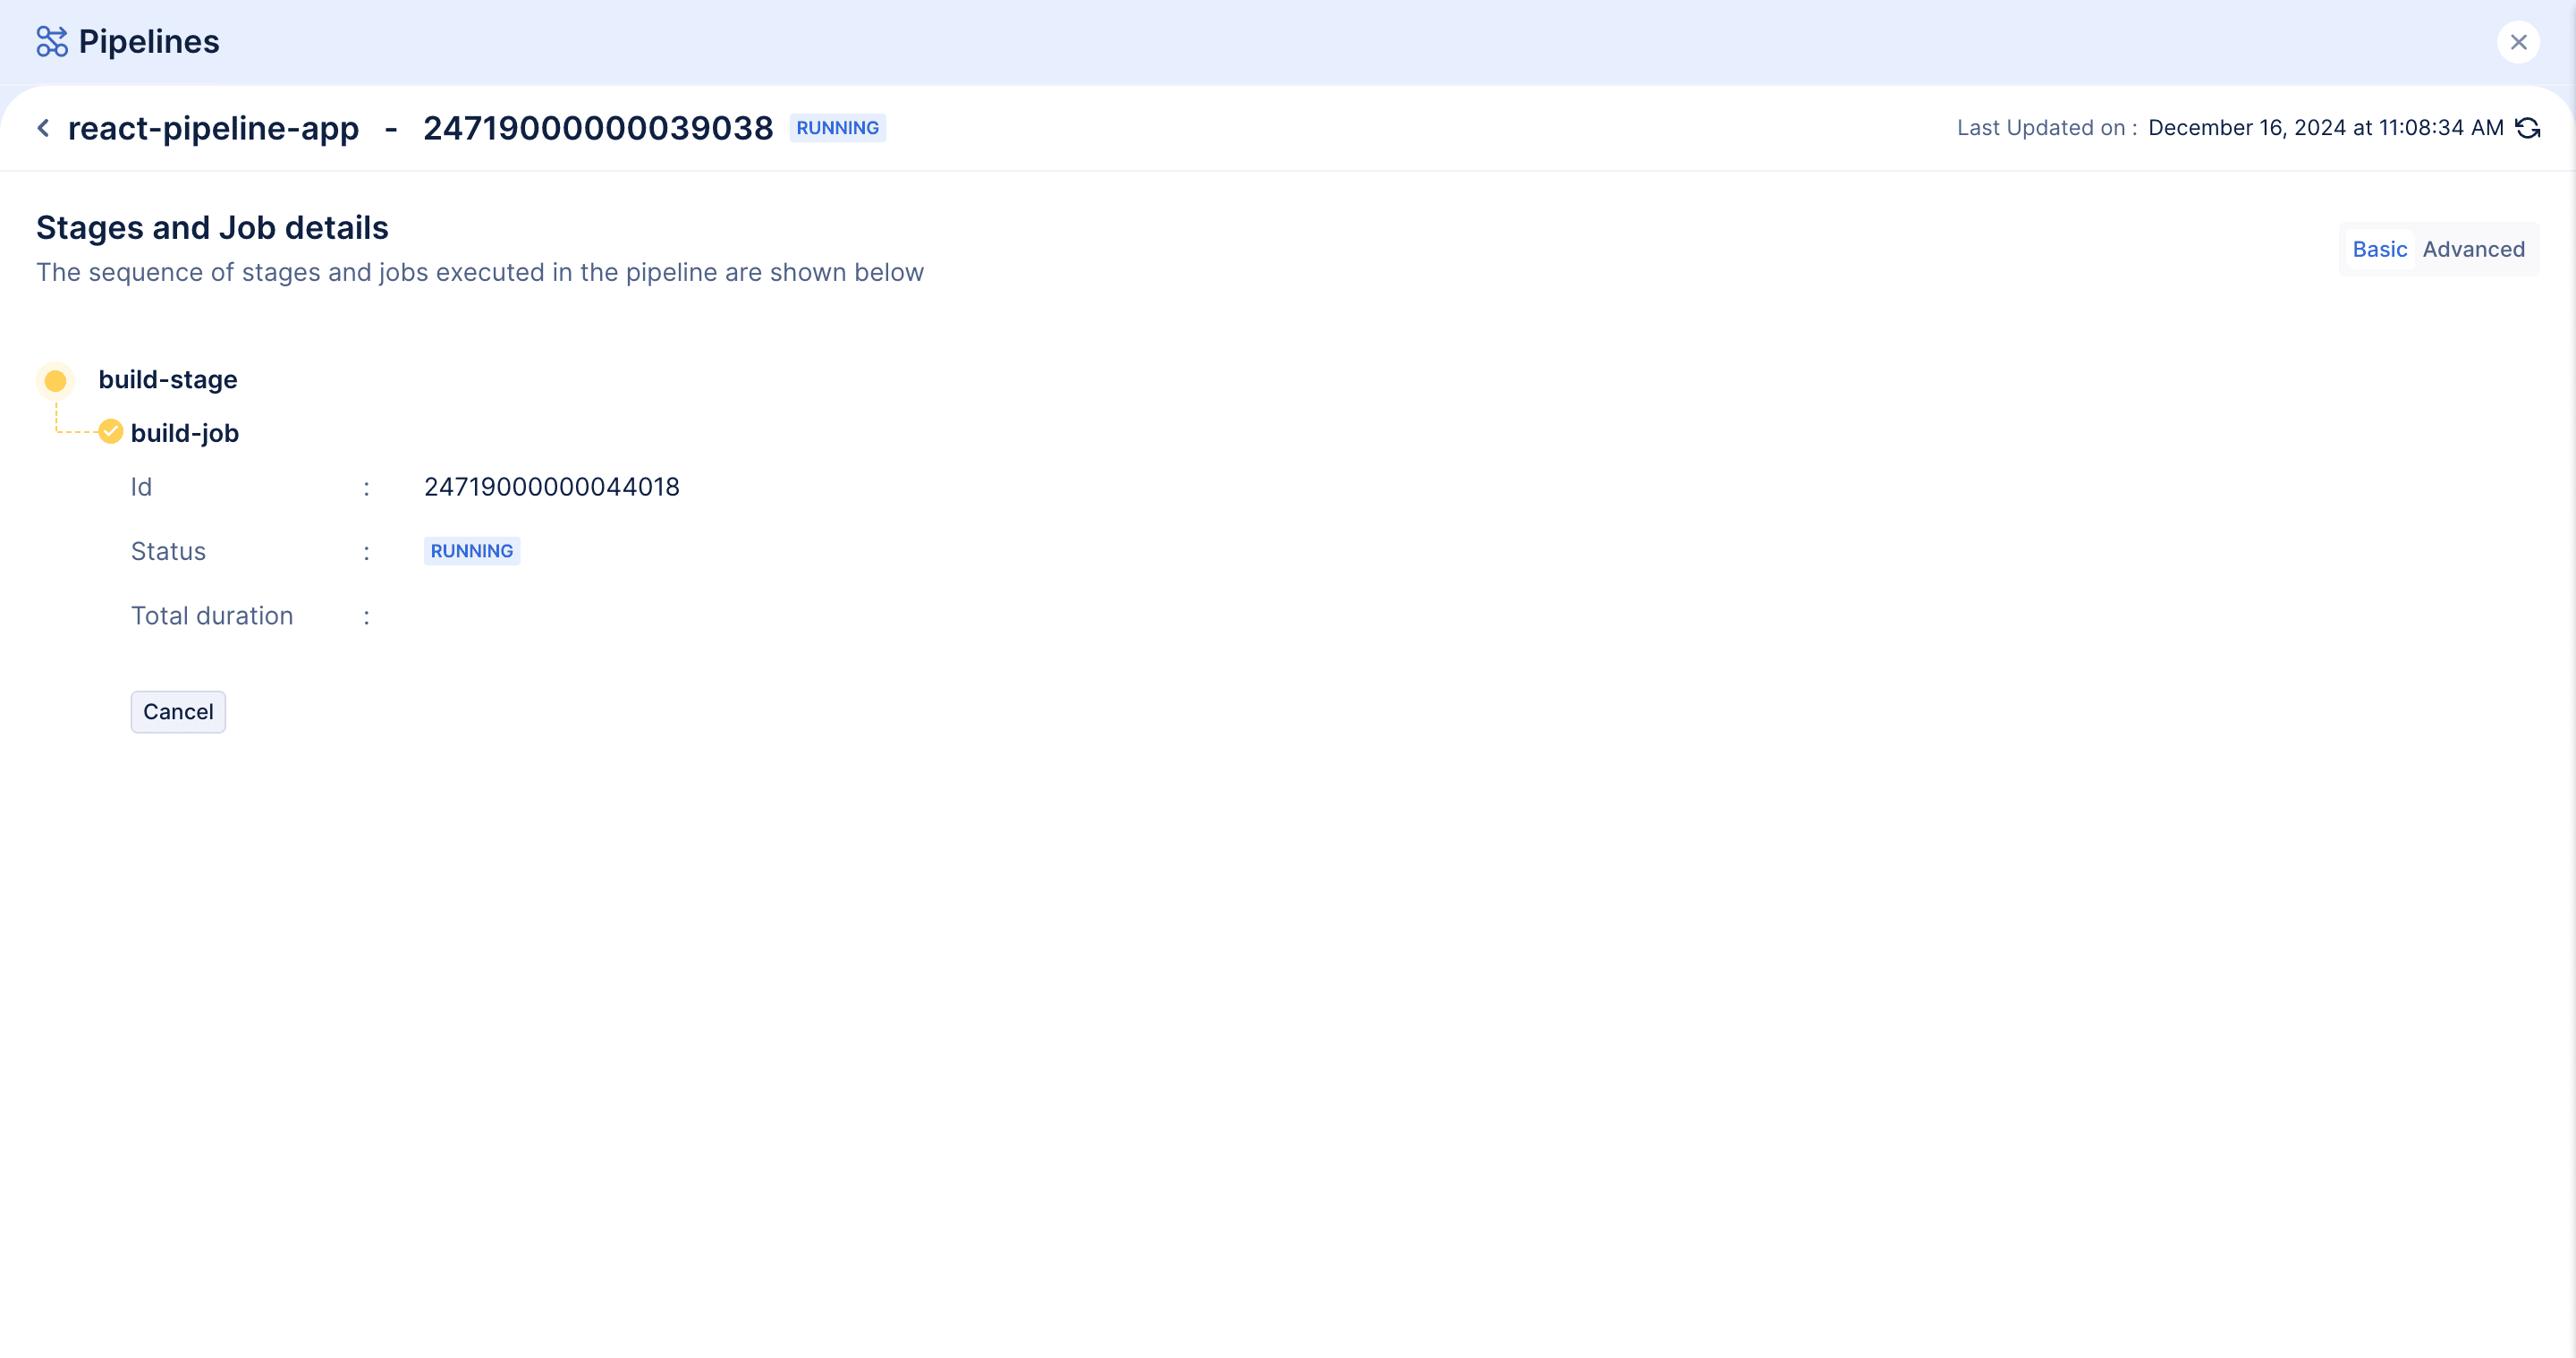
Once the changes are committed, the pipeline will be executed automatically.
Pipeline Execution:
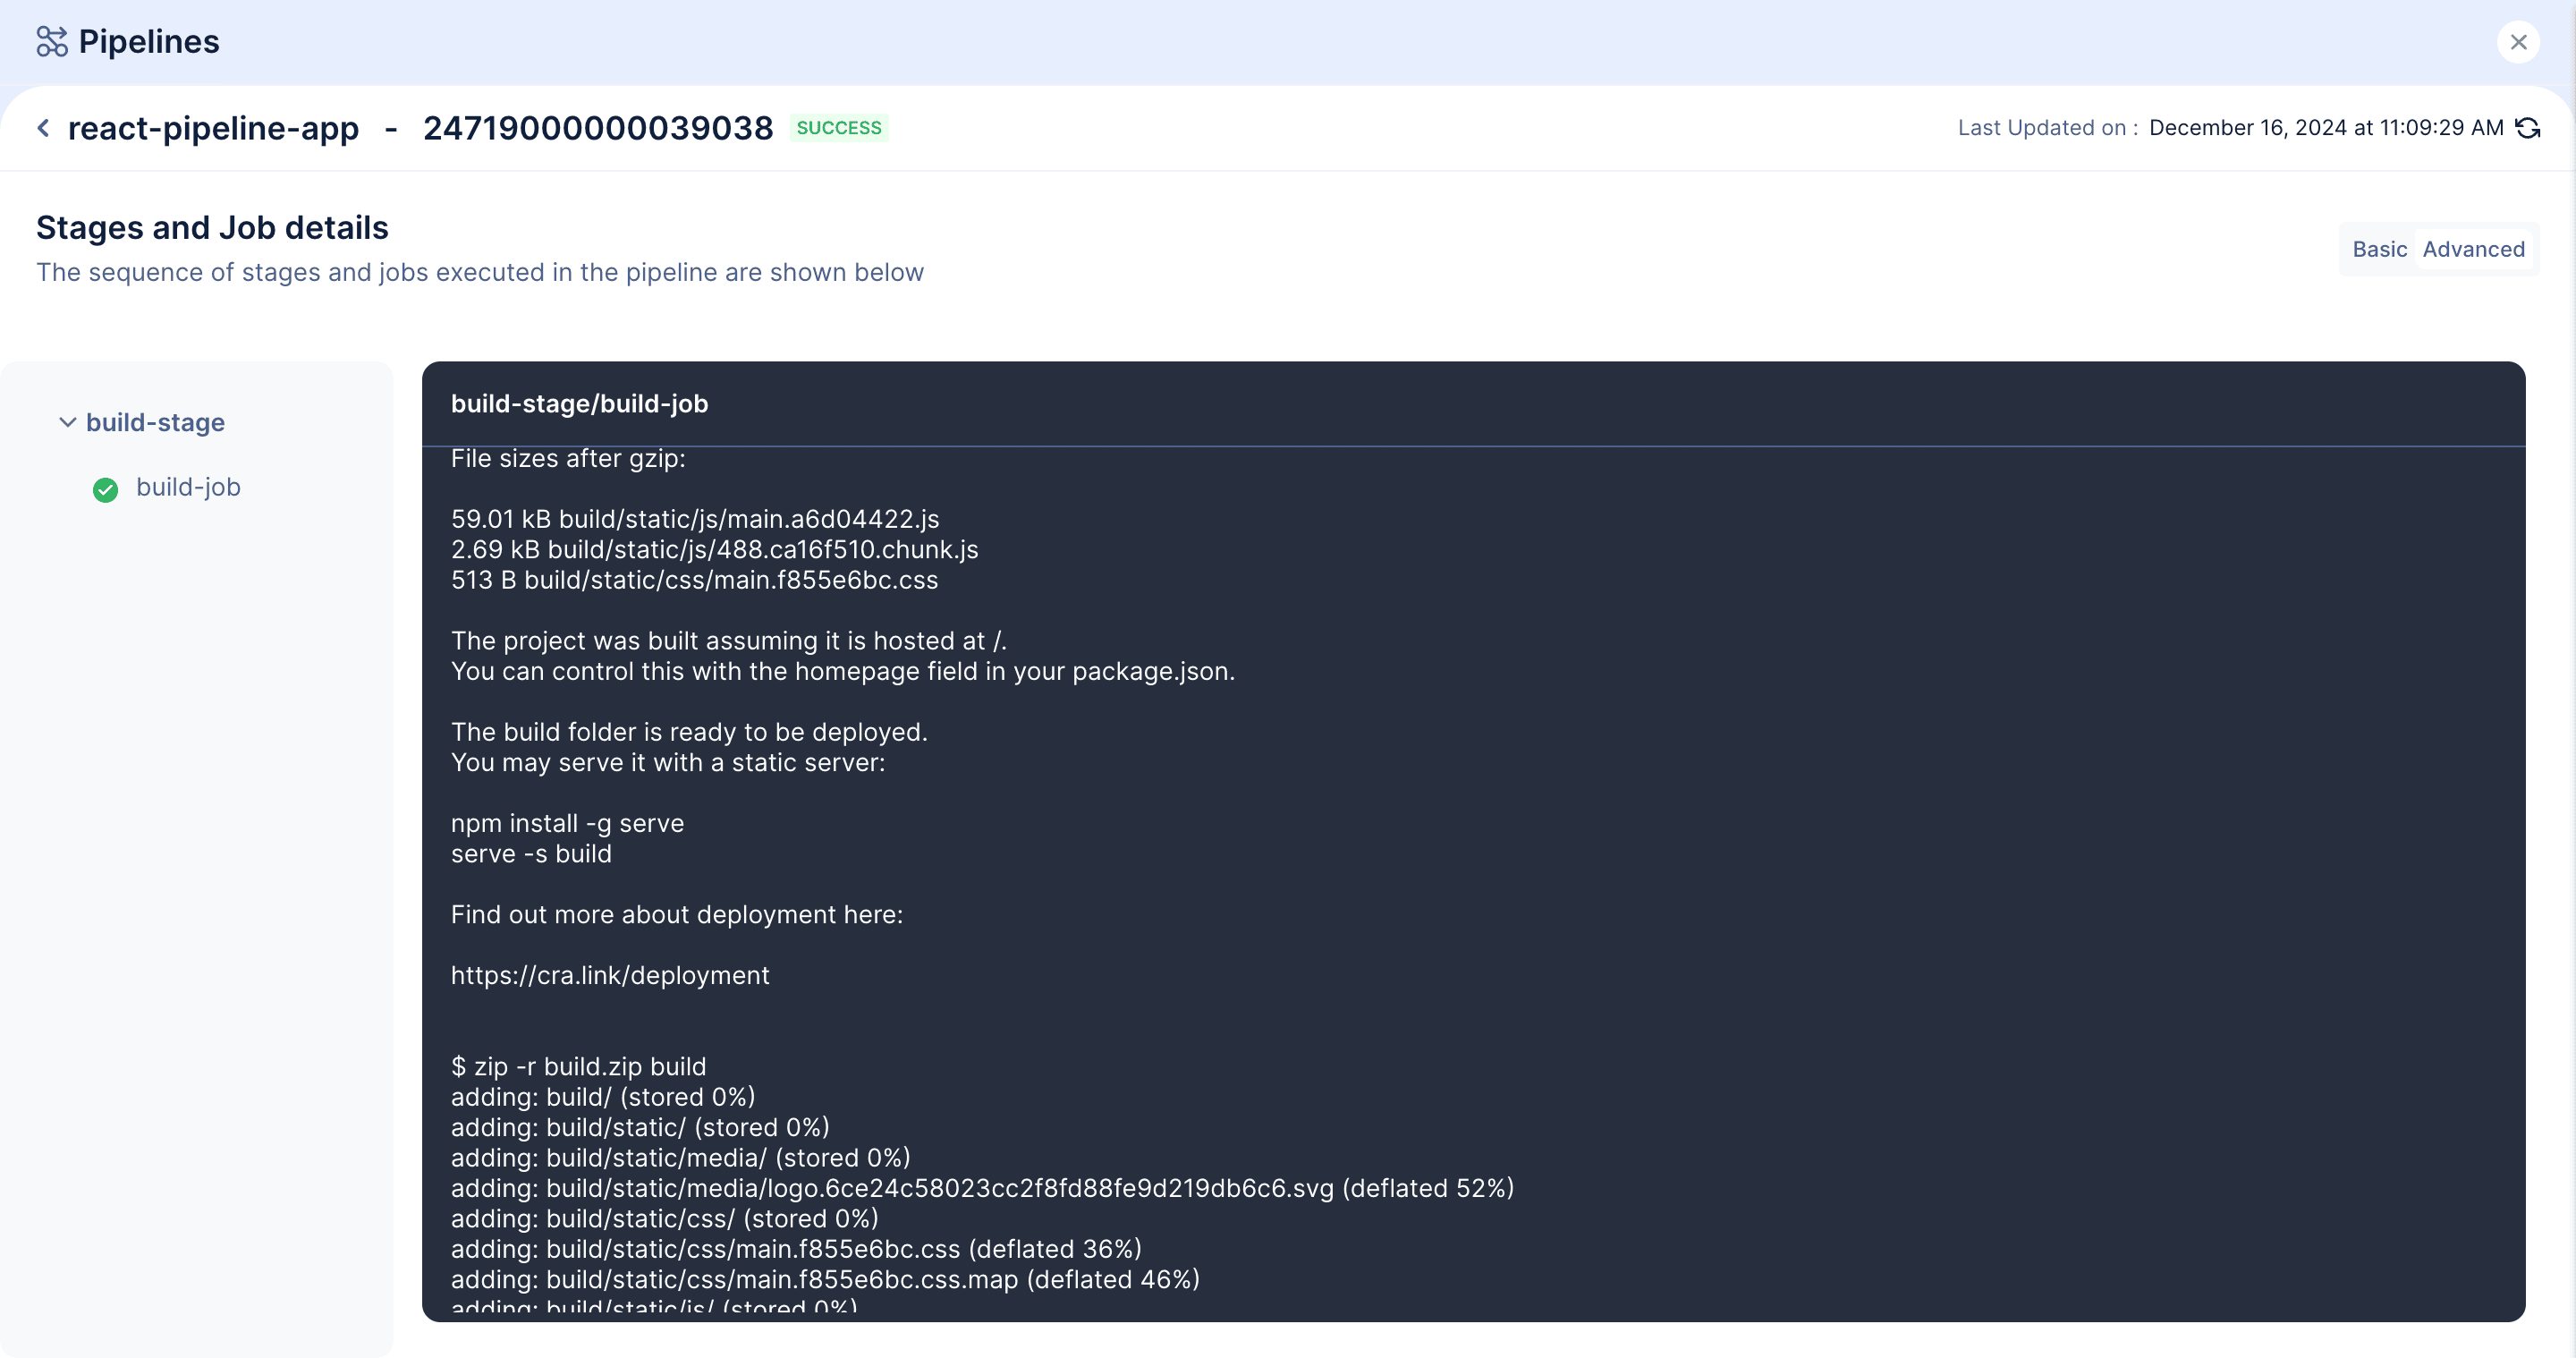
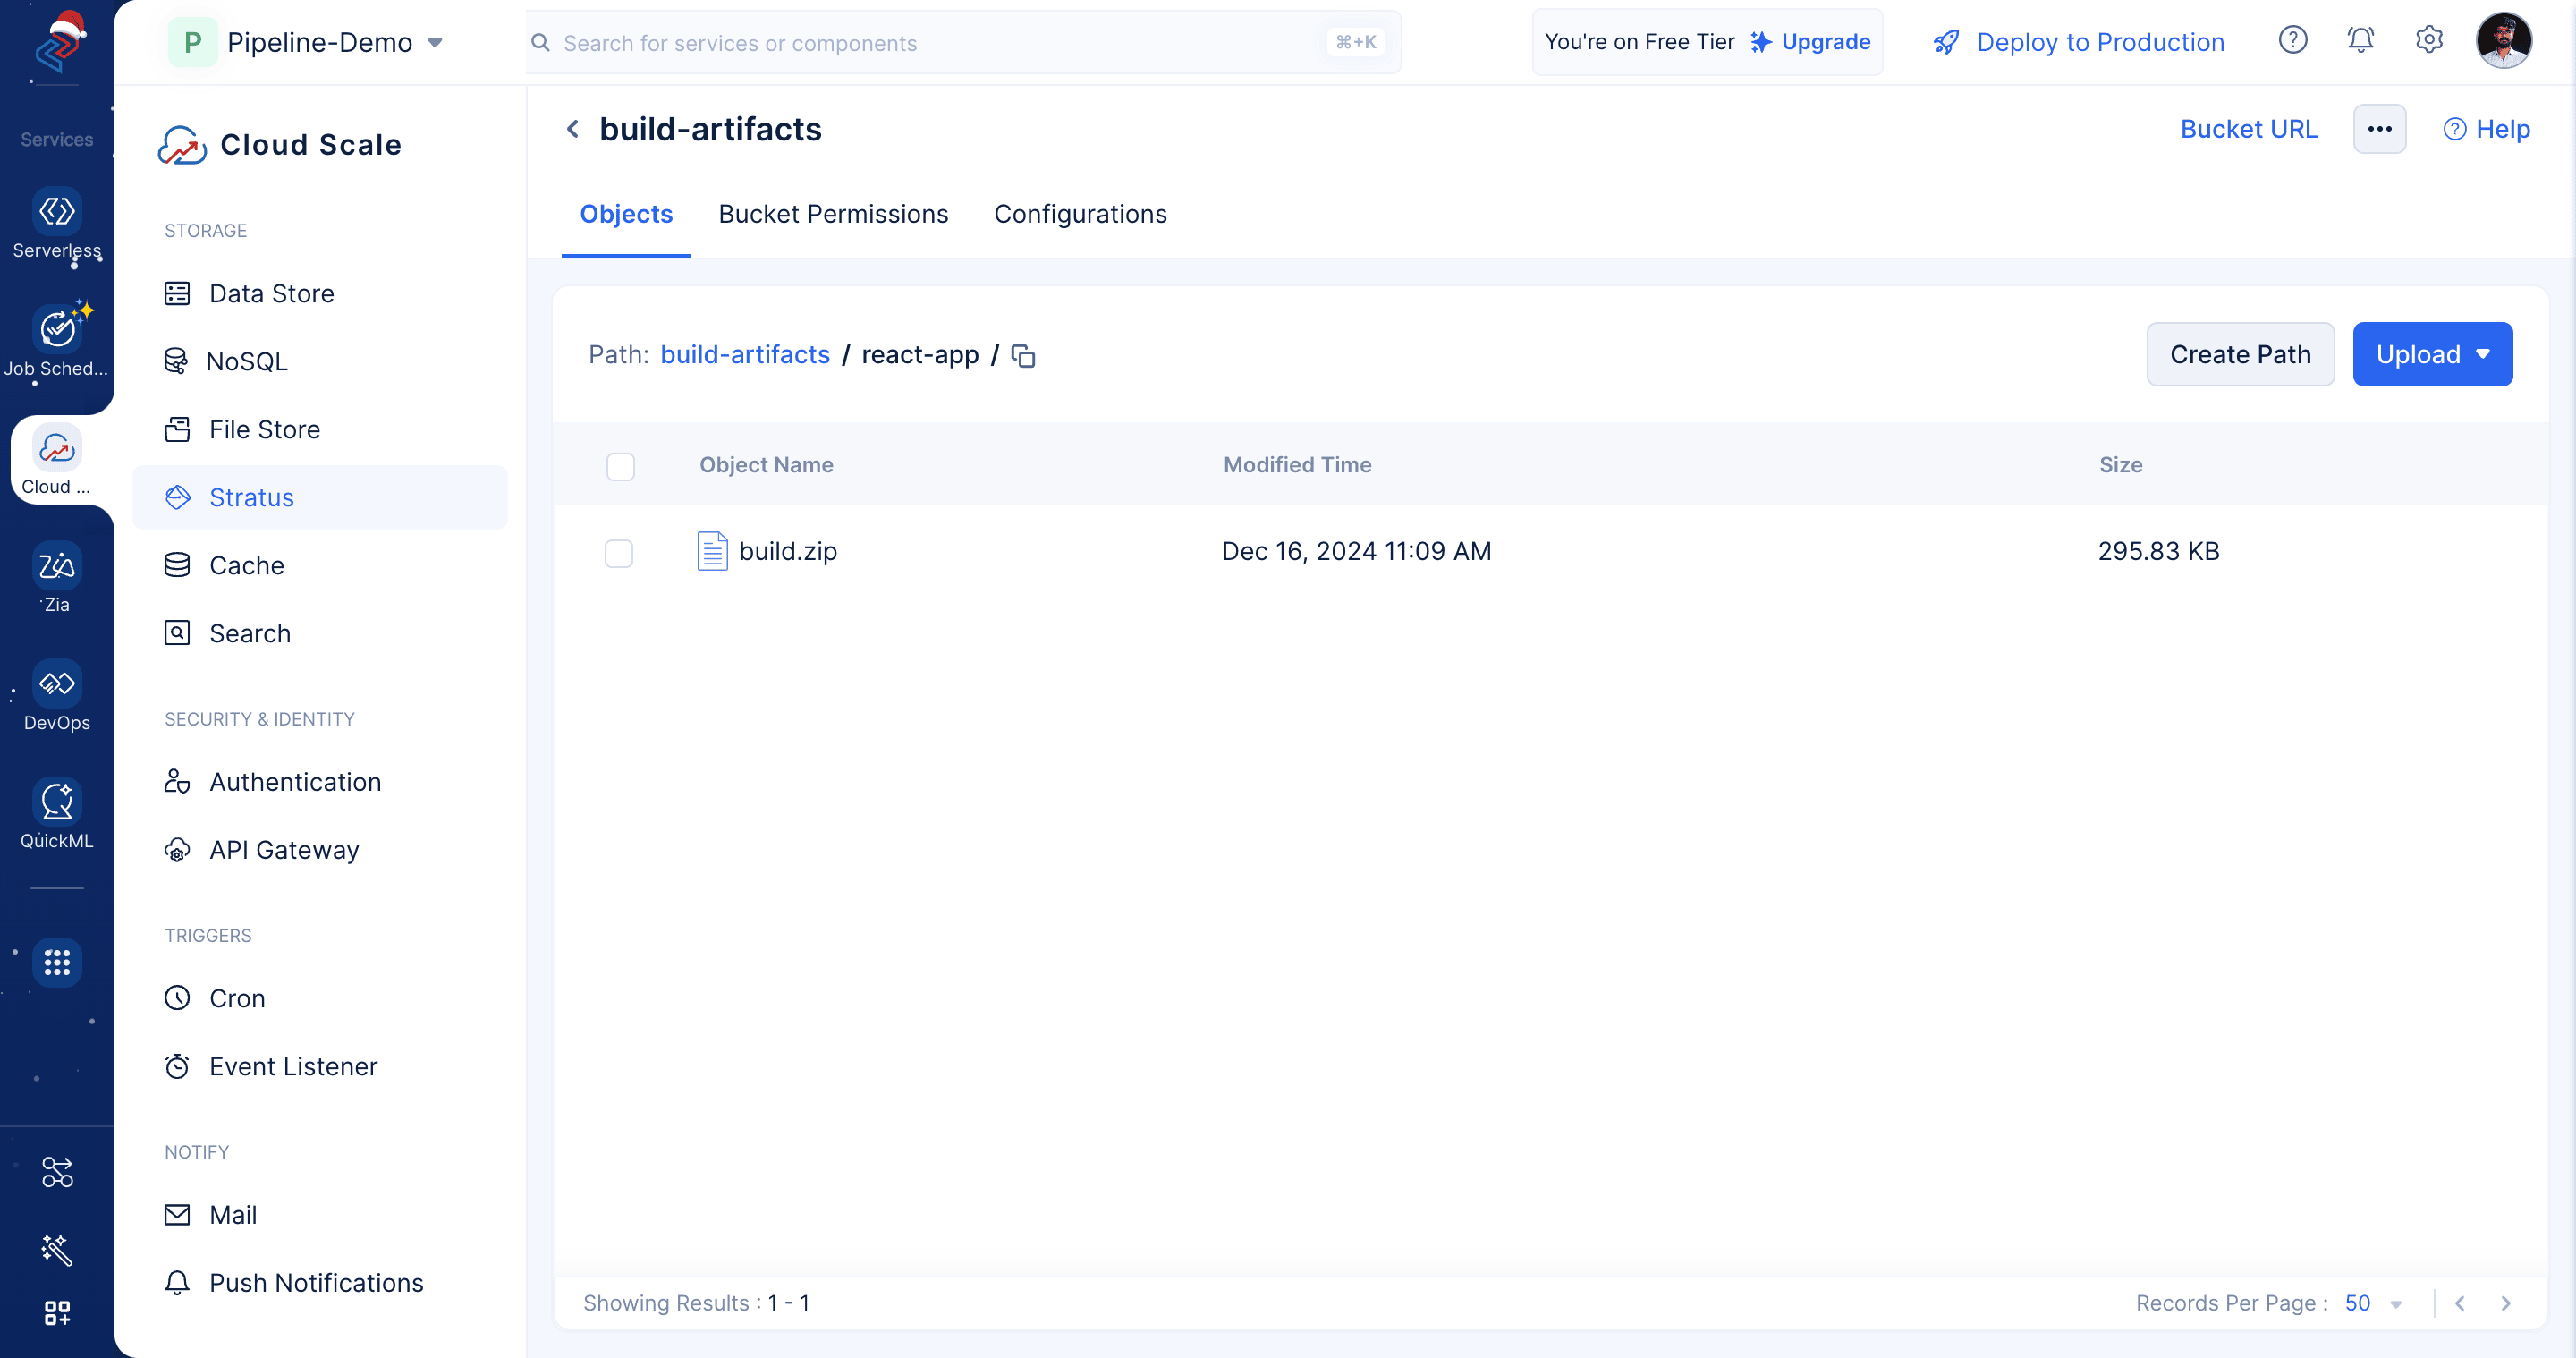
Here's the link to the GitHub repository:
https://github.com/rengarajan-dev/pipeline-appTopic Participants
Arun Gokul
Announcements
Catalyst backs Vite.js!
Hi everyone, We're happy to support the open-source ecosystem that powers modern web development! If you’re building apps with Vite, Catalyst Slate is your go-to platform to deploy blazing-fast frontend apps with ease, scalability, and zero infrastructureCatalyst QuickML 2025 Year In Review
Hello everyone 👋 It’s been an exciting year for Catalyst QuickML. In 2025, as the Catalyst platform continued to expand its capabilities, QuickML focused on strengthening reliability, developer control, and operational readiness across the AI lifecycle.Introducing GenAI Features in Catalyst QuickML
Hi everyone, Building machine learning models can often feel slow and complex, especially when teams wait for perfect certainty before testing their ideas. But in reality, faster progress comes from early experimentation—trying out models quickly, learningAnnouncing Deprecation of Catalyst File Store, Event Listeners, and Cron
We would like to announce that the following Catalyst features are now in their deprecation phase and will reach End Of Life (EOL) on 30 April, 2026- Catalyst File Store Catalyst Event Listeners Catalyst Cron New users who sign up for Catalyst from todayReact Nexus 2025 Recap: Catalyst Slate in Action!
Hey Catalyst Community! We recently attended the React Nexus 2025 conference, an exciting gathering for frontend enthusiasts and React developers. Our team had an incredible time presenting and conducting a hands-on workshop on Catalyst Slate, our streamlined